Loosening screws, repairing threads
Seized screws and irreparably damaged threads are among the trickiest problems that can arise when working on your motorcycle. But even these problems can be solved with a bit of patience and know-how.
- Loosen the screws on the motorcycle
- Stripped screw heads
- Undoing Screws – now let's get started
- Loosening with an impact wrench
- Free rusted nuts with penetrating oil
- Drive triple-square bit into hex socket screw
- Loosen nut with hammer and chisel
- Saw a groove in the nut
- Drill out damaged screw head
- Split nut with nut splitter
- Angle-grind nut from the side
- Seized stud bolts
- Thread repair with V-Coil
- Avoiding trouble with faulty threads
- Our recommendation
Loosen the screws on the motorcycle
You know the story: the sun's shining and you're all set to take off on a weekend tour just as soon as you've replaced one small thing on your bike. And then disaster strikes. You can't budge that one final screw fastening the part you want to change... or the screw head simply shears off and you're left with an inaccessible stump... or the wretched thing comes out bringing the mating (internal) thread with it in the form of a sad-looking little spiral.
No matter what's going through your head at a moment like this, don't give in to your rage! Right now you need to keep your cool to avoid more serious damage. Before you do anything hasty, first get yourself a cold beer, or whatever will calm you down, and take time to examine the problem.
Stripped screw heads
If the slotted head or cross-head of a screw no longer provides adequate grip for a normal screwdriver to apply enough force to unscrew it, it's best to stop before you do even more damage to the screw. In this situation you should use an impact driver. This tool transforms a hammer blow into a very powerful rotational force, without damaging the head of the screw. Every motorbike toolbox should have one.
Undoing Screws – now let's get started
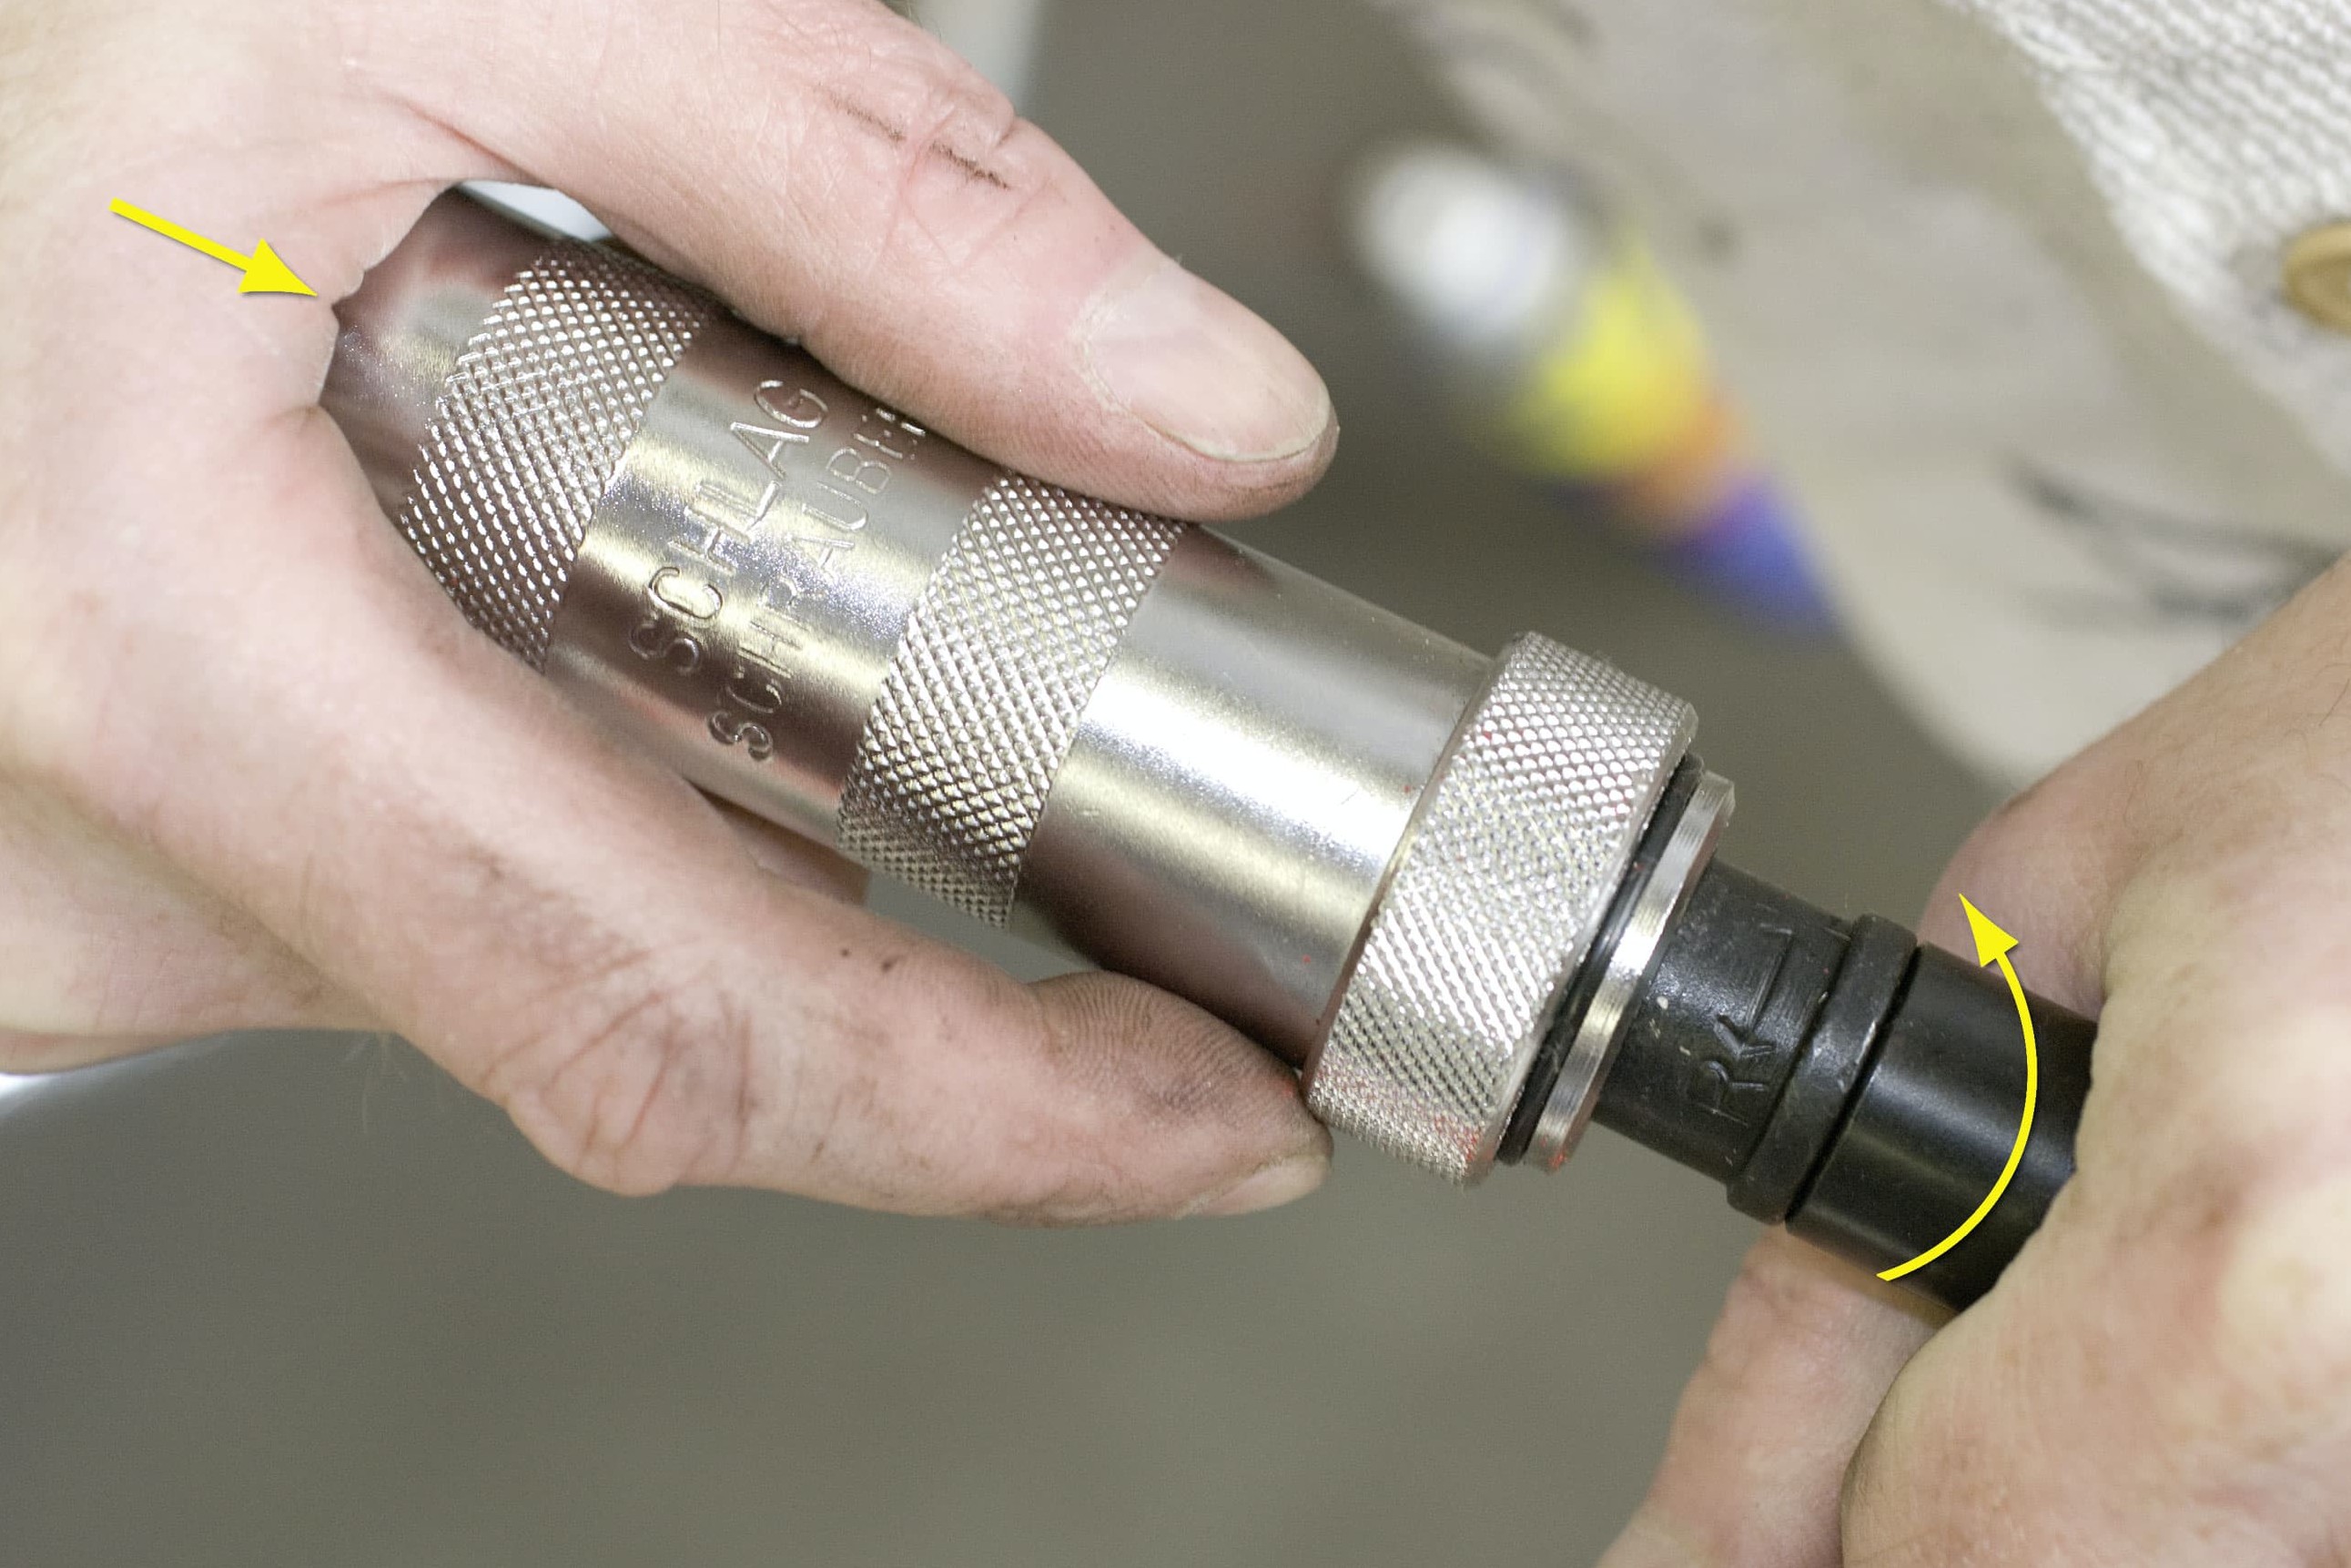
Set impact driver to correct direction...
Loosening with an impact wrench
Set the impact driver to "Loosen".
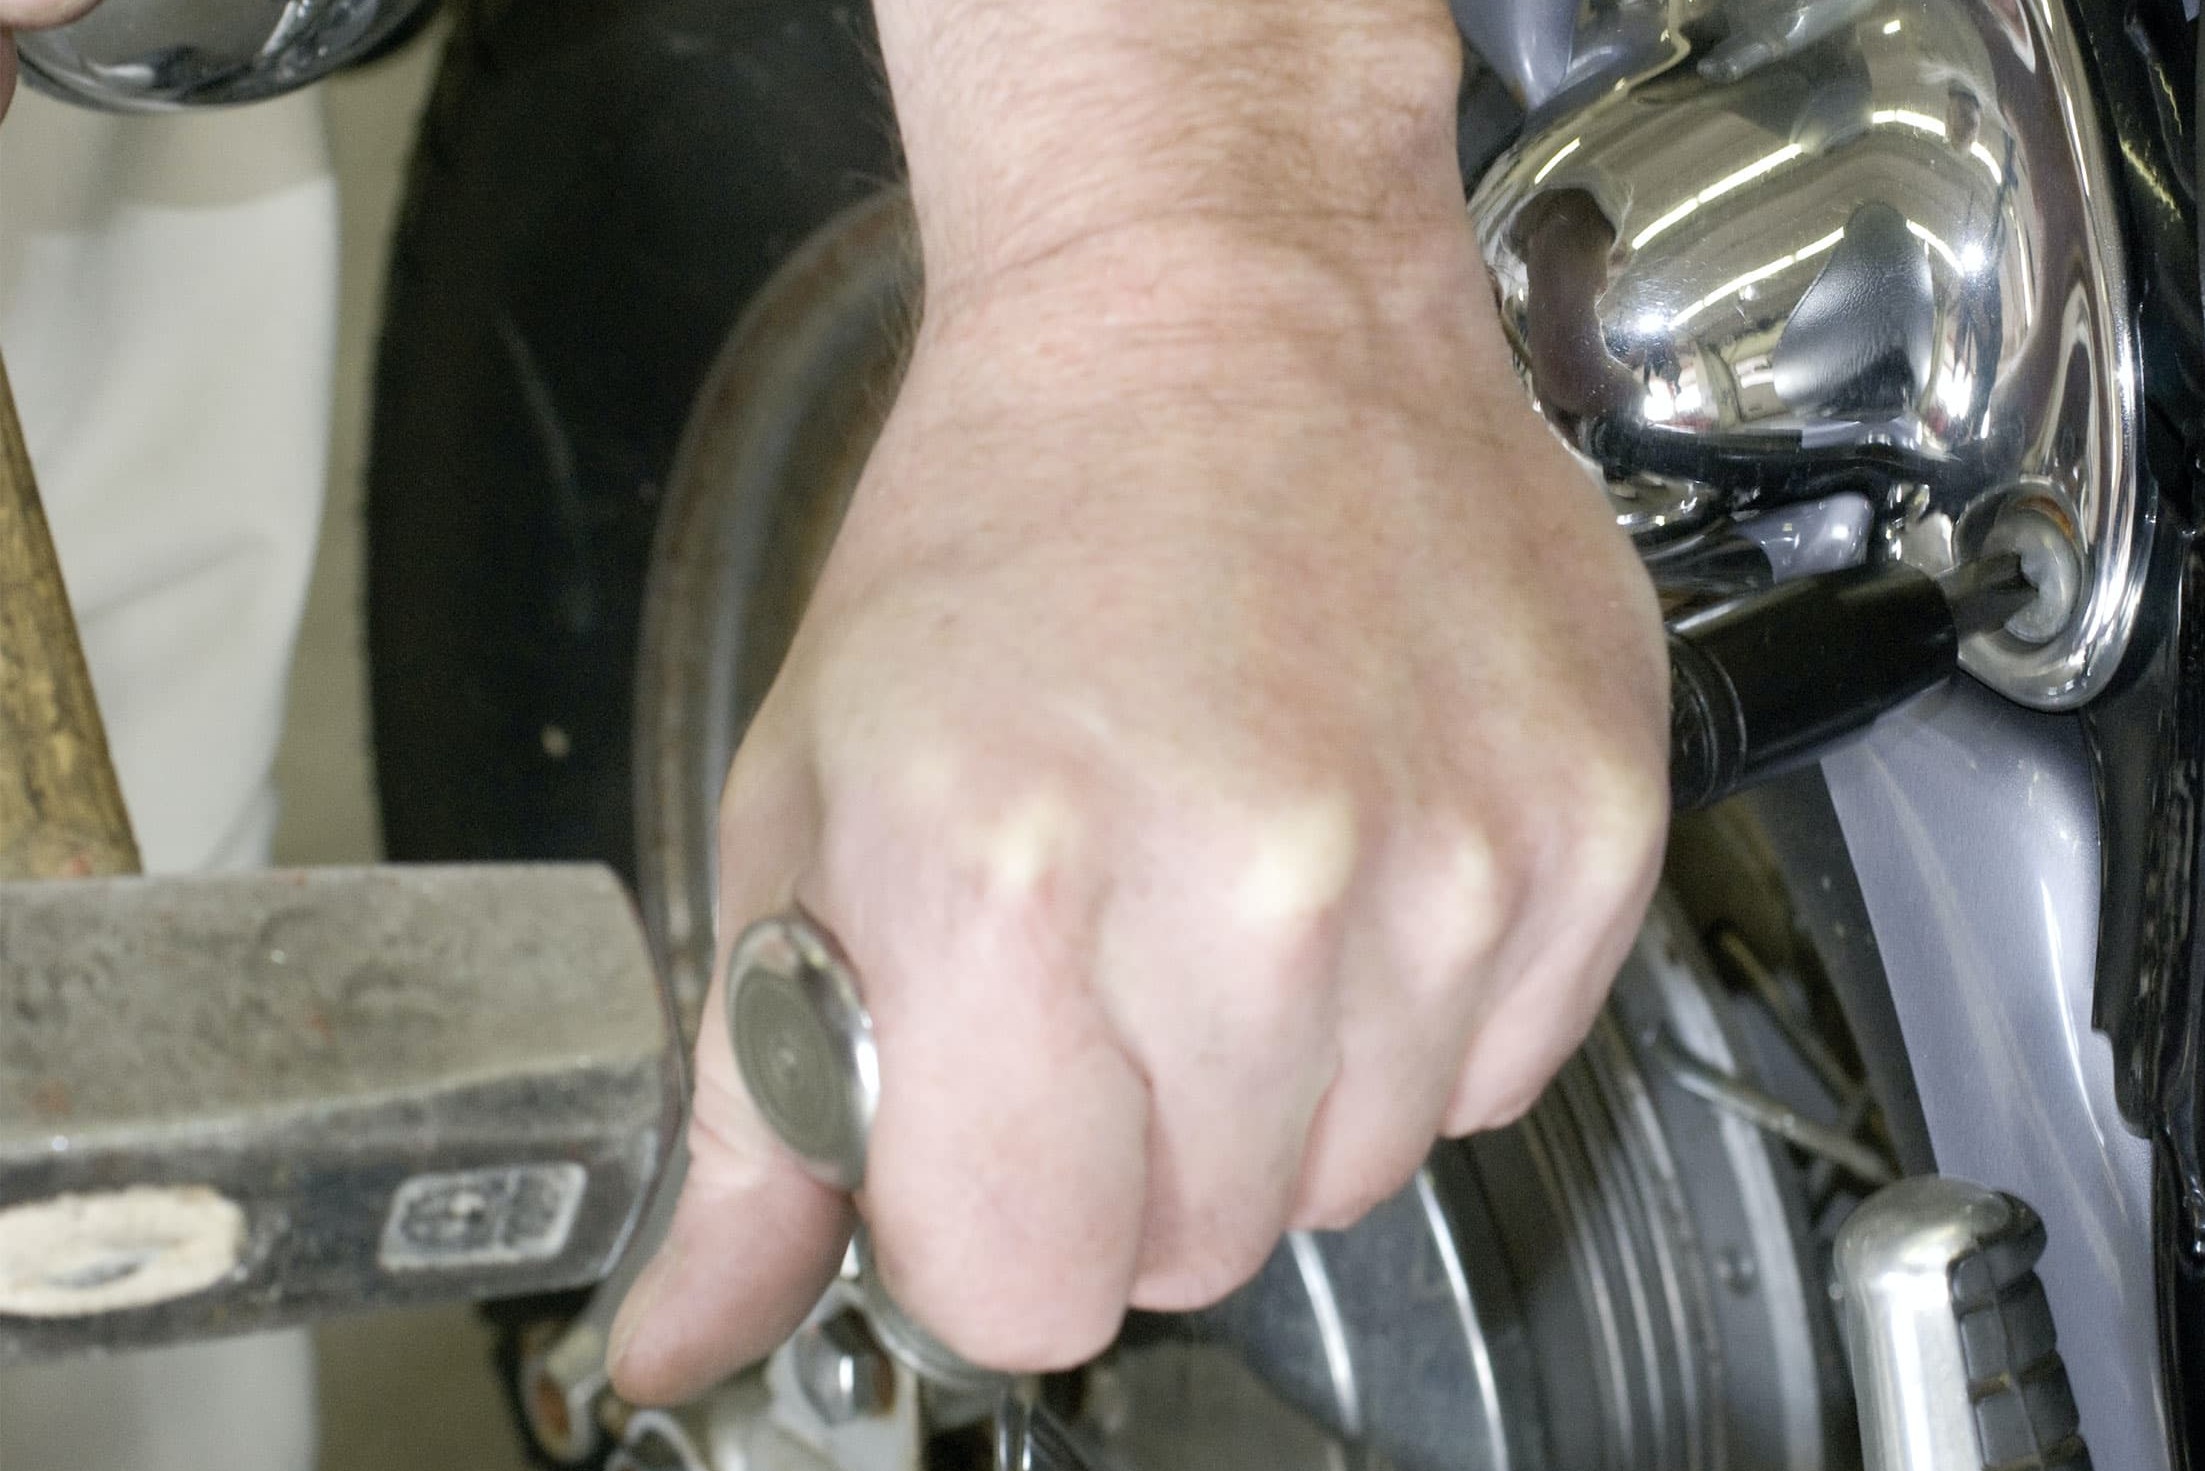
... and loosen screw with hammer blows
Select a bit that is a good fit and give a couple of measured blows with a large hammer (at least 300 g) on the tool. This will loosen screws that are overtightened or seized up due to rust and with a damaged head!
Free rusted nuts with penetrating oil
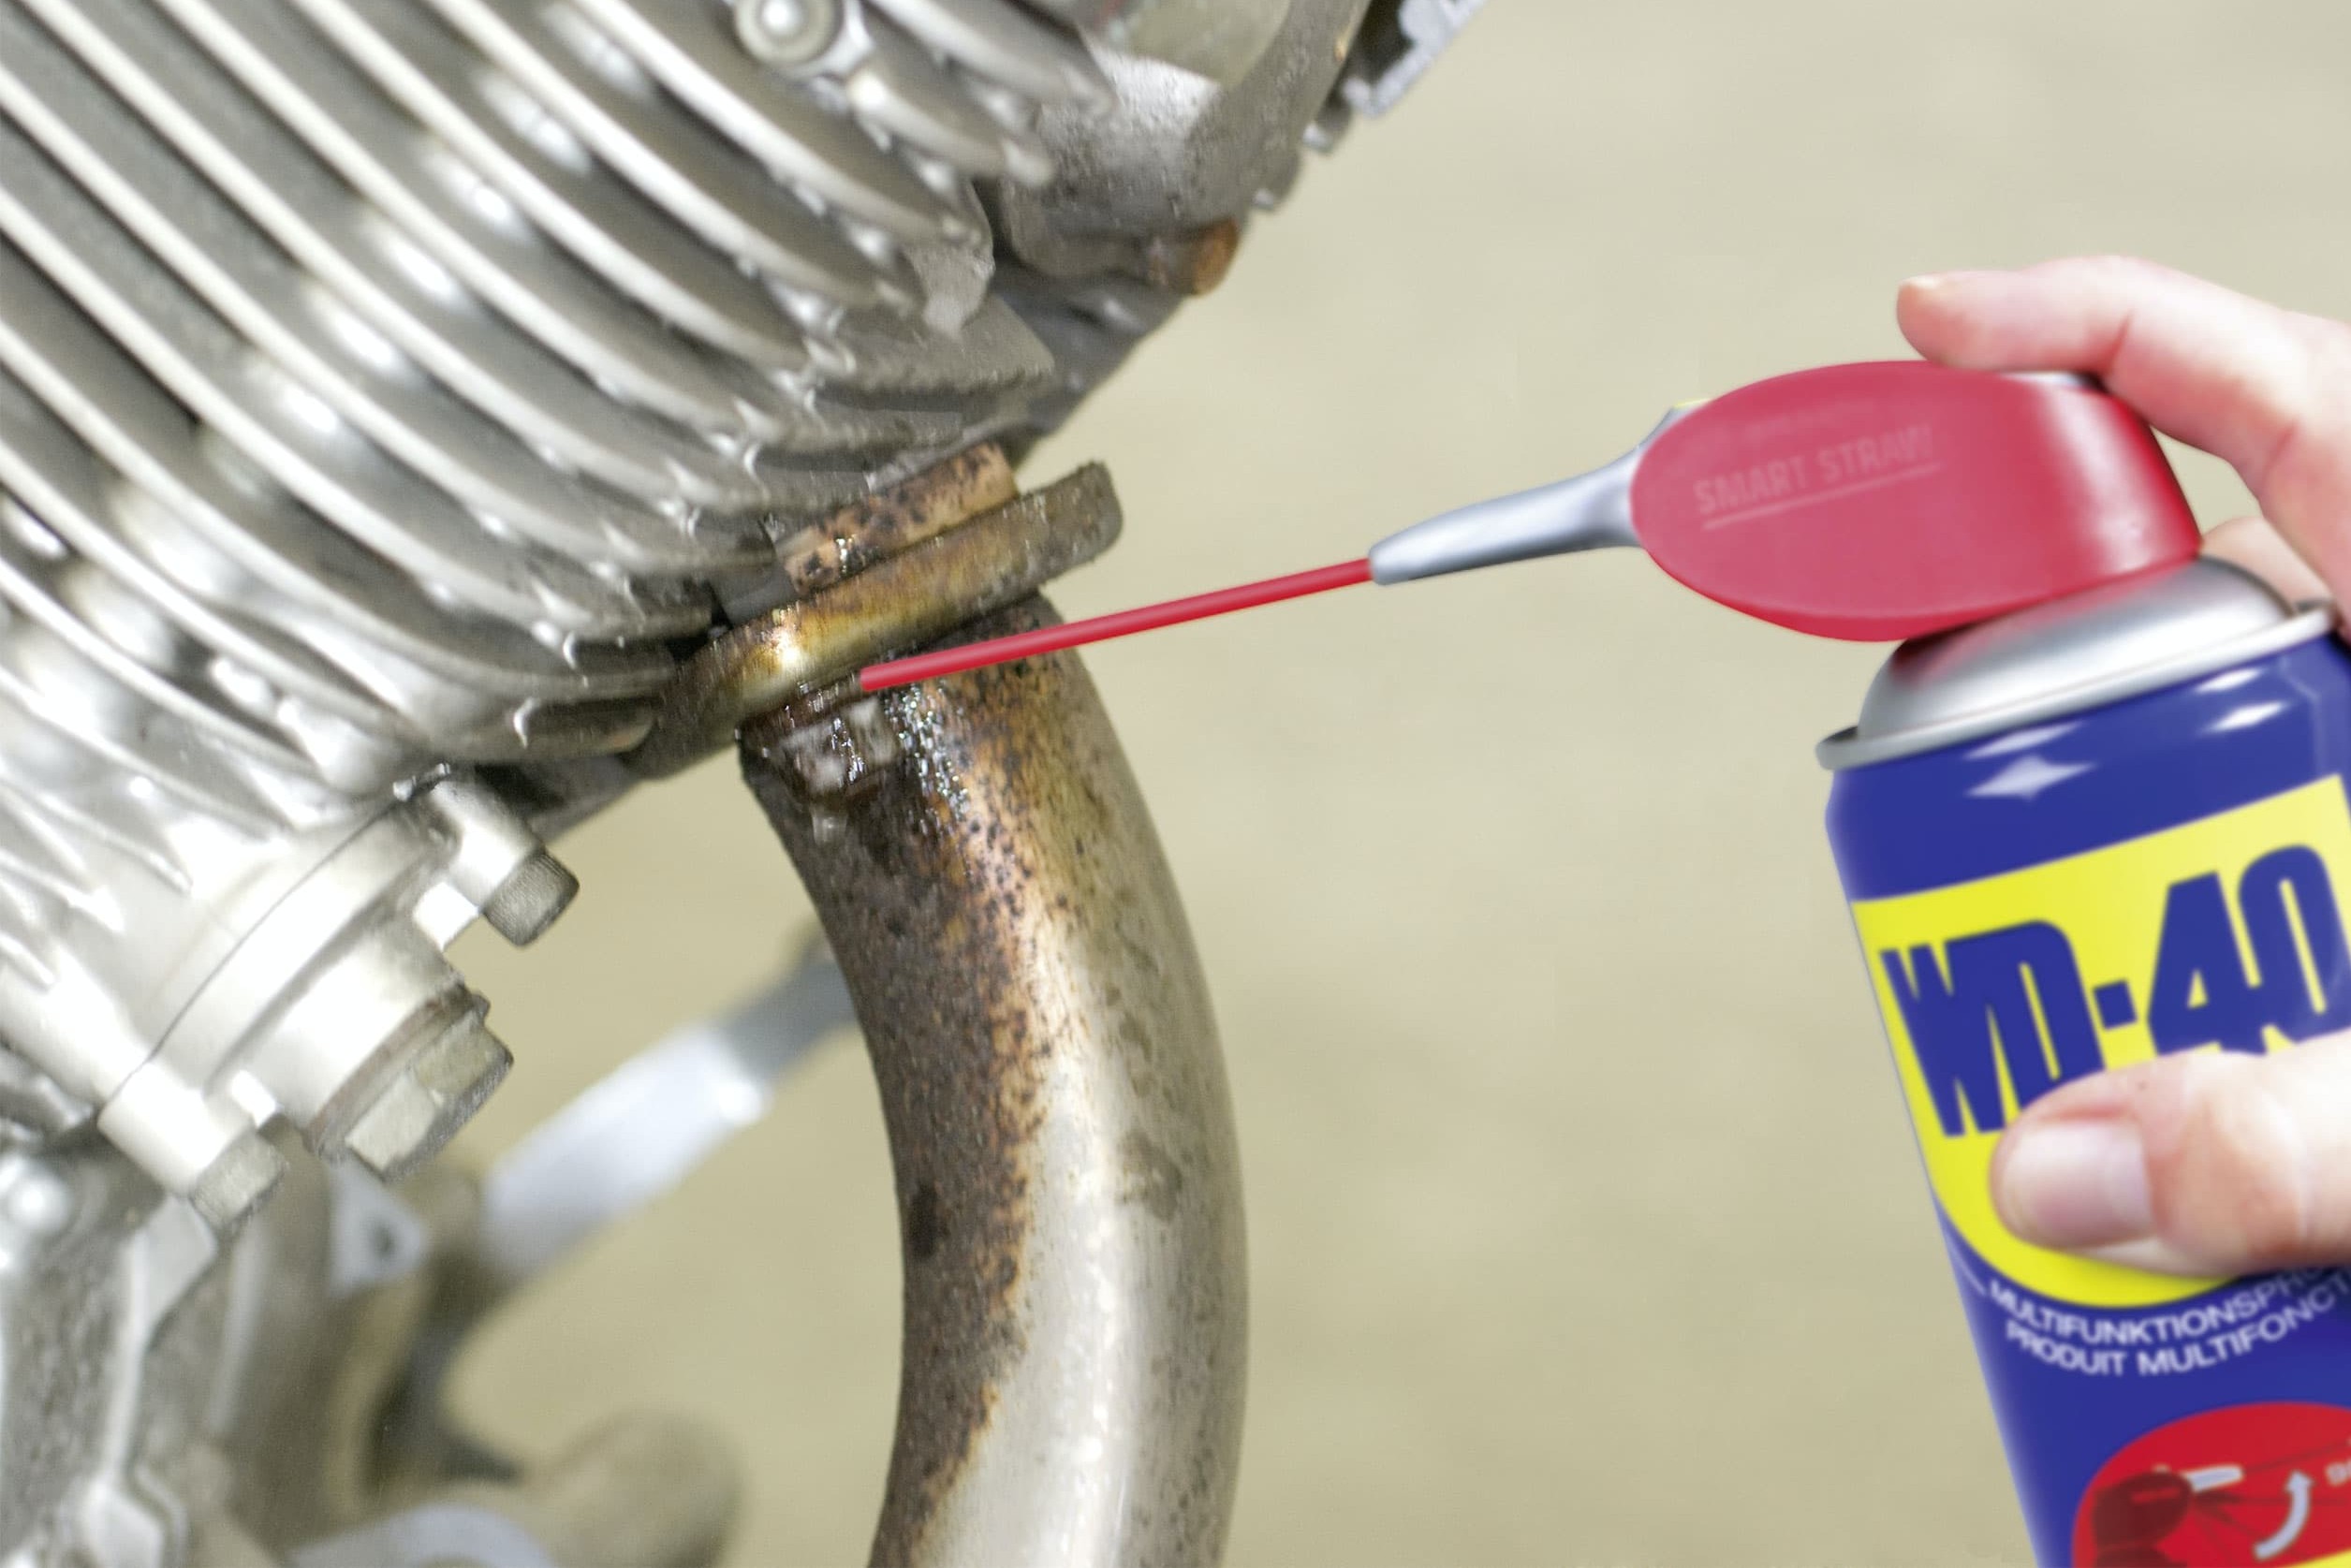
Free rusted nuts with penetrating oil
In fact, a simple blow on the screw head using a screwdriver and hammer or some penetrating oil (e.g. WD-40) will often help to loosen up any rust in the thread. If the screw or nut is visibly rusty, you should give the penetrating oil time to work before you continue. Of course, a hammer or impact driver is not a good idea for delicate components. The key to loosening chewed up screws is always to choose the tool that fits best. Screwdriver blades should fit optimally and not be rounded with wear. Hex bolts should be loosened with a ratchet and socket with flank-drive (included in socket wrench sets in the Louis range).
Other loosening methods: If you can get at it, firmly grip the head of the screw with a good pipe wrench and try to turn it slowly. You need to use your strength here; don't let the tool slip.
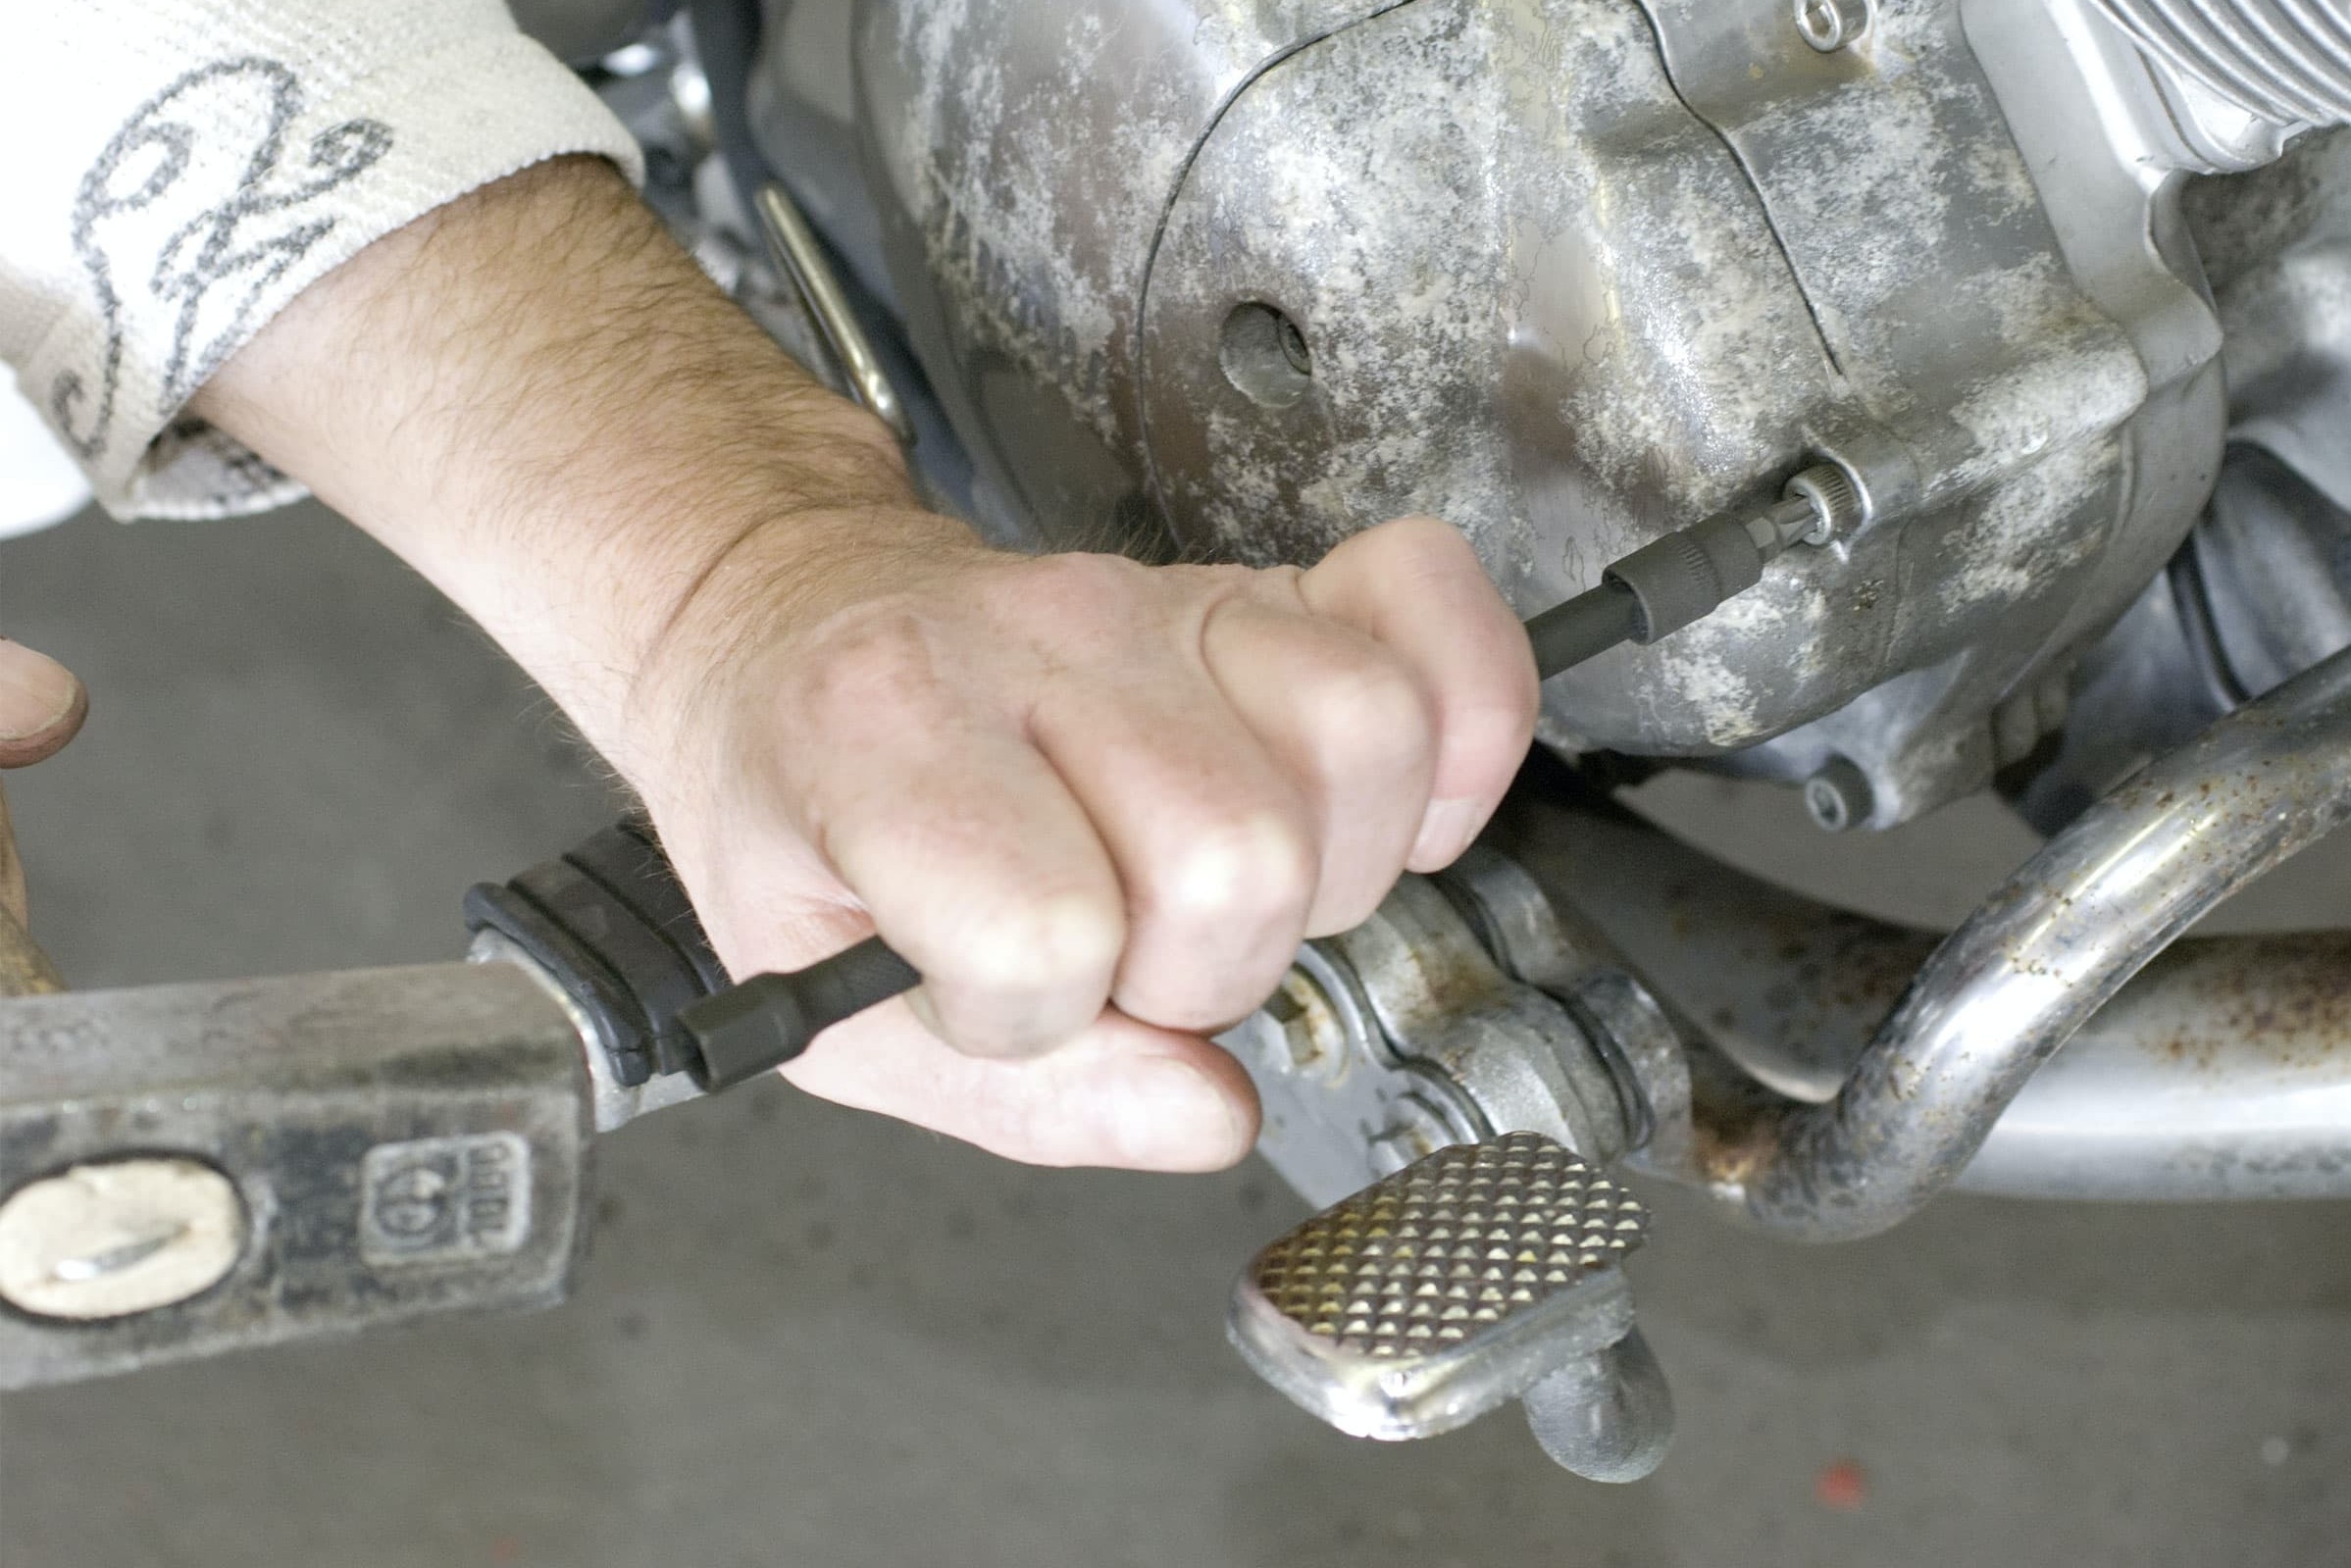
Drive triple-square bit into hex socket screw
Drive triple-square bit into hex socket screw
Stripped hexagon socket screws can be loosened by driving in a triple-square bit with a hammer and turning it with the ratchet. Of course this may damage the triple-square bit, but your main concern is to loosen the screw!
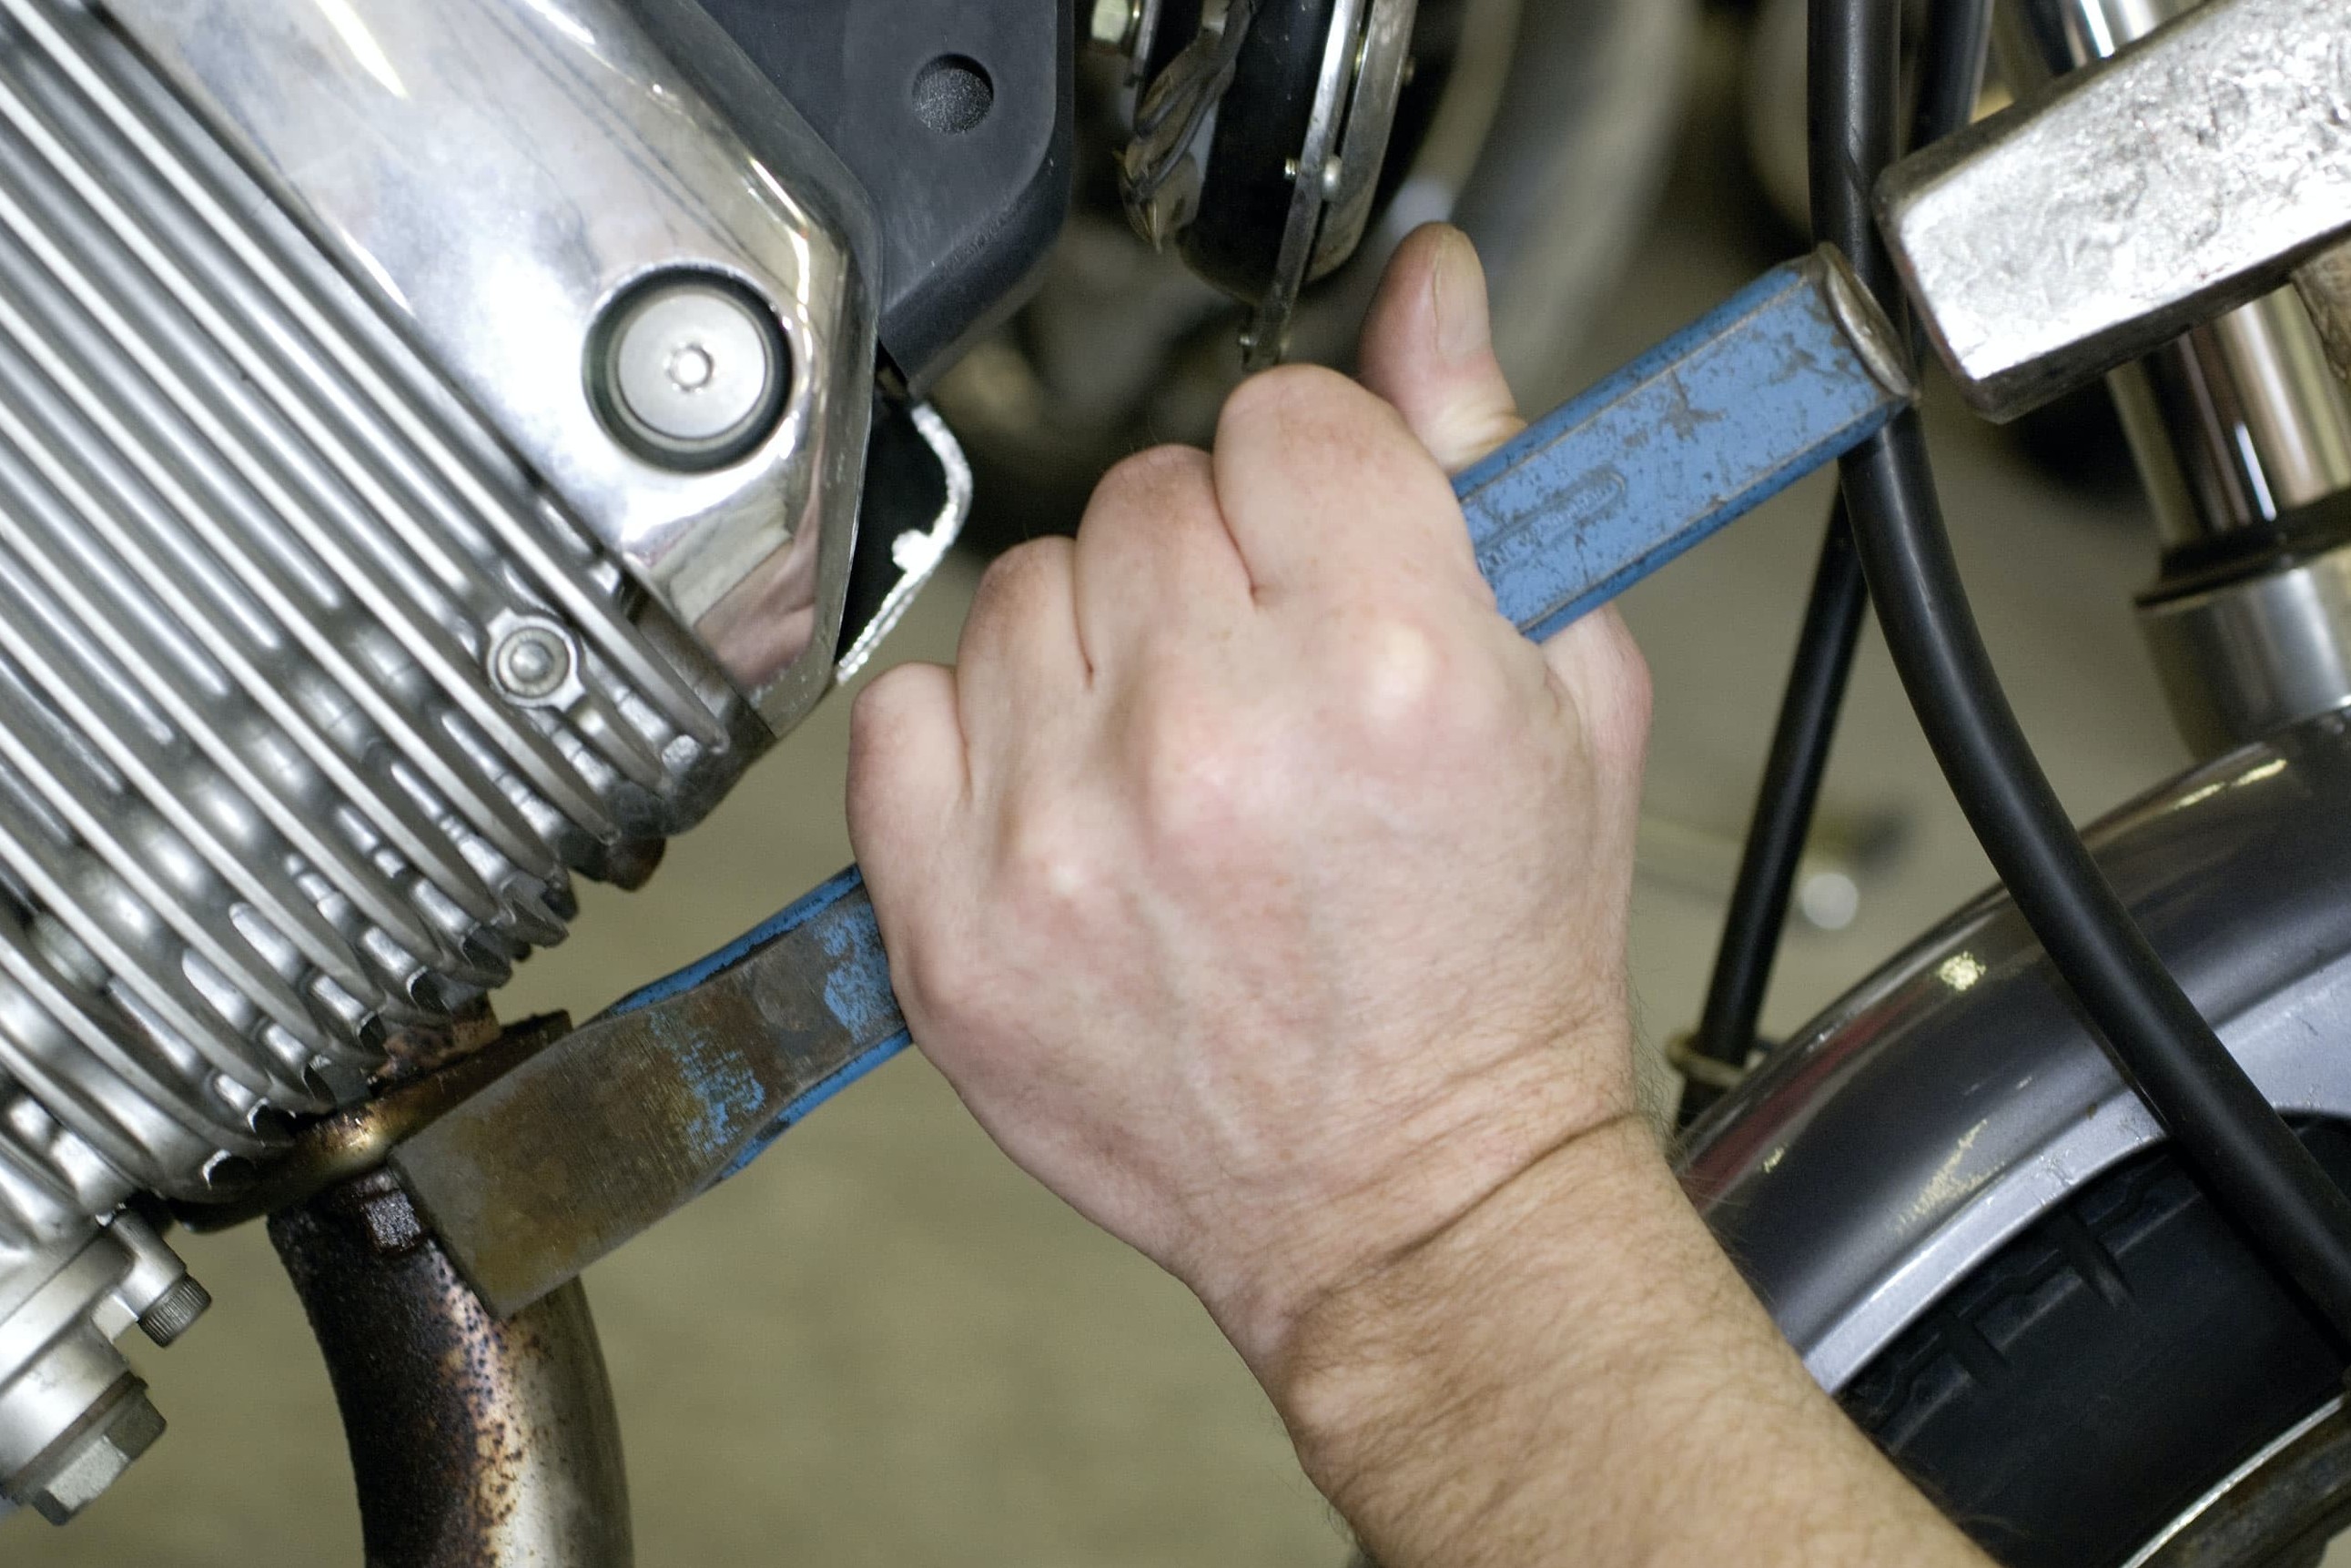
Loosen nut with hammer and chisel
Loosen nut with hammer and chisel
With a hammer and a small chisel, you can try to shift the head of the screw from the side.
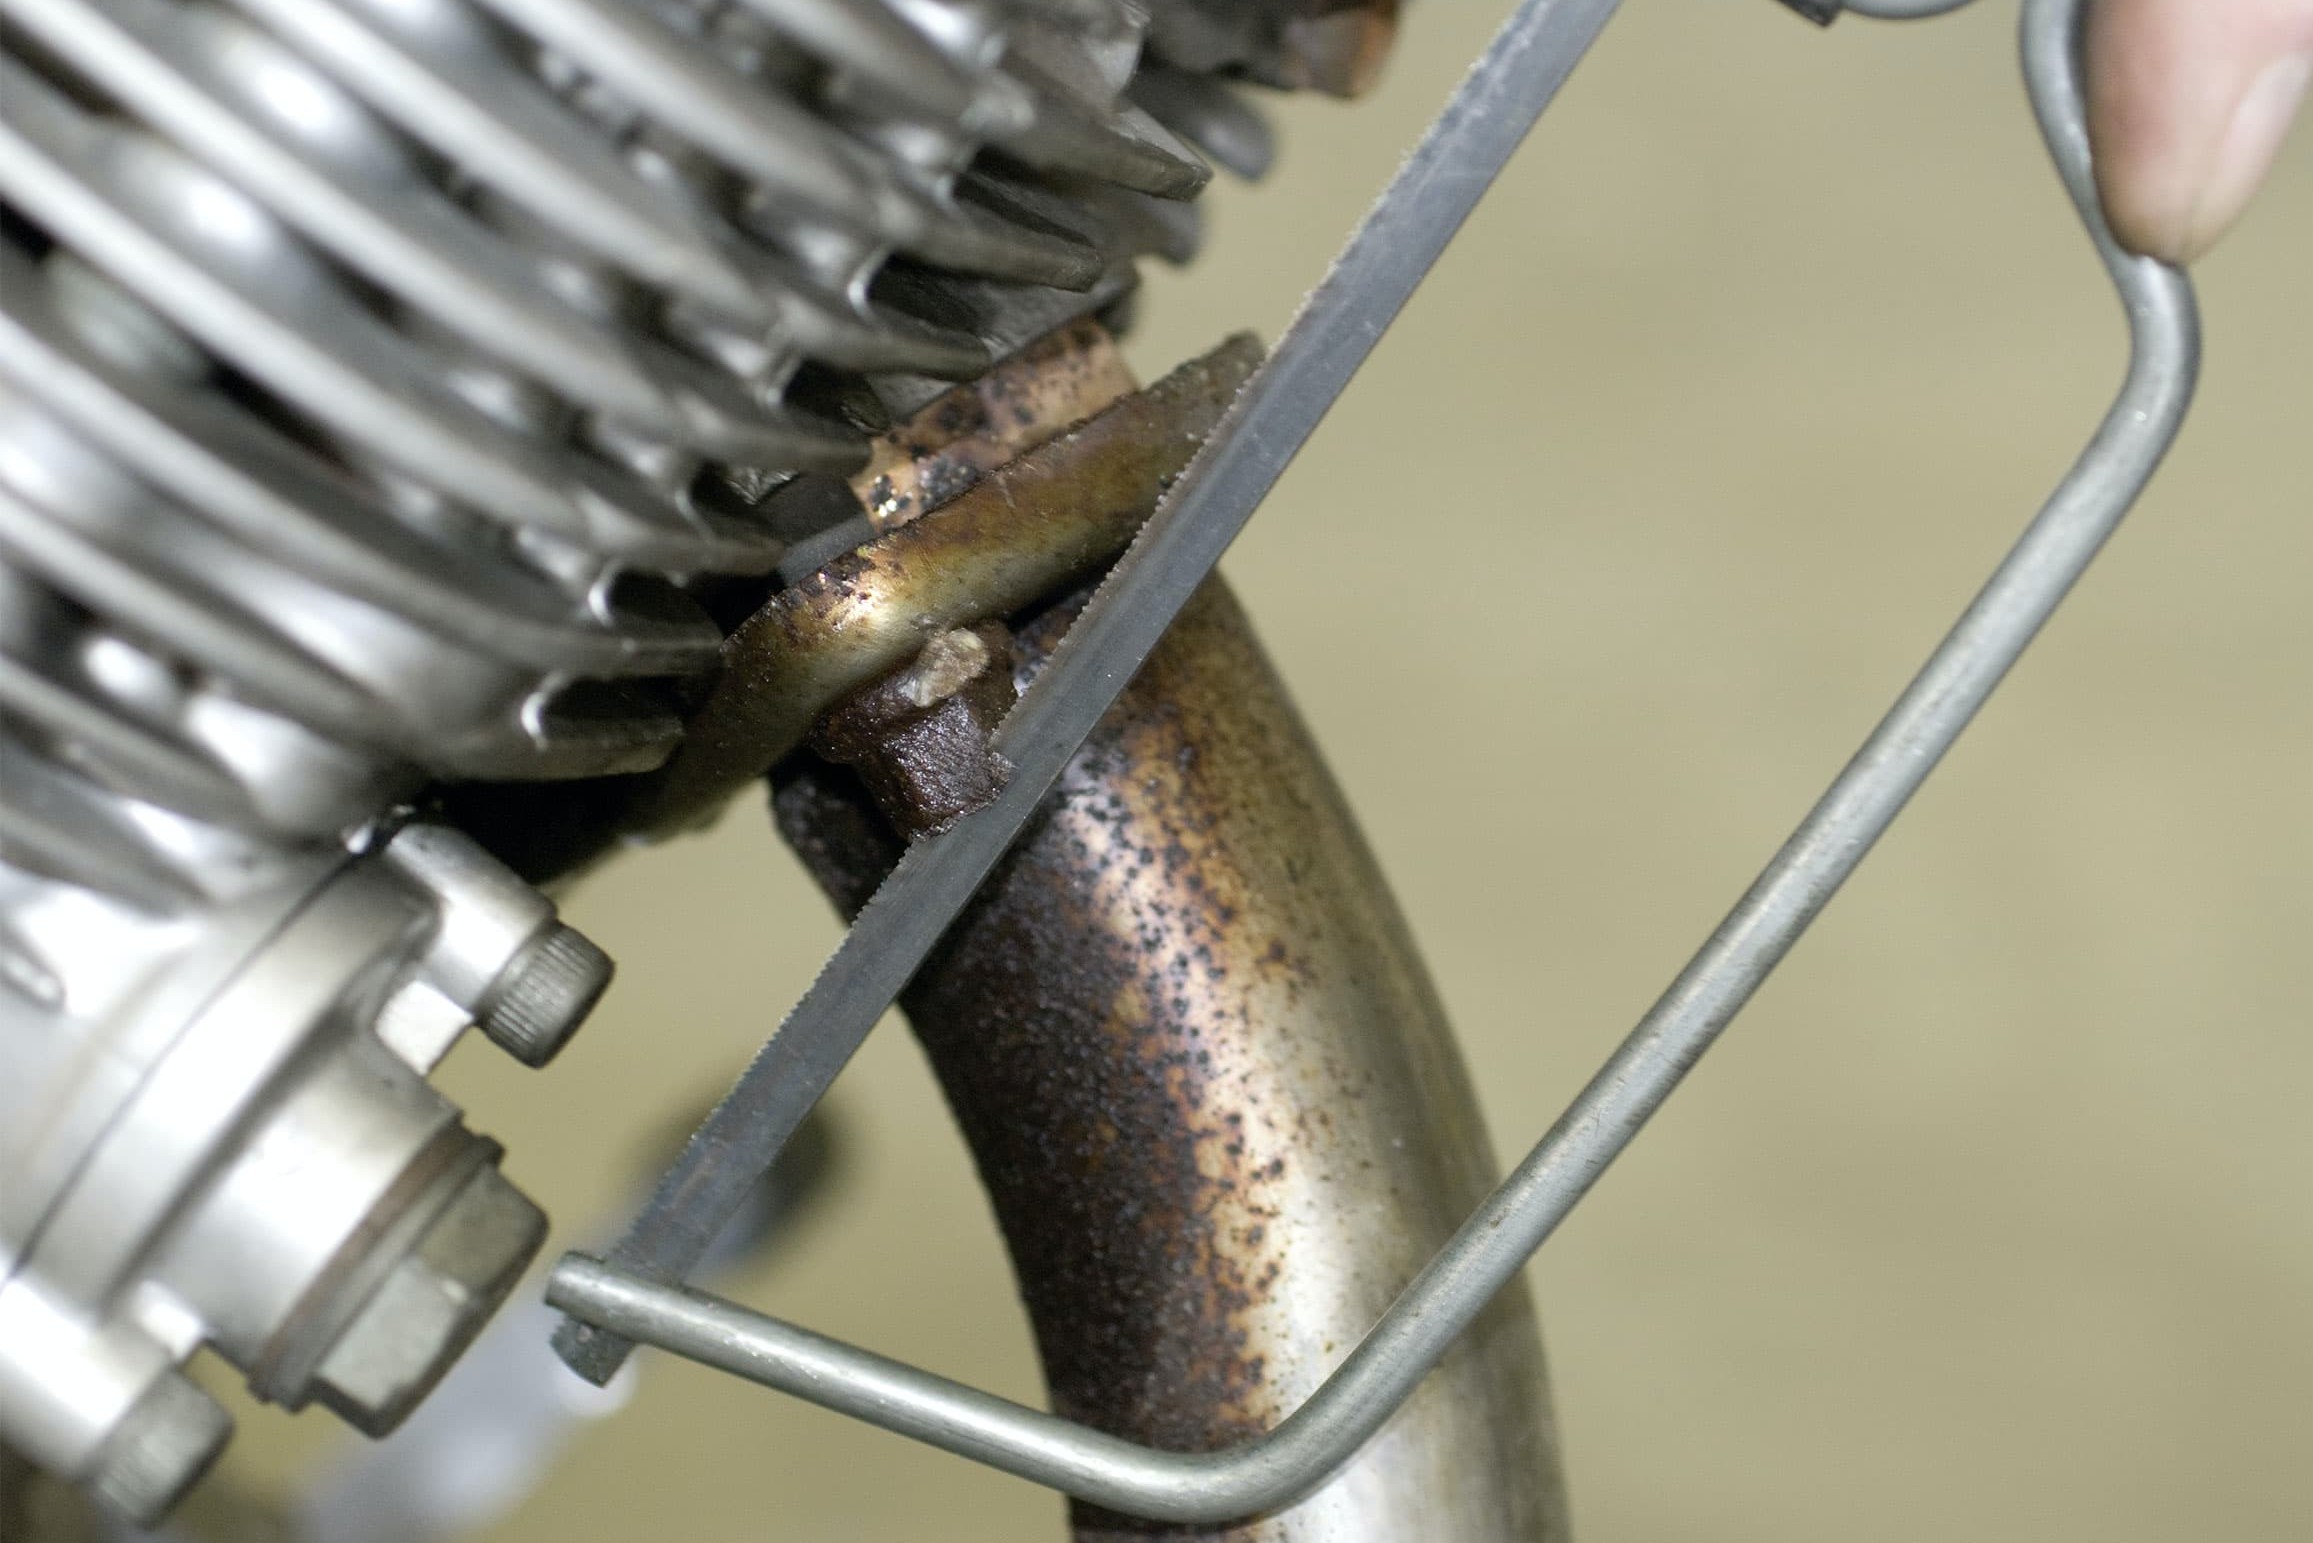
Saw a groove in the nut
Saw a groove in the nut
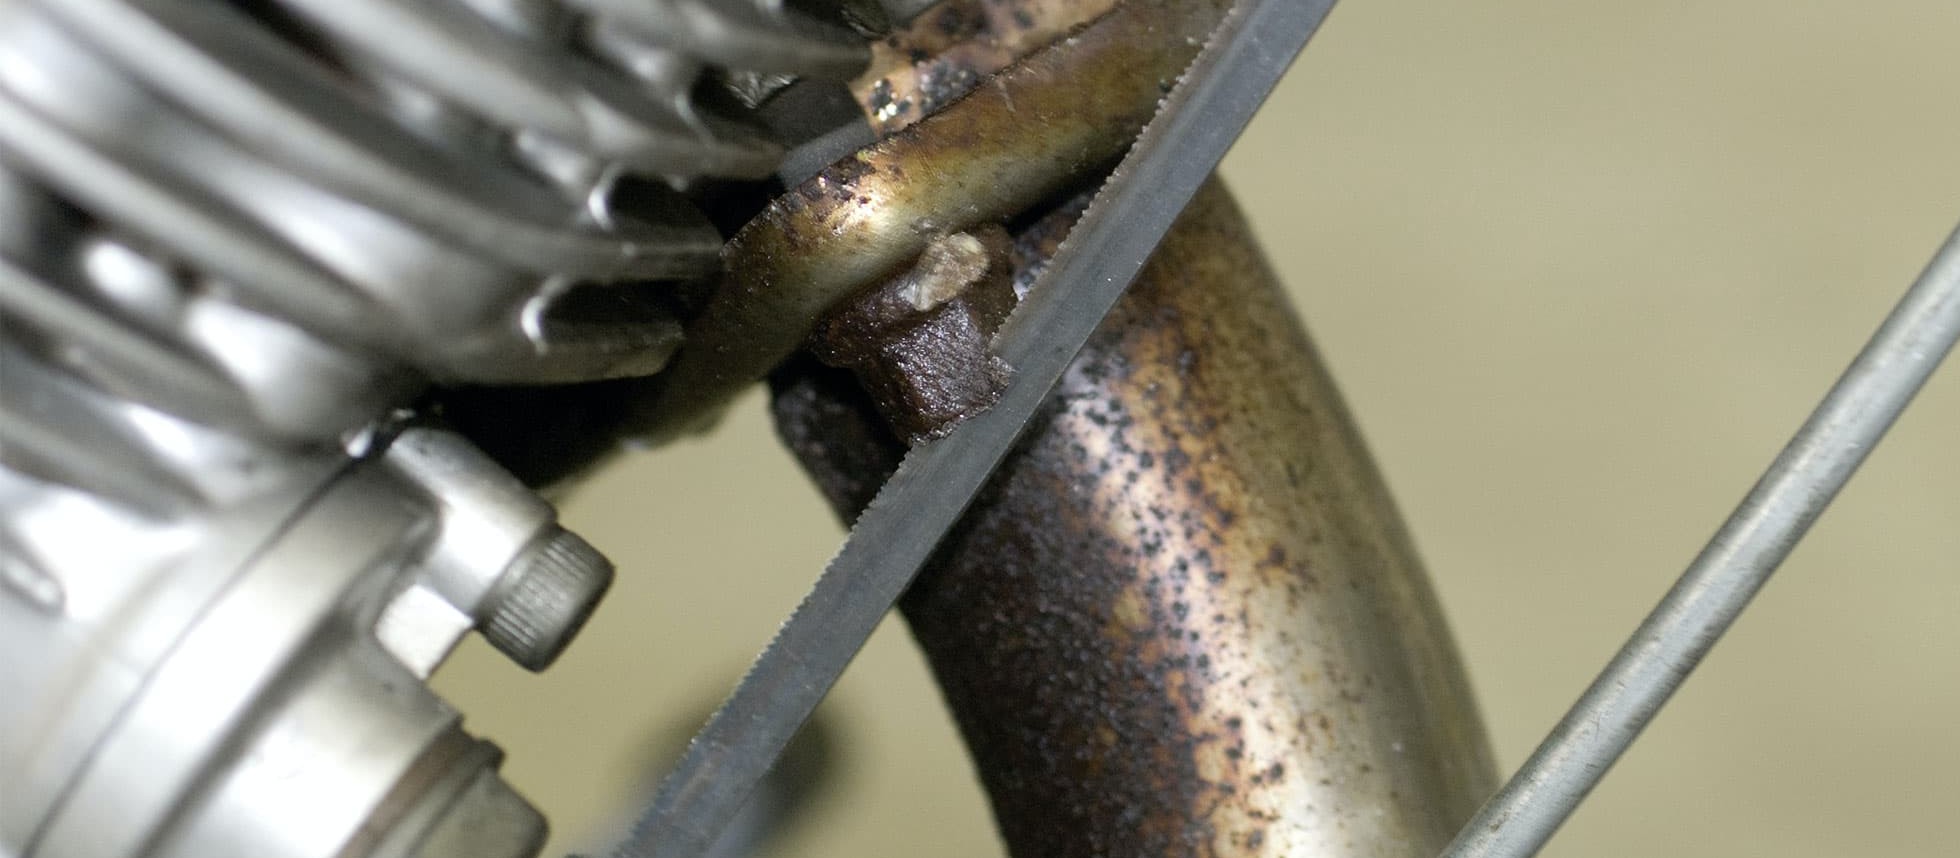
If you're still getting nowhere, or if using a hammer is not an option because you risk damaging a delicate component, try to make a deep slot in the screw head with a hacksaw and a key file so that a large slotted screwdriver can grip.
If the screw is seated in aluminium, heat can help loosen it (see section "Stubborn stud bolts").

Drill out damaged screw head
Drill out damaged screw head
If all else fails, you will have to remove the head of the screw with a drill. Always drill in the centre, pre-drilling first with a small bit and then finishing with the same diameter as the screw thread. Remember: to begin with, you only want to remove the screw head, so don't drill too deep. Later you can decide how best to remove the threaded shank that's left behind. If the thread is intact, it can usually be easily gripped and unscrewed with a pipe wrench.
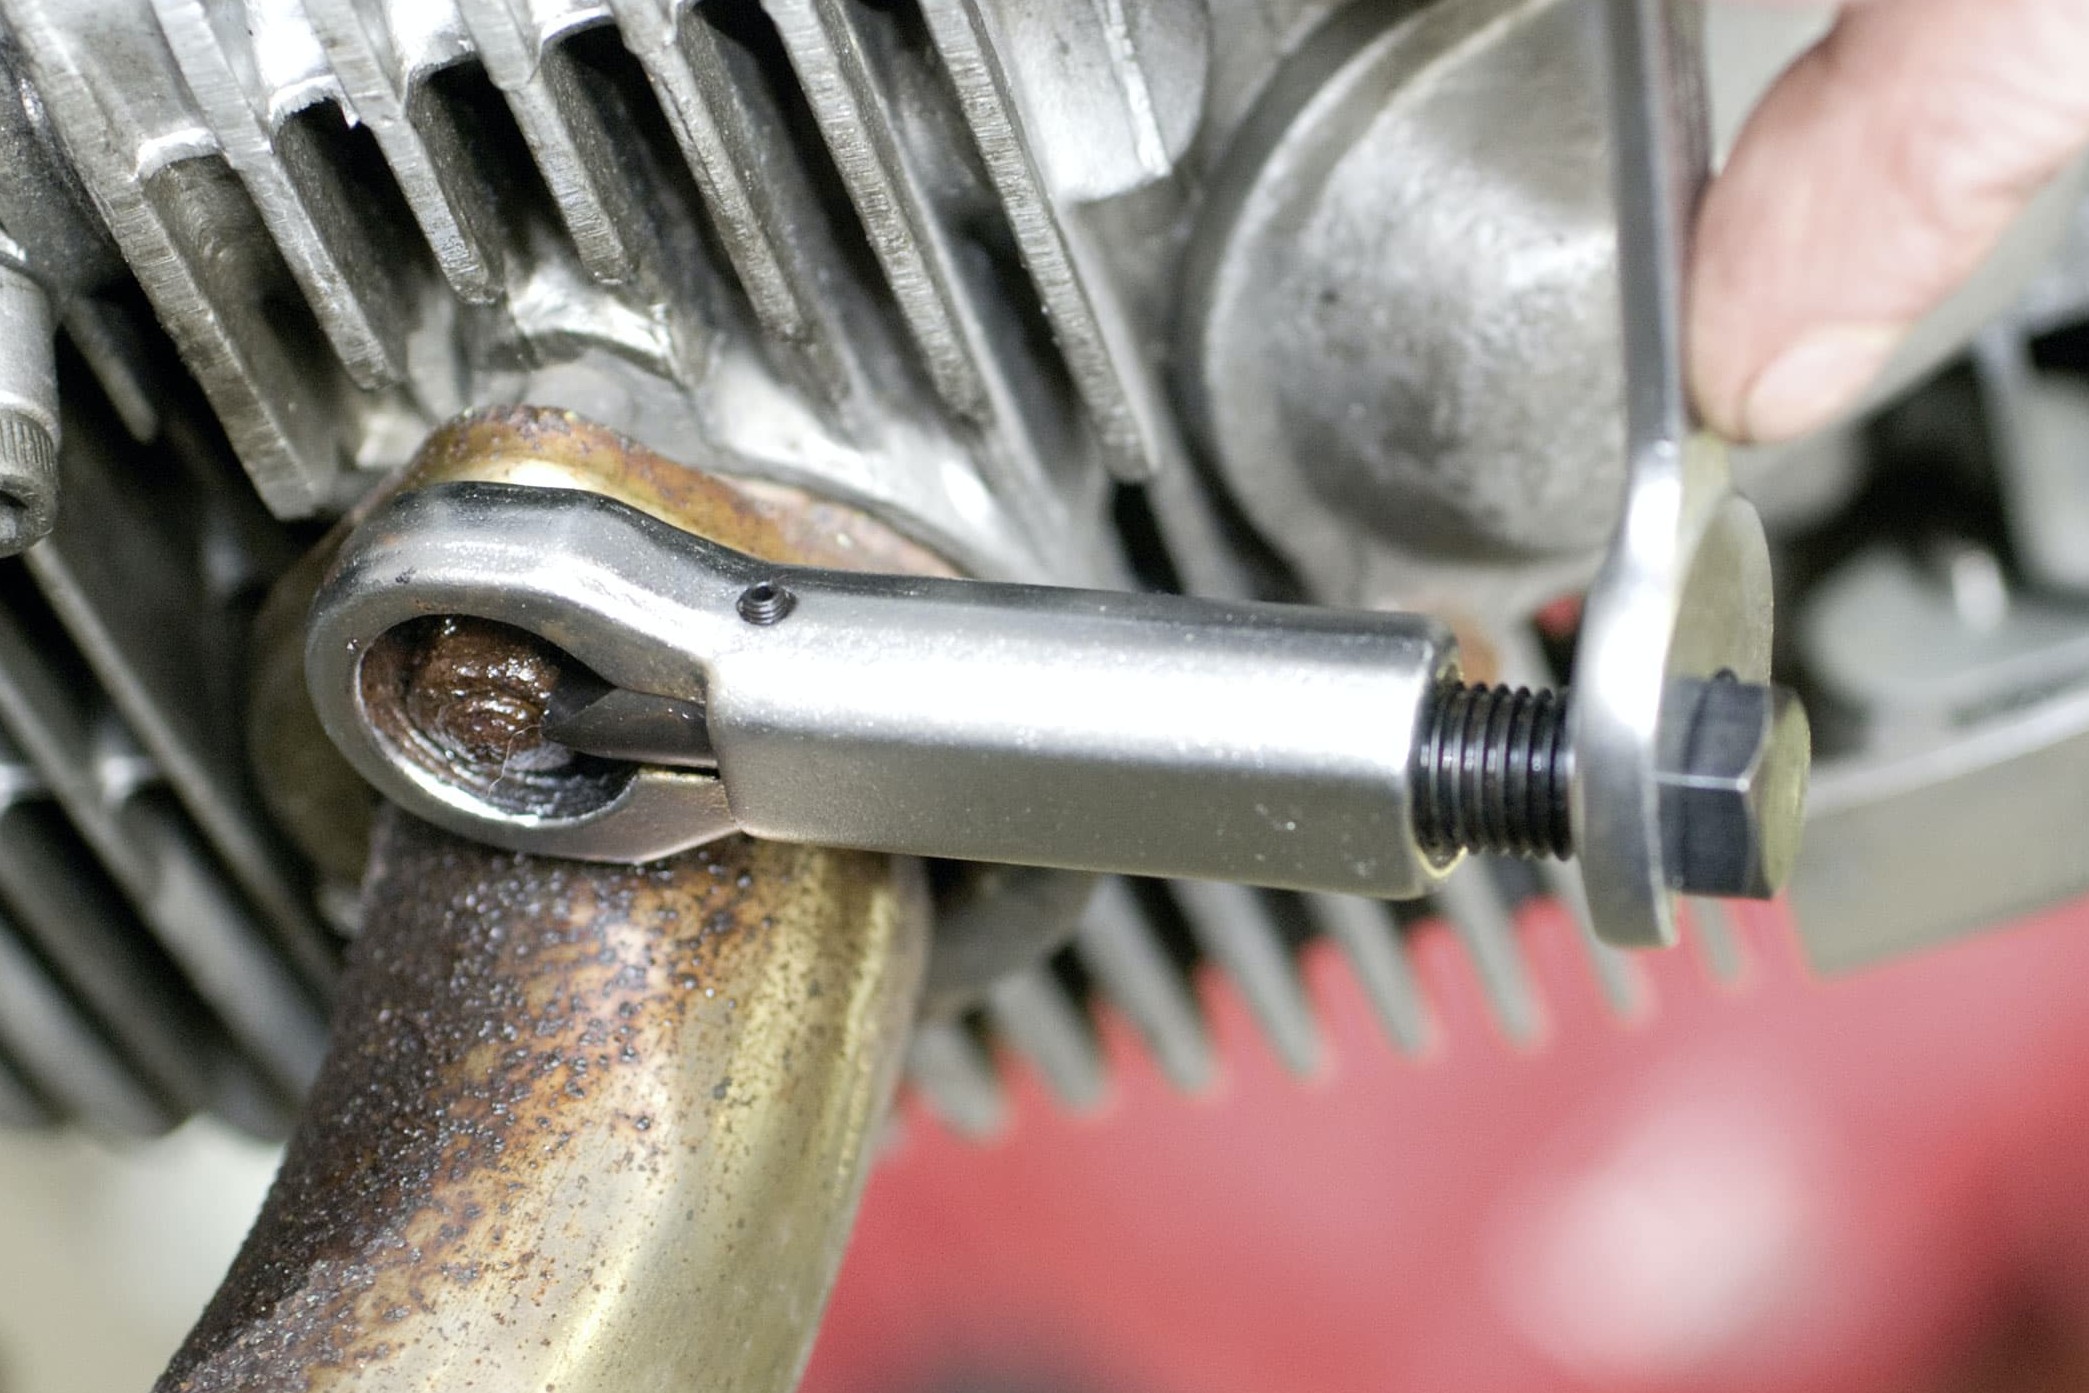
Split nut with nut splitter
Split nut with nut splitter
You can split a rusted-on or stripped nut from the side with a nut splitter.
You can also use a file, hacksaw or angle grinder. Do not cut into the thread! Take care not to do damage around the nut. Cover or tape off surrounding surfaces for protection. If you can access the nut, and the bolt is easy to replace, you can simply remove it by sawing it off flush (between the nut and the washer). This is often the quickest method. Always protect the surrounding area from the sawblade.
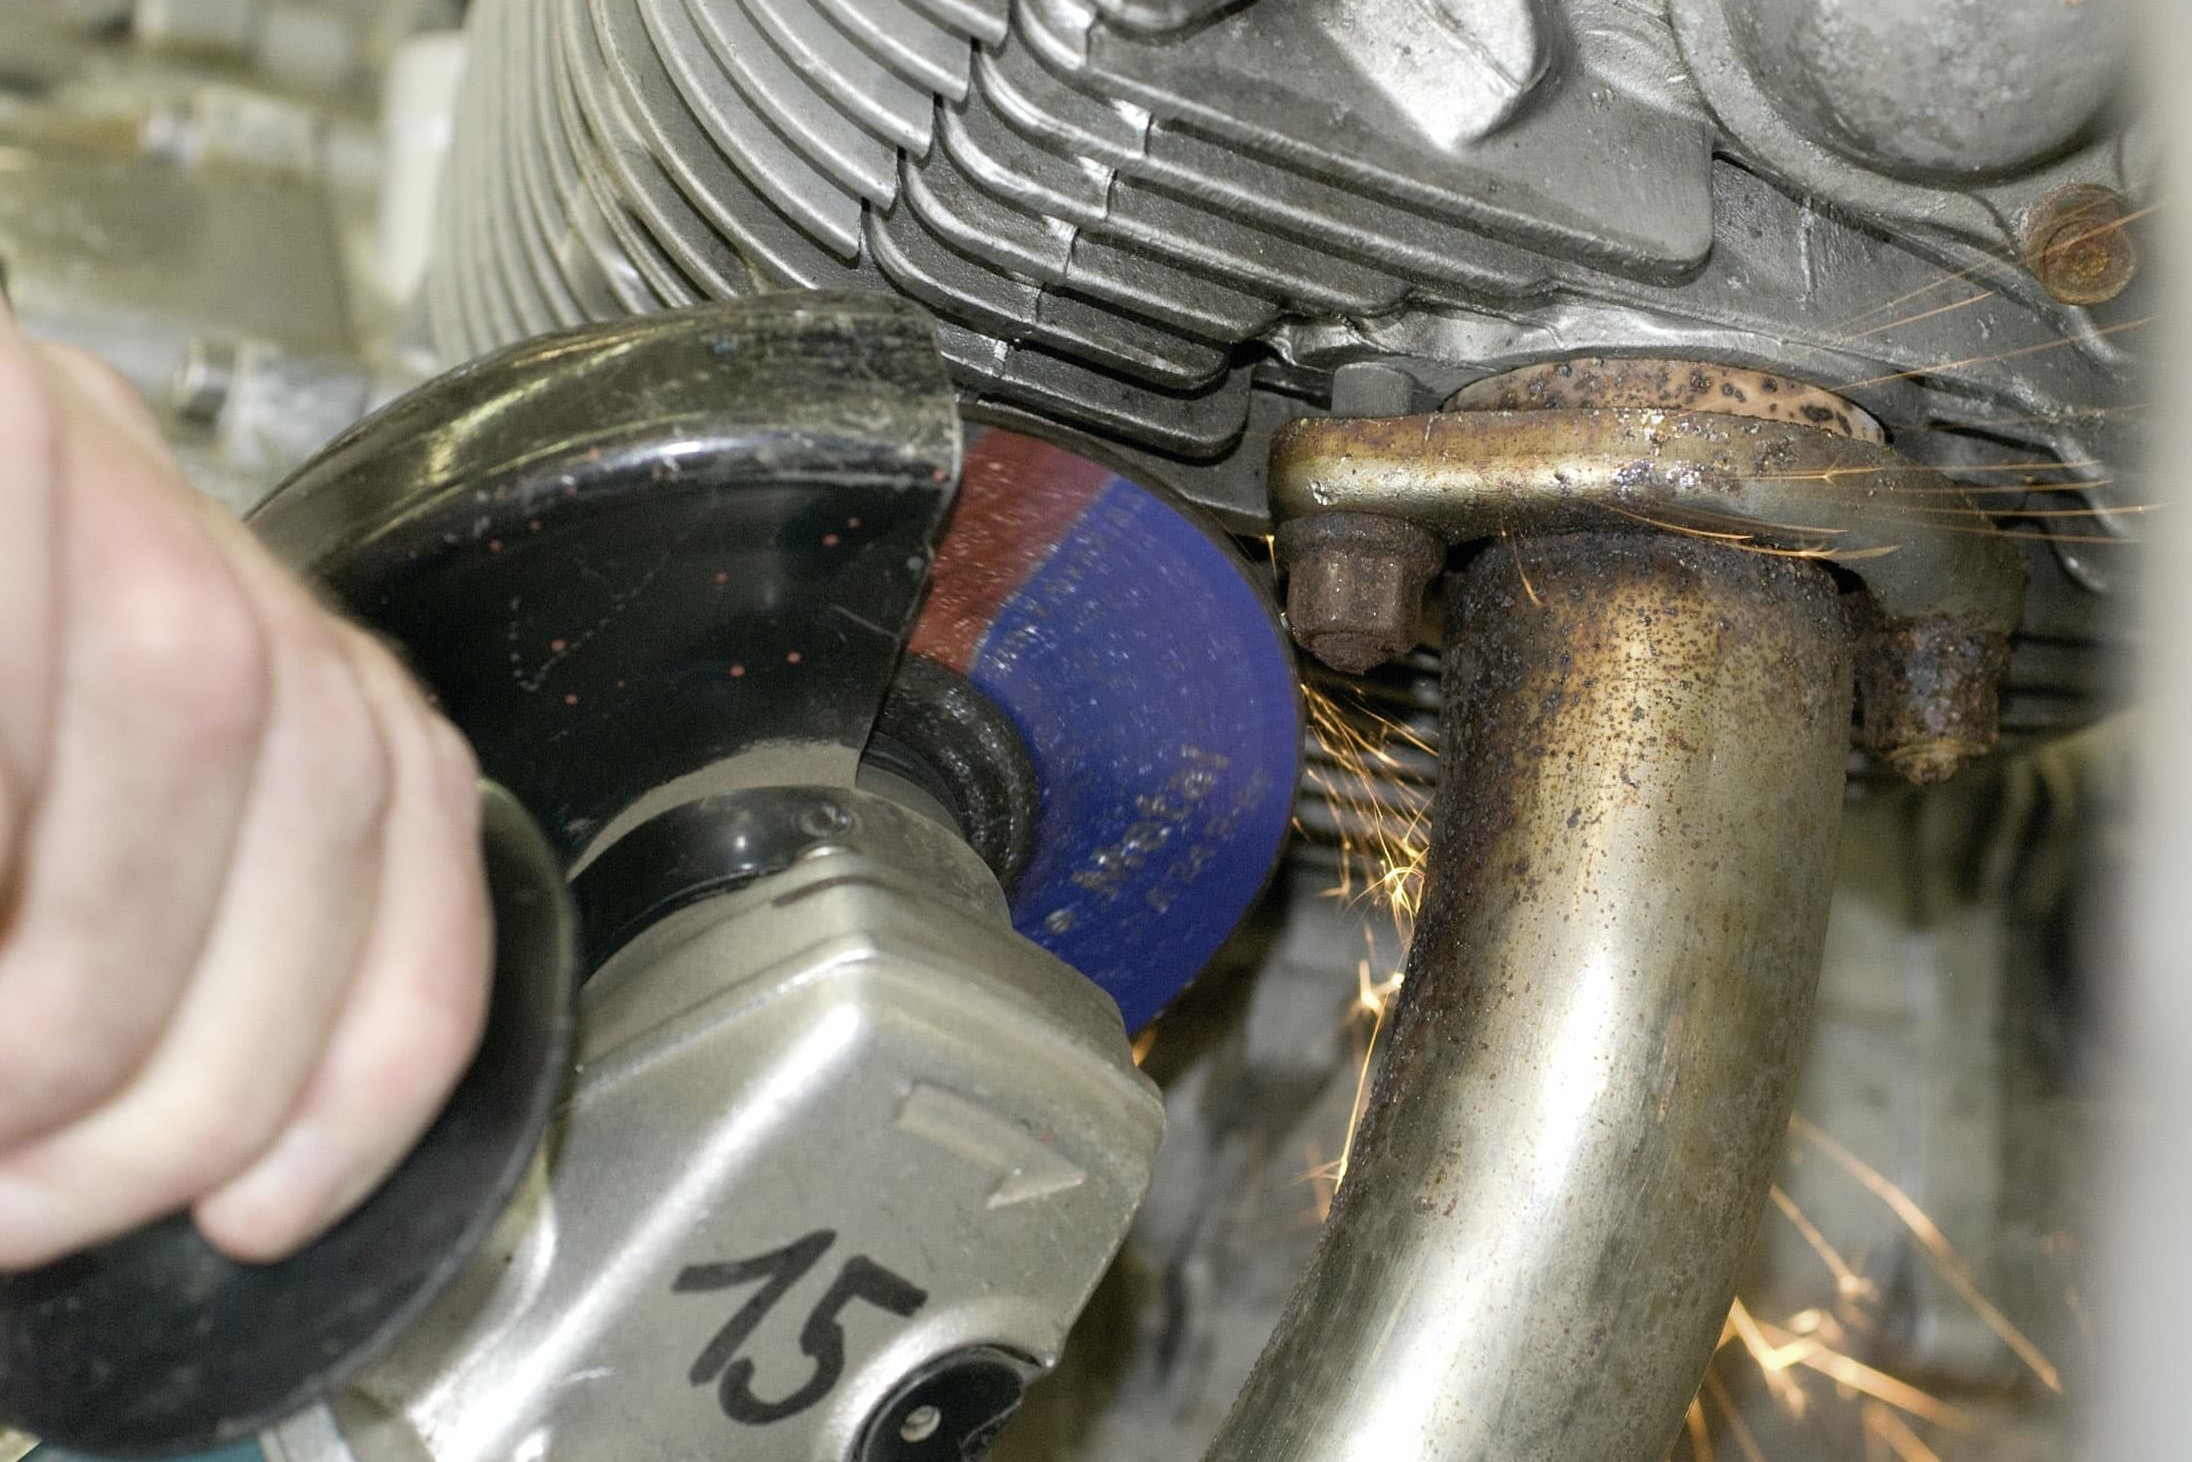
Angle-grind nut from the side
Angle-grind nut from the side
If a countersunk-head screw is so badly damaged that no tool can grip or move it, you can use a screw extractor, provided the screw has a diameter of 6 mm or larger. This means drilling into the screw exactly straight and in the exact centre, using the correct diameter of screw extractor (follow the instructions on the packaging). If you do not succeed in drilling the screw exactly centrally, things can get very difficult. So it may be better to leave the job to an expert, unless you're confident in your own ability.
You should also be careful not to put too much strain on a small screw extractor. If it snaps off, you will be left with a piece of hardened steel wedged in the screw, which is extremely difficult to remove. Of course, screw extractors can also be used on stubborn stud bolts. They are only suitable for a right-hand thread, not for a left-hand thread.
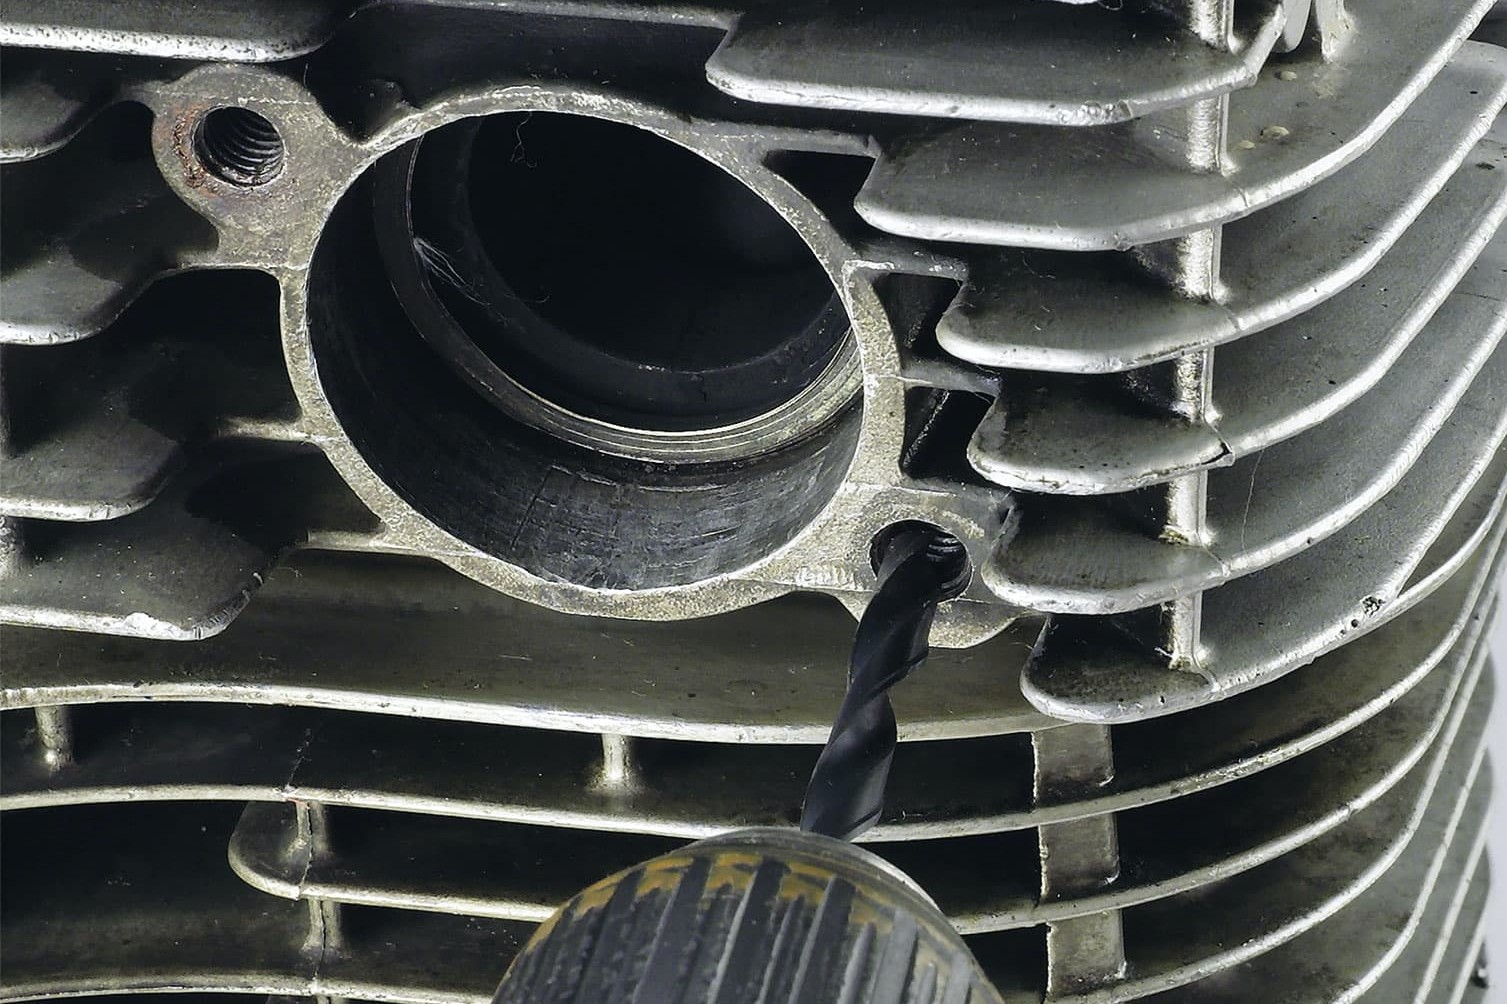
Drill out defective thread …
Seized stud bolts
Stripped screw heads or bolts are often a sign of a deeper-seated problem. Usually the bolt won't budge because it's rusted tight or the thread is damaged. First try applying some penetrating oil and leaving it overnight!
What you do next depends on how much of the bolt is left to grip. If there is enough thread for two nuts, put them on, lock them tightly and try to twist the bolt out. If very little thread is left, try gripping the bolt with a pipe wrench. Grip the bolt as tightly as possible and try to turn it. If that doesn't work, don’t try again.
Instead, use what is left of the thread to weld on an intact screw and turn this screw! If you haven't got any welding equipment, you can try using a screw extractor. If the bolt is screwed into aluminium, applying heat can make it much easier to release because hot aluminium expands more than steel. However, make sure there are no rubber shaft seals, O-rings, rubber gaskets or other heat-sensitive parts in close proximity, which would otherwise have to be replaced. If possible, housing covers should be taken off and warmed up by laying them on a hotplate. If you use a gas torch, always heat the bolt with a circular movement. Never hold the flame stationary on one spot. If you're dealing with painted aluminium, use a hot-air gun instead and avoid excessive heat. 100°C-150°C is hot enough to loosen a bolt (as a guide: oil evaporates at 200°C, water at just above 100°C). If high-strength threadlock adhesive was applied to a bolt, it must generally be loosened with heat, even if it is a steel/steel connection. Loctite "high-strength" requires a very hot 300°C.
Important: If none of this helps, you will need to think about what to do next – especially if the problem bolt is in the engine block. Engine refurbishers use spark erosion to remove bolts. This means applying a strong electric current to make the bolt disintegrate, leaving the surrounding aluminium undamaged – and likewise the internal thread!
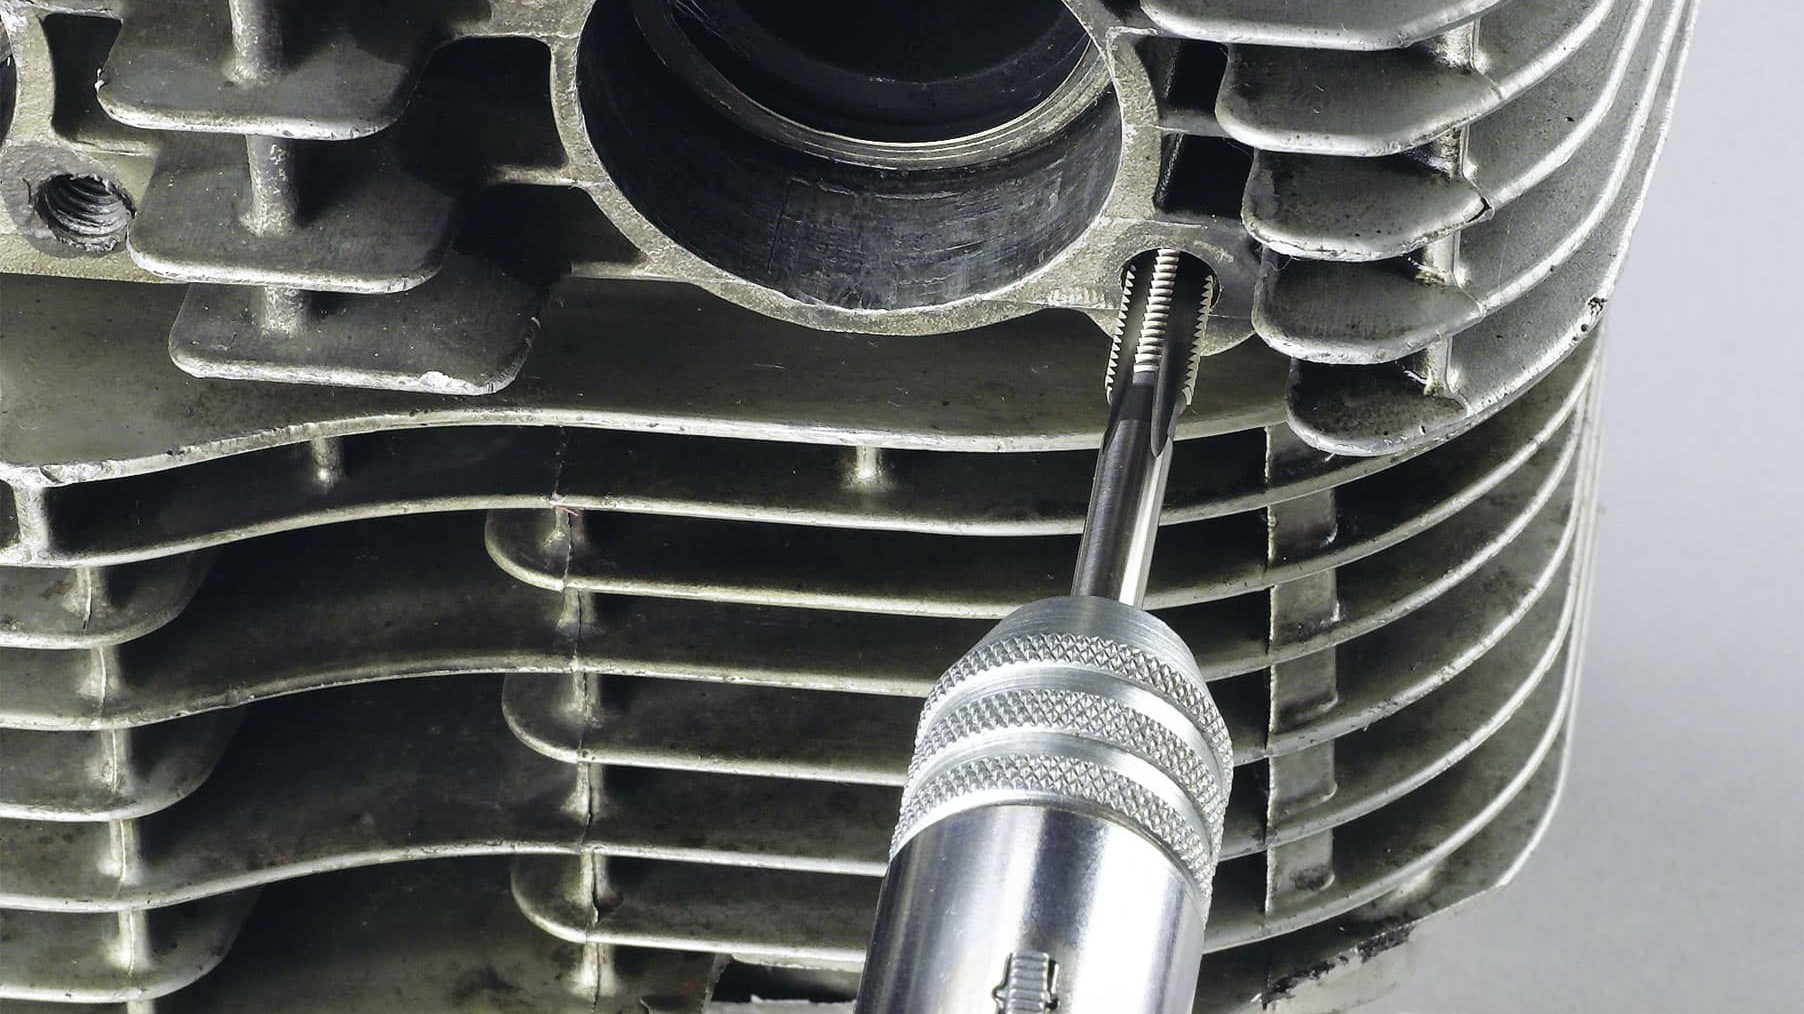
… cut thread for V-Coil repair insert …
Drilling out a broken bolt always means repairing the internal thread afterwards, or else recutting the thread one size larger. In this case, it’s essential to drill exactly straight and in the exact centre. You should possibly leave this job to the experts because if your drilling is not precise enough, you may end up making a "crater", and that really is a problem. The only solution is then to weld the whole thing and rethread. However, the thread in the welded-on material will not have the same strength as the original.
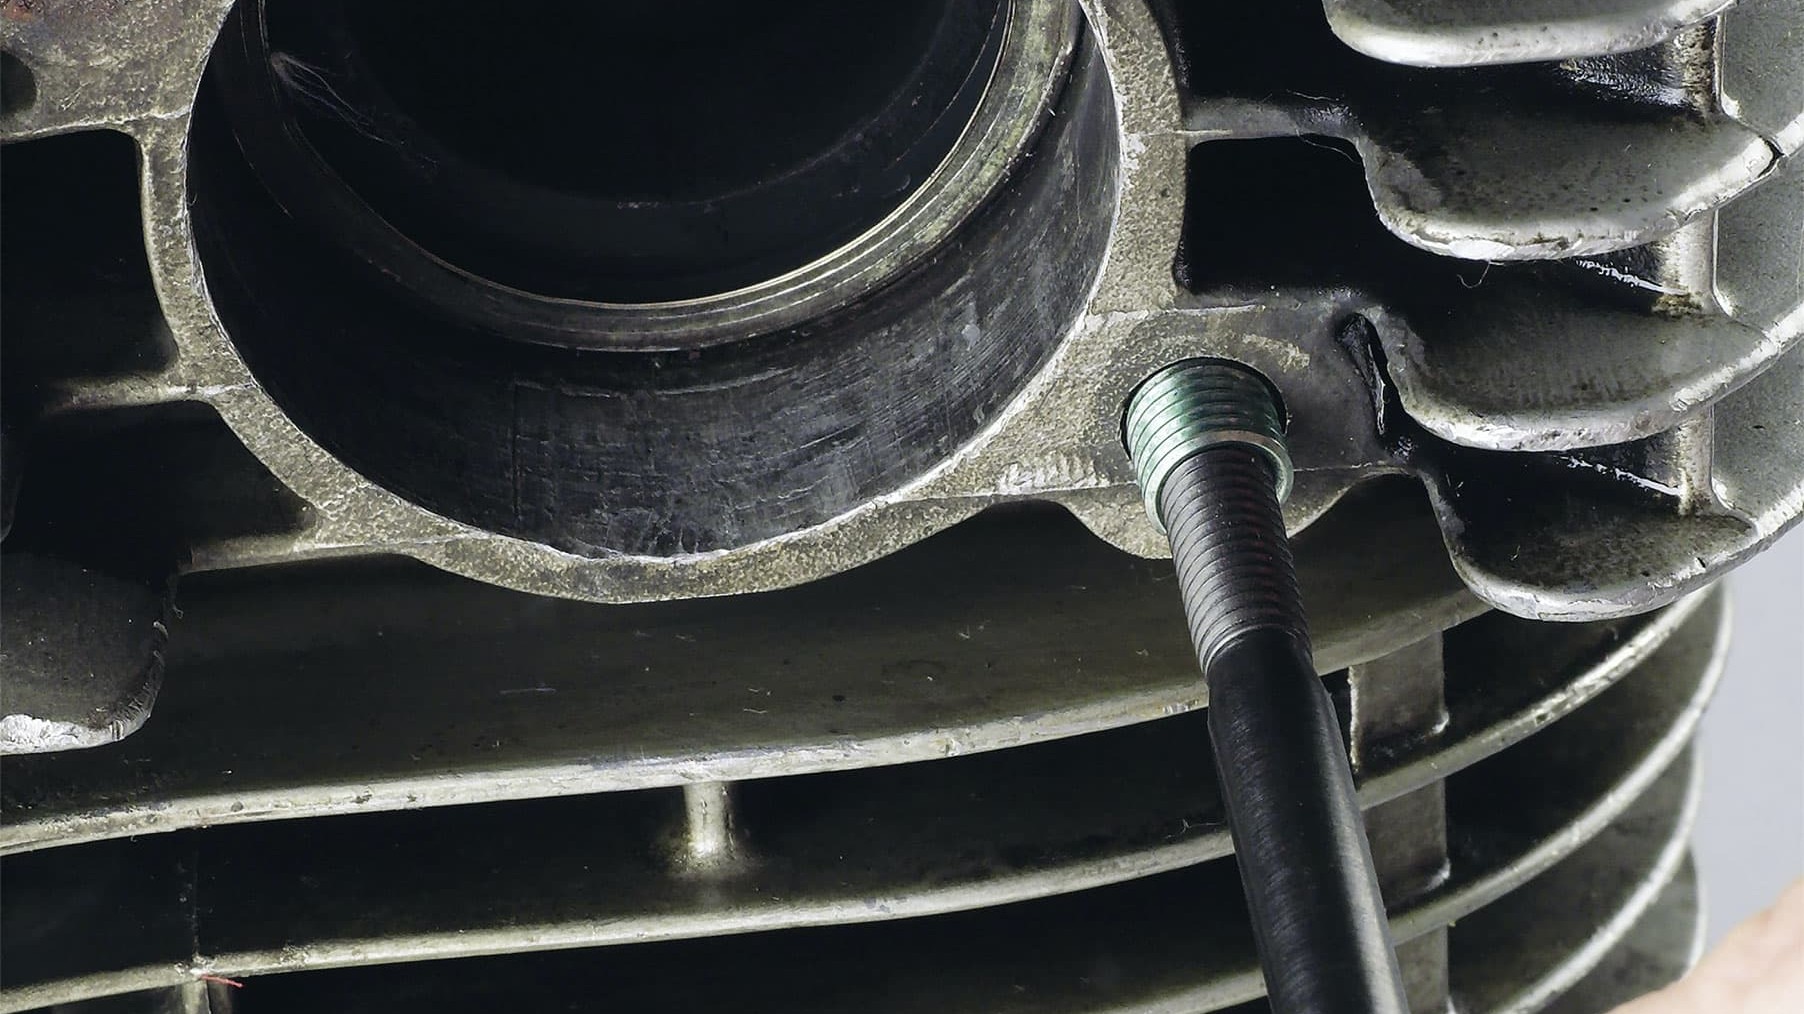
… and position V-Coil repair insert
Thread repair with V-Coil
The patented "V Coil" thread insert does a good, durable job of repairing a damaged internal thread. Compared to threaded inserts made of steel, the V-Coil has the advantage that it will not work loose under continuous thermal loads. This makes it ideal for repairing spark plug threads, for example.
In addition to the spiral inserts, each V-Coil repair kit also contains a bit for drilling the required size of hole, a special thread-cutting tap and a tool for screwing in the inserts correctly. To ensure a successful repair, it's absolutely essential to properly remove all remnants of the old bolt so that you have a clean, straight hole for cutting the new V-Coil thread.
Important: If you're not confident that you can do a good job, you should leave this repair to a motorcycle workshop. For example, it takes experience, a very good eye and the right feel to drill the thread of the header mount on the cylinder head centrally and at the right angle without removing the engine. In case of doubt, it's always better to remove the part that requires drilling so that you can align it accurately under a bench drill, and save yourself the constant annoyance of a crooked, botched thread!
Avoiding trouble with faulty threads
Prevention is better than cure, as anyone who's ever had to deal with any of the problems described will tell you. And prevention is quite easy, actually. Always make sure the tools you use for any job are in good condition. Banish all worn-out screwdrivers, wrenches and other tools from your toolbox! The problems they cause will far outweigh any satisfaction of saving some money in the short term. You should have a good selection of slotted and cross-head screwdrivers or bits so that you always have a tool that really fits properly. You will find everything you need in our range.
You should also invest in a bit set for your impact driver. Ratchet sockets with a flank-drive are especially useful to avoid damaging hex bolts. All Rothewald socket wrench sets in our range have them. Make sure the thread is clean before you assemble any part! You'll find brake cleaner or compressed air useful for this. And remember! It's important to wear safety goggles.
Just a tiny amount of copper paste will make any threaded fastener much easier to tighten and loosen. And copper paste, unlike grease, does not reduce the strength of the connection at all. If you're installing stainless-steel screws in aluminium, always apply some copper paste! If you drop a screw coated with copper paste and it lands in the dirt, you need to to give it a very thorough clean (e.g. with brake cleaner).
Always insert screws with care, and spark plugs especially. If you feel any resistance, unscrew it again immediately, and find the cause! You can often save a worn thread by recutting it or repairing it with a thread file. If in doubt, ask at your local motorcycle workshop. You can find more information in the DIY tip Thread Cutting.
Our recommendation
The Louis Technical Centre
If you have a technical question about your motorbike, please contact our Technical Centre, where they have endless experience, reference books and contacts.
Please note!
These tips for DIY mechanics contain general recommendations that may not apply to all vehicles or all individual components. As local conditions may vary considerably, we are unable to guarantee the correctness of information in these tips for DIY mechanics.
Thank you for your understanding.


