Scooter maintenance
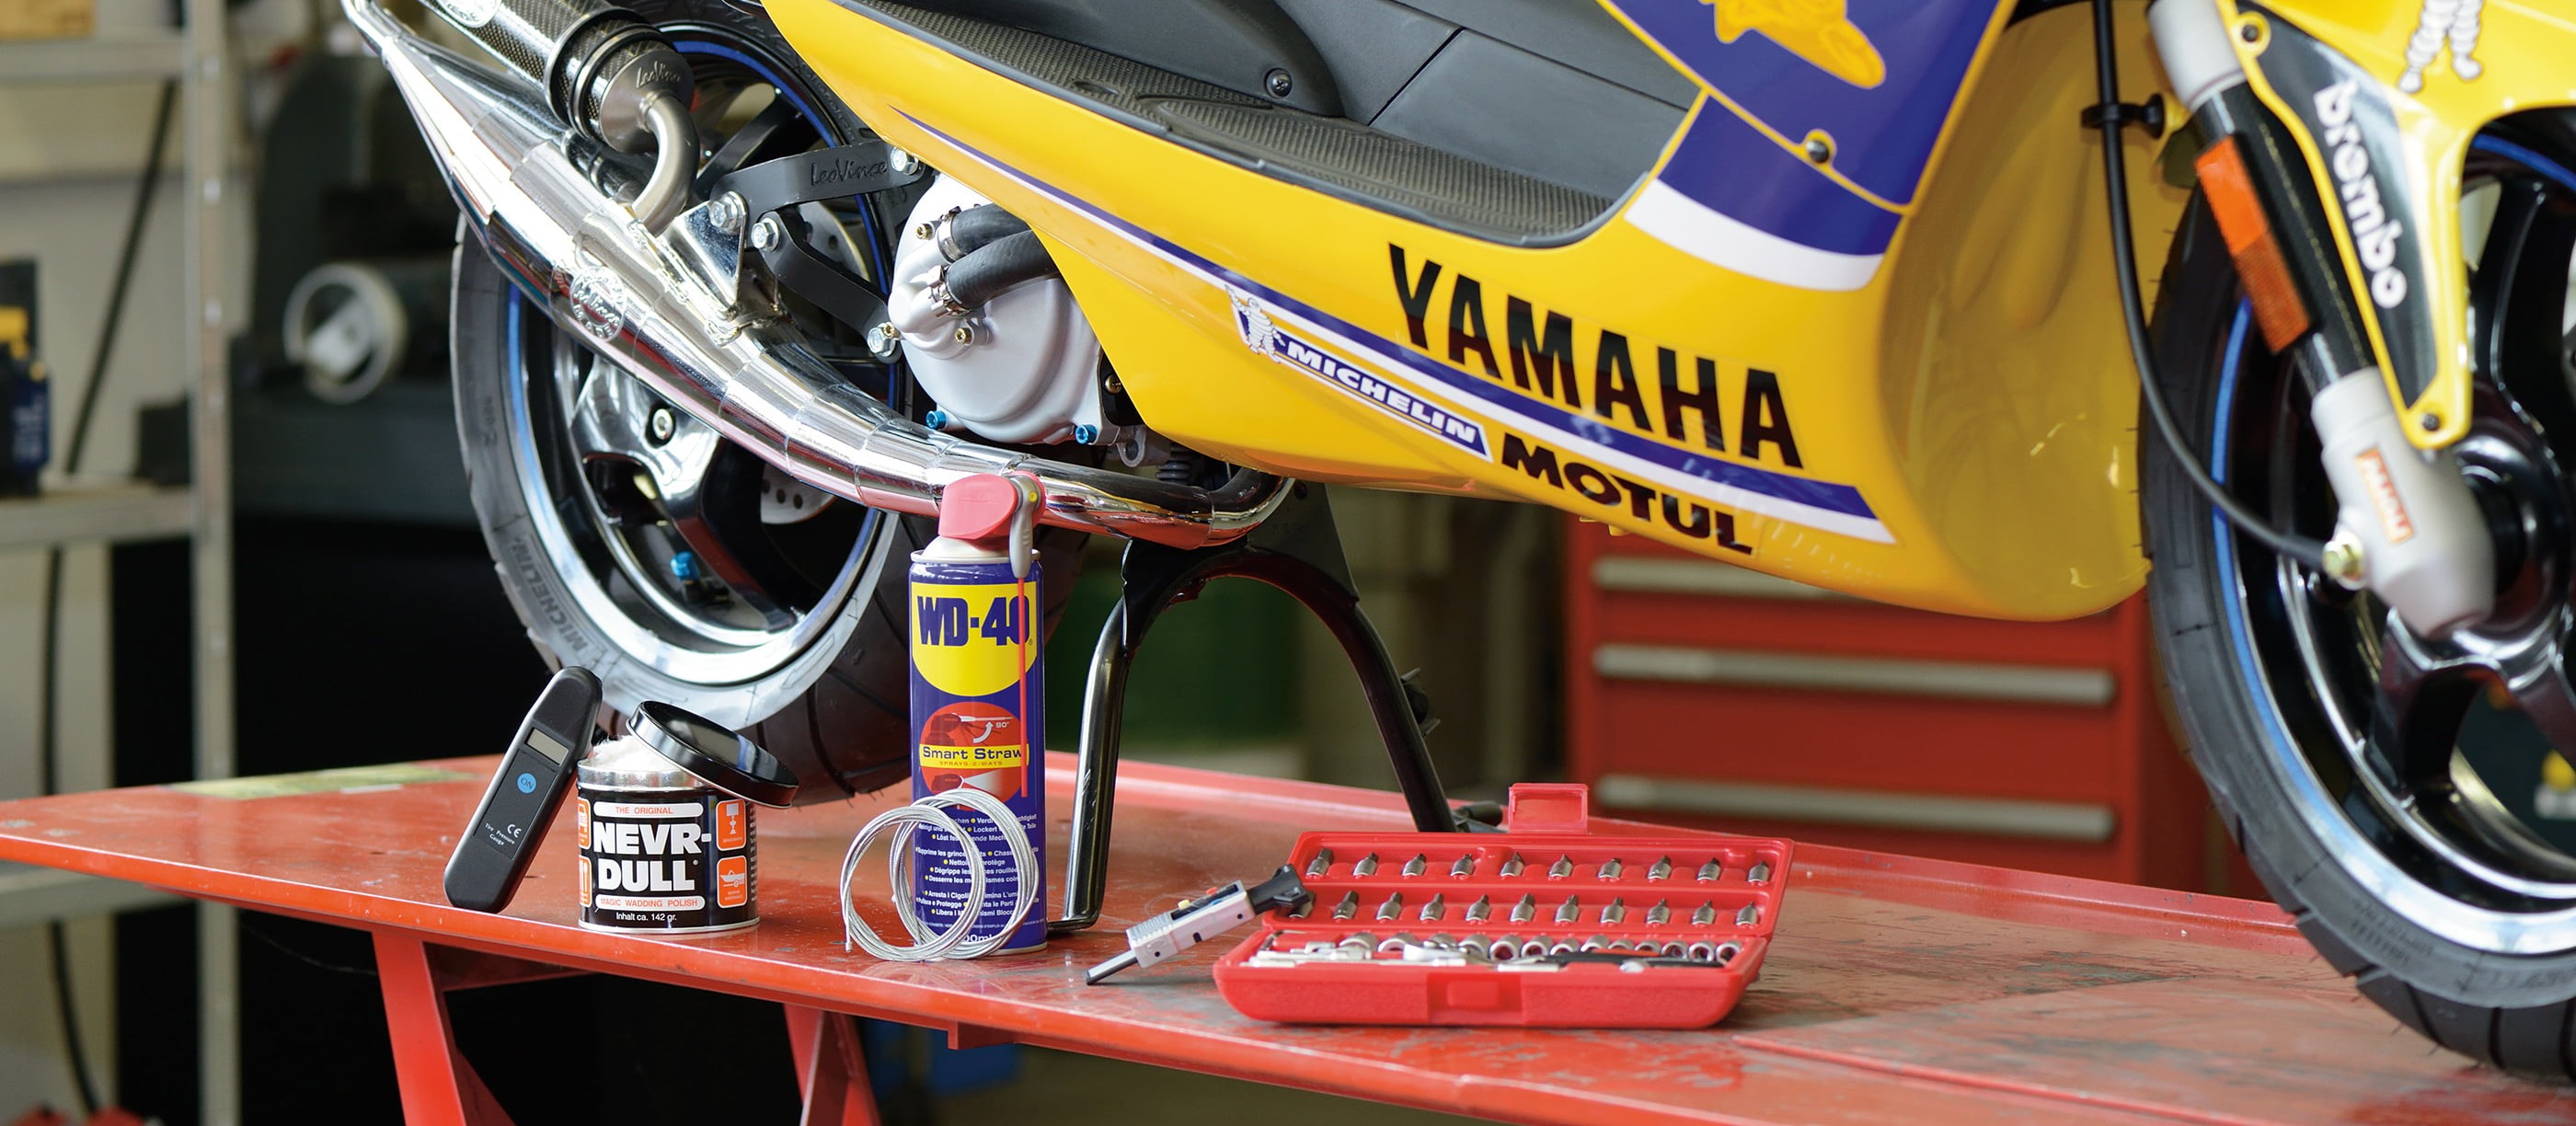
A motor-scooter is basically a quite undemanding little runabout, but even the simplest scooter can't do without a certain amount of maintenance. The more carefully you look after it the better it will go.
Note: The videos are in German.
- Fitness for two-wheelers
- Scooter maintenance – now let's get started
- 01 – Check tyre pressure
- 02 – Check tread depth
- 03 – Check condition of brake pads
- 04 – Check brake discs
- 05 – Check the battery
- 06 – Regularly top up two-stroke oil
- Additional maintenance jobs
- 07 – Check air filter
- 08 – Drain engine oil
- 09 – Remove oil filter
- 10 – Install new seal
- 11 – Correct viscosity and quantity of oil
- 12 – Change oil in final drive
- Our recommendation
Fitness for two-wheelers
All scooters need some attention, even though they're very low-maintenance otherwise. So you should regularly check that everything is functioning correctly, all the components are in good condition, and your scooter is safe to take on the road. Then it will give you long years of enjoyment.
Scooter maintenance – now let's get started
Step 1: Check tyre pressure ...
01 – Check tyre pressure
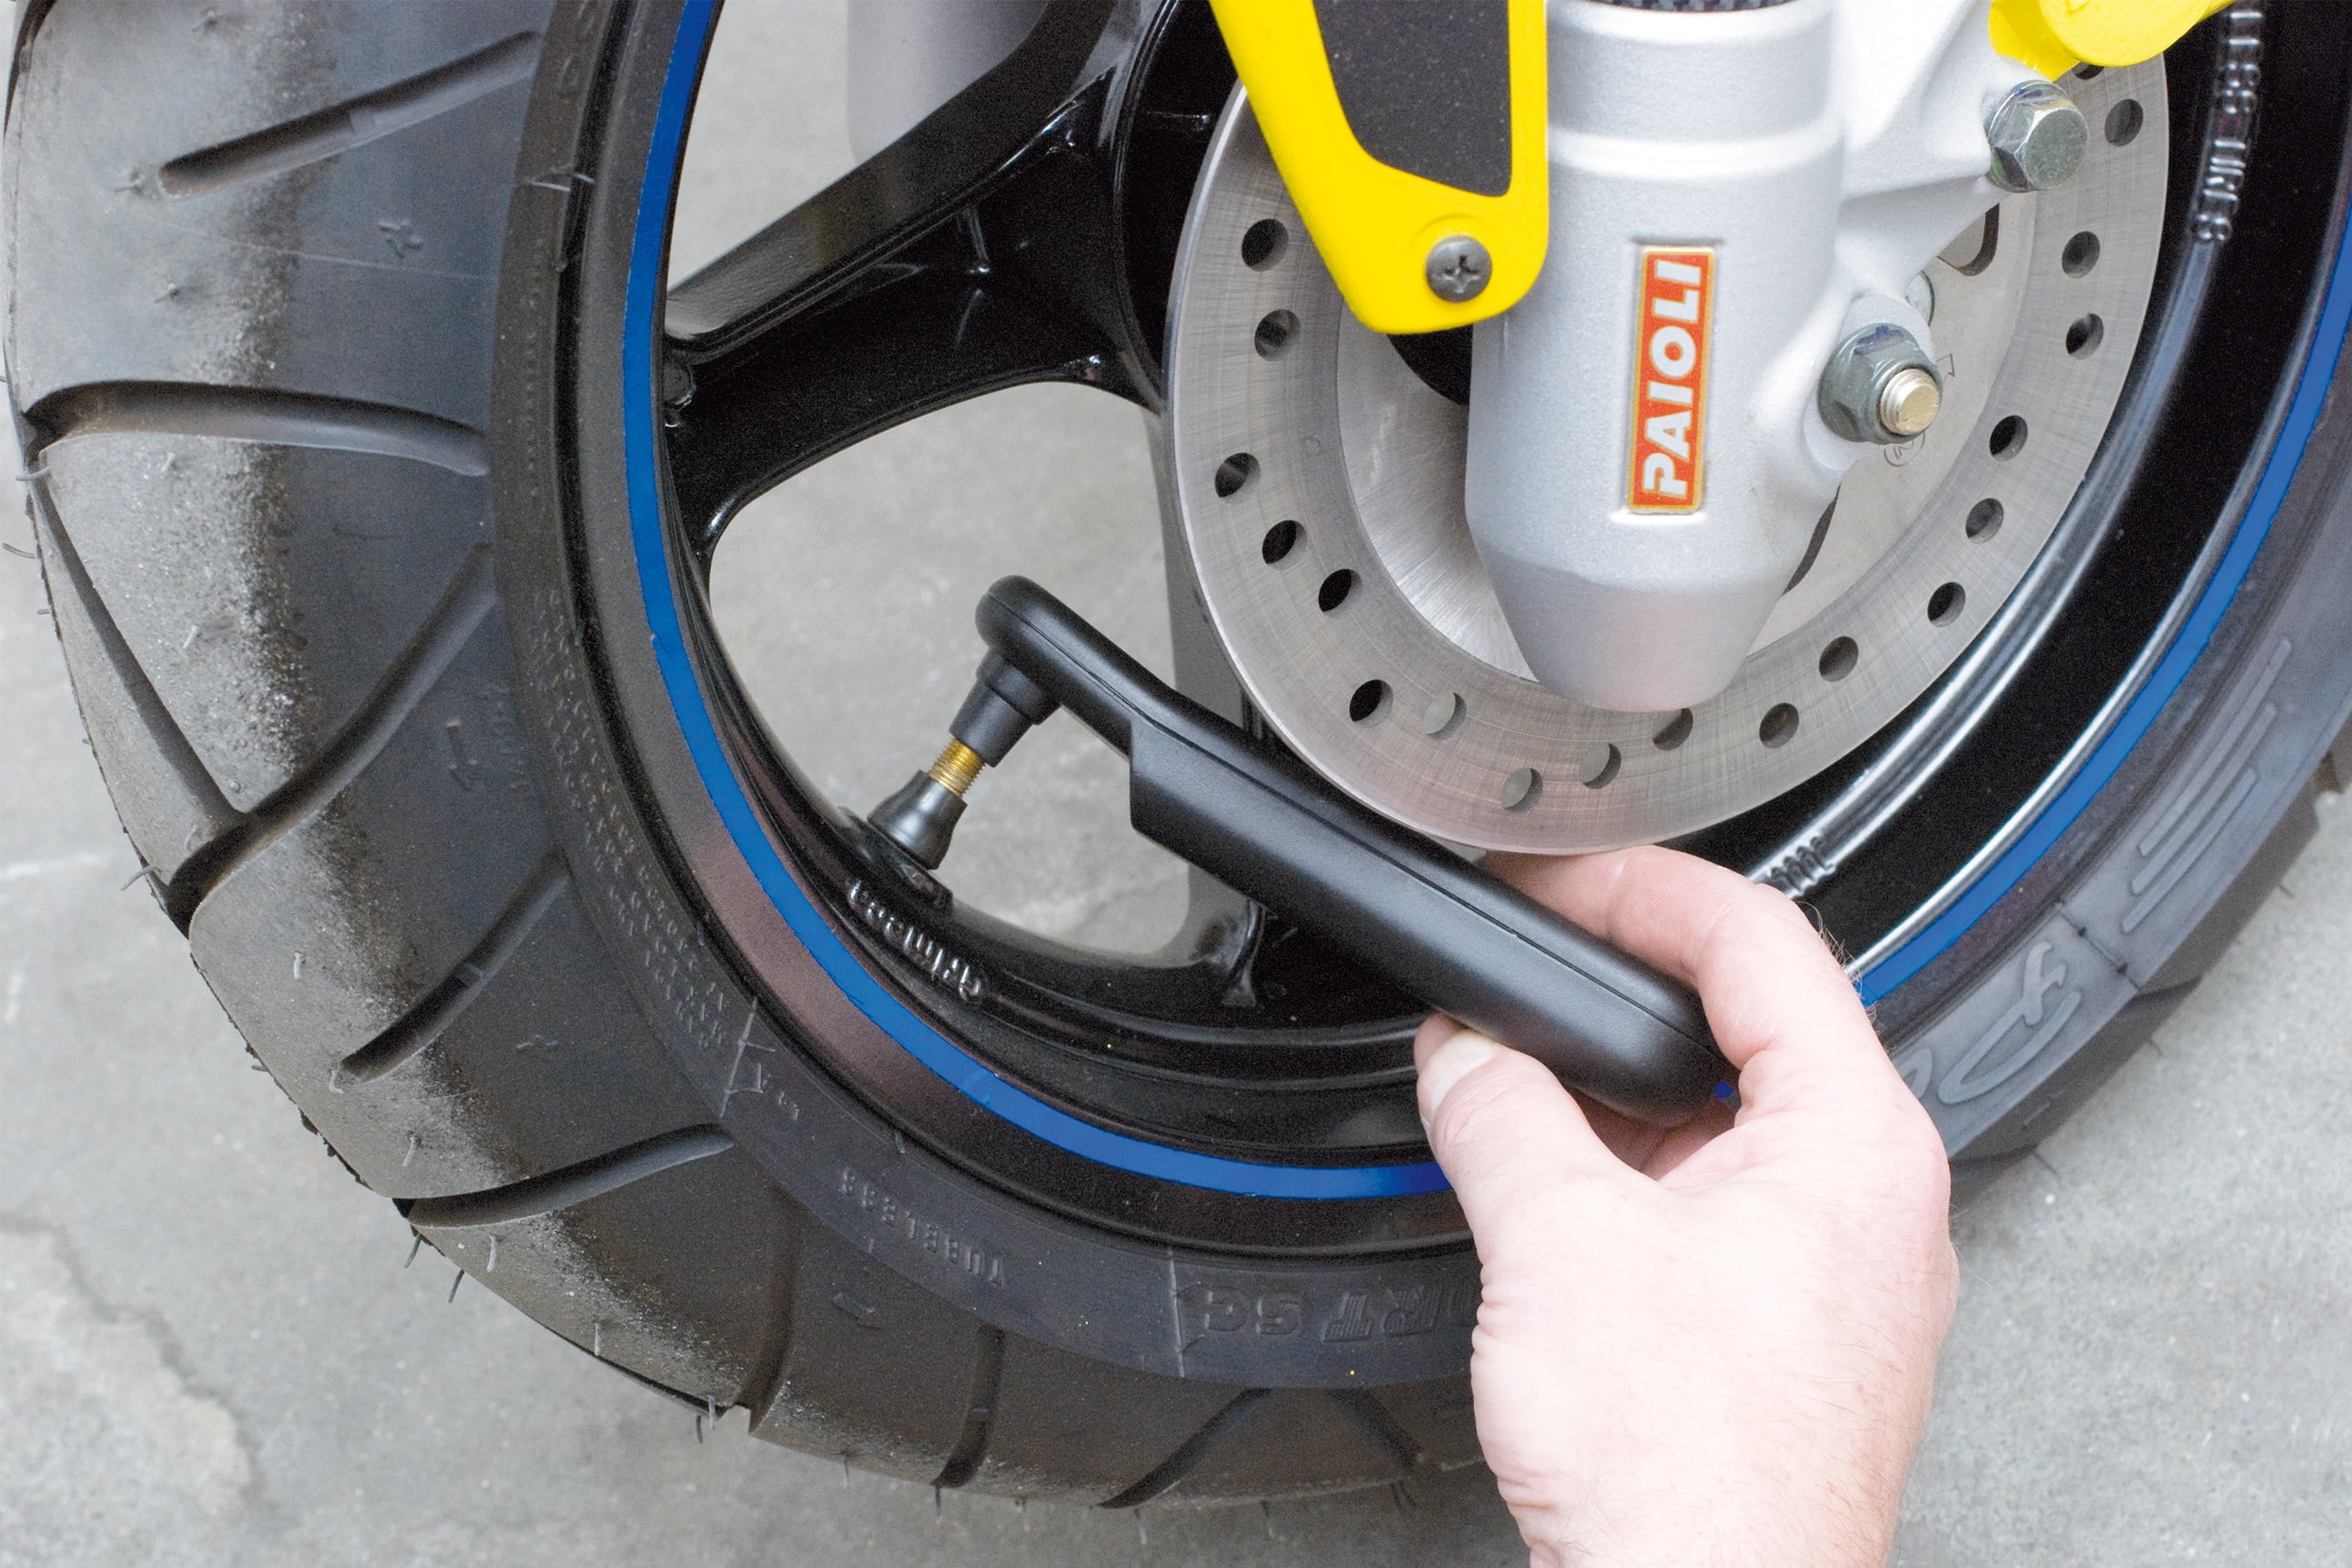
Check your tyre pressure (refer to your owner's manual). The correct pressure is usually 1.5–1.8 bar at the front and 2.0–2.2 bar at the rear.
Step 2: … and tread depth
02 – Check tread depth
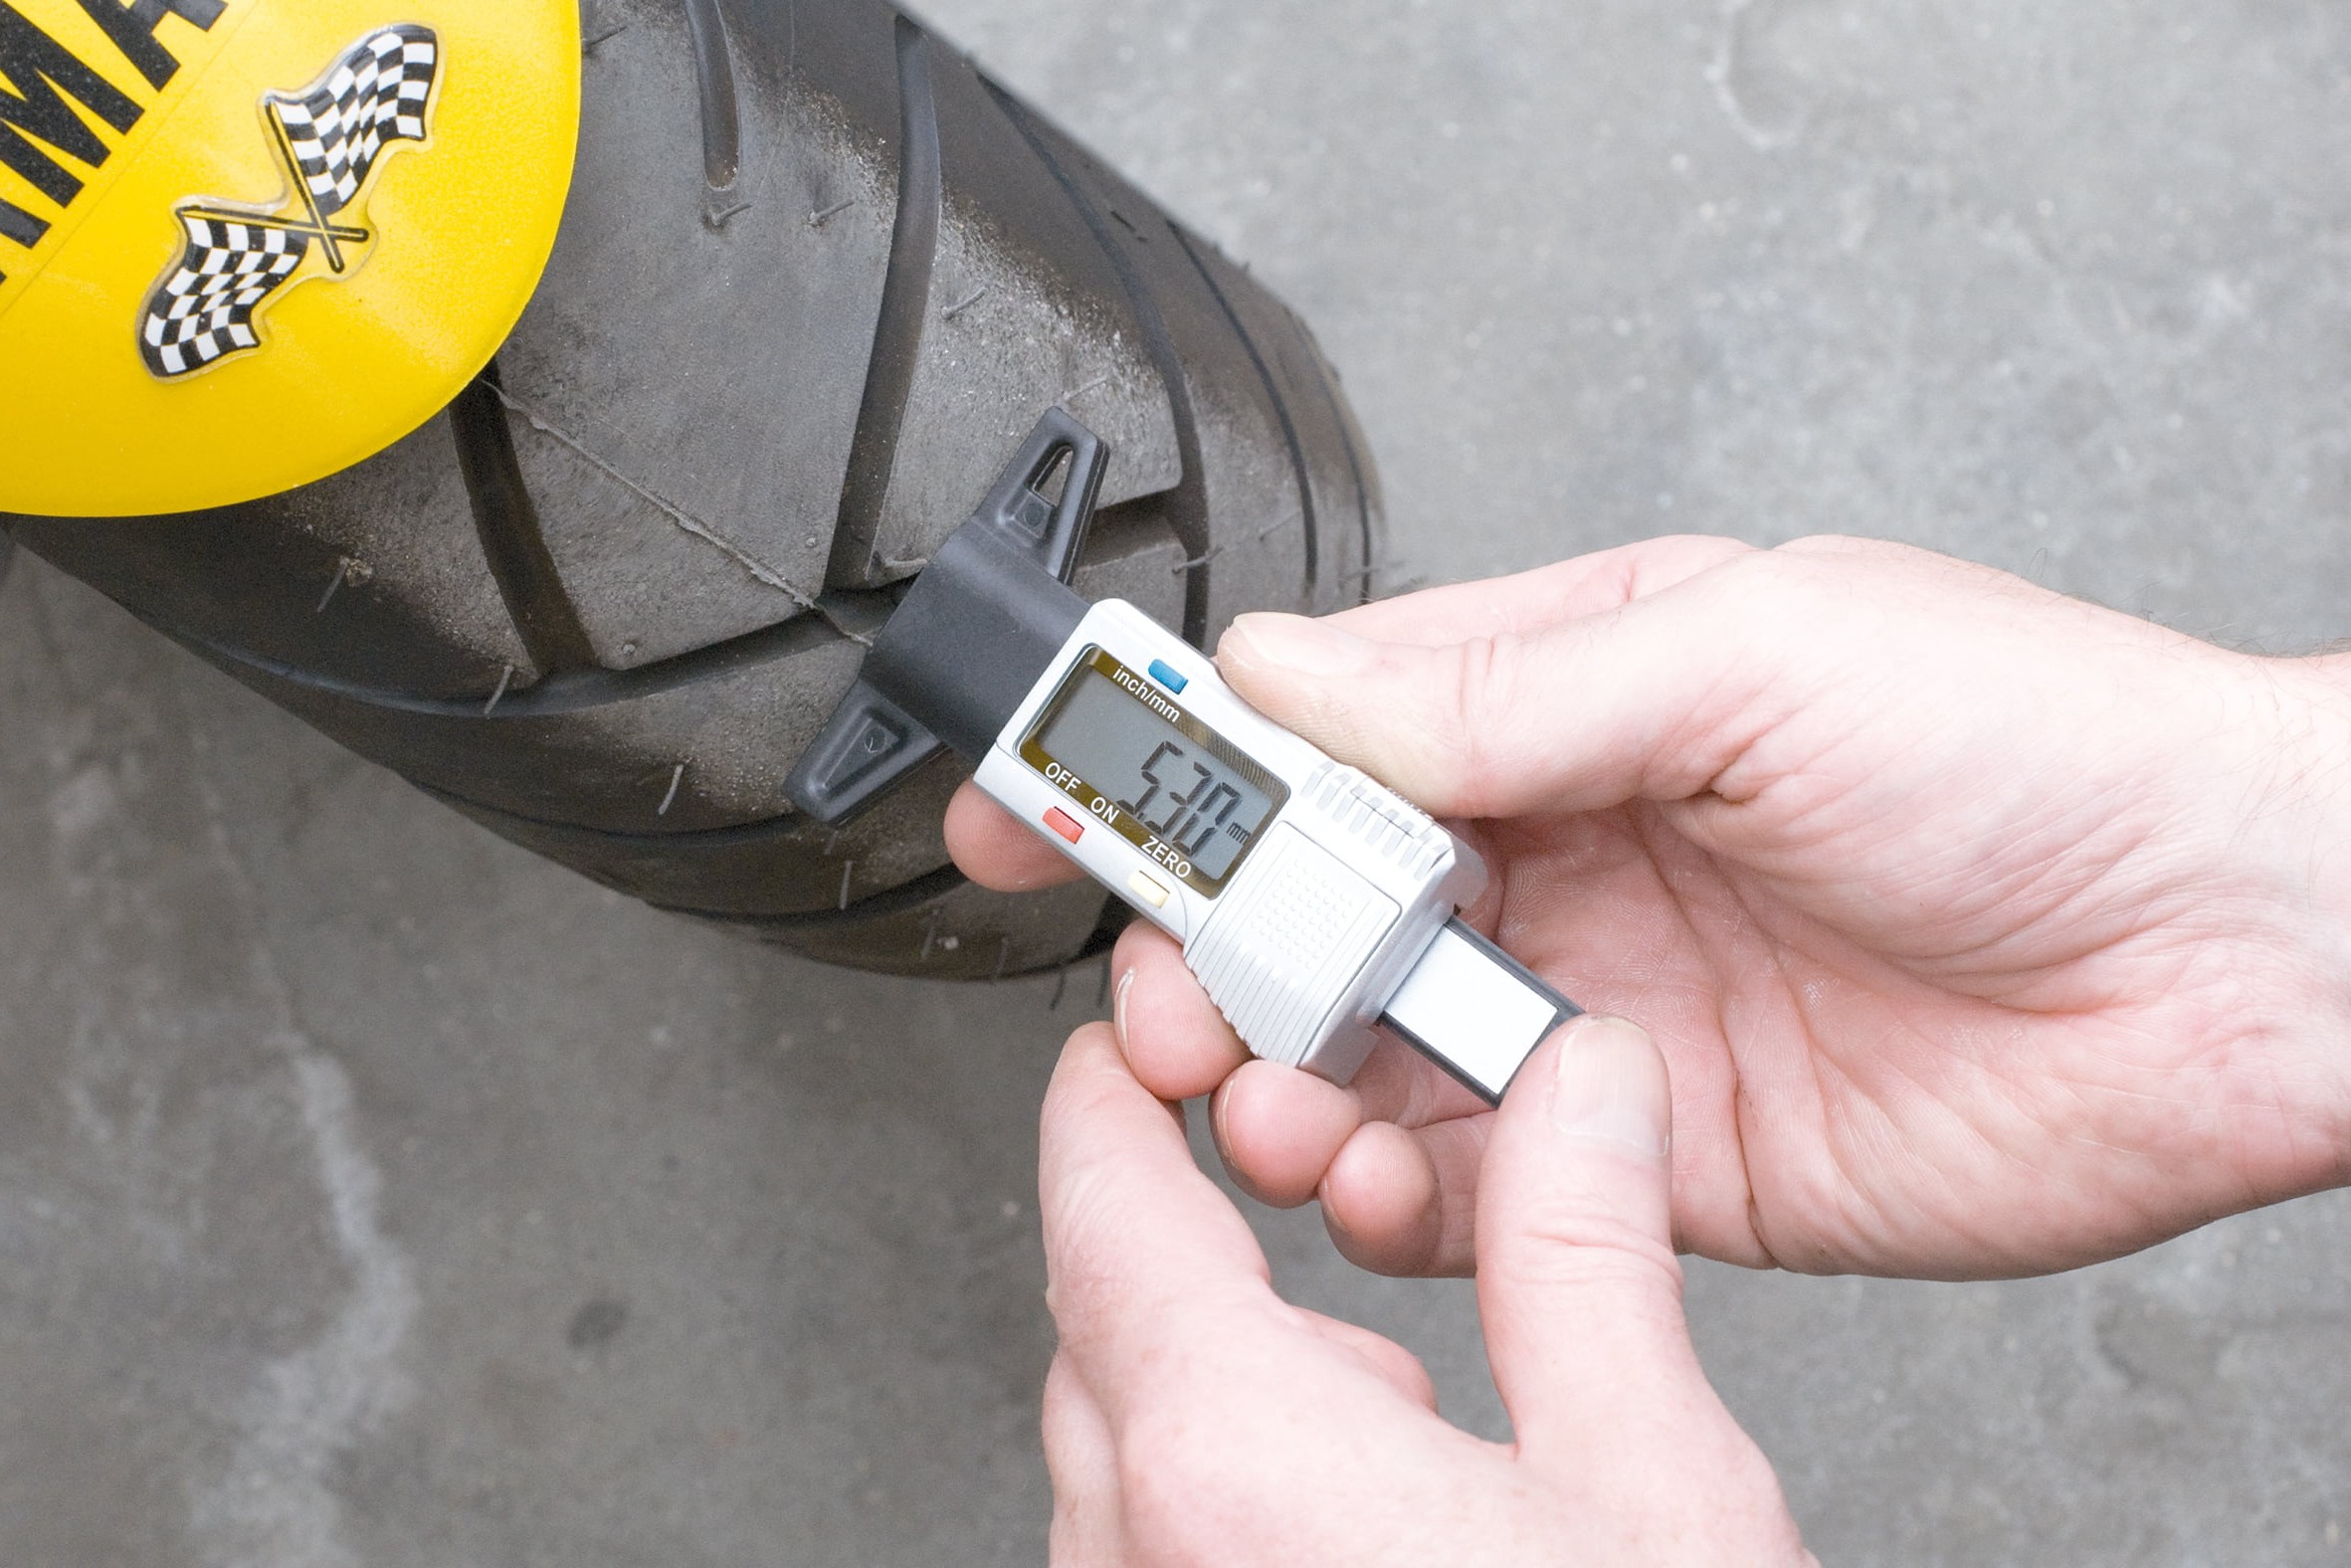
Check your tyre tread depth. The legal minimum is 1.6 mm, but for safety on wet roads, you should really replace your tyres once they reach 2 mm.
Step 3: Is there enough wear left in your brake pads?
03 – Check condition of brake pads
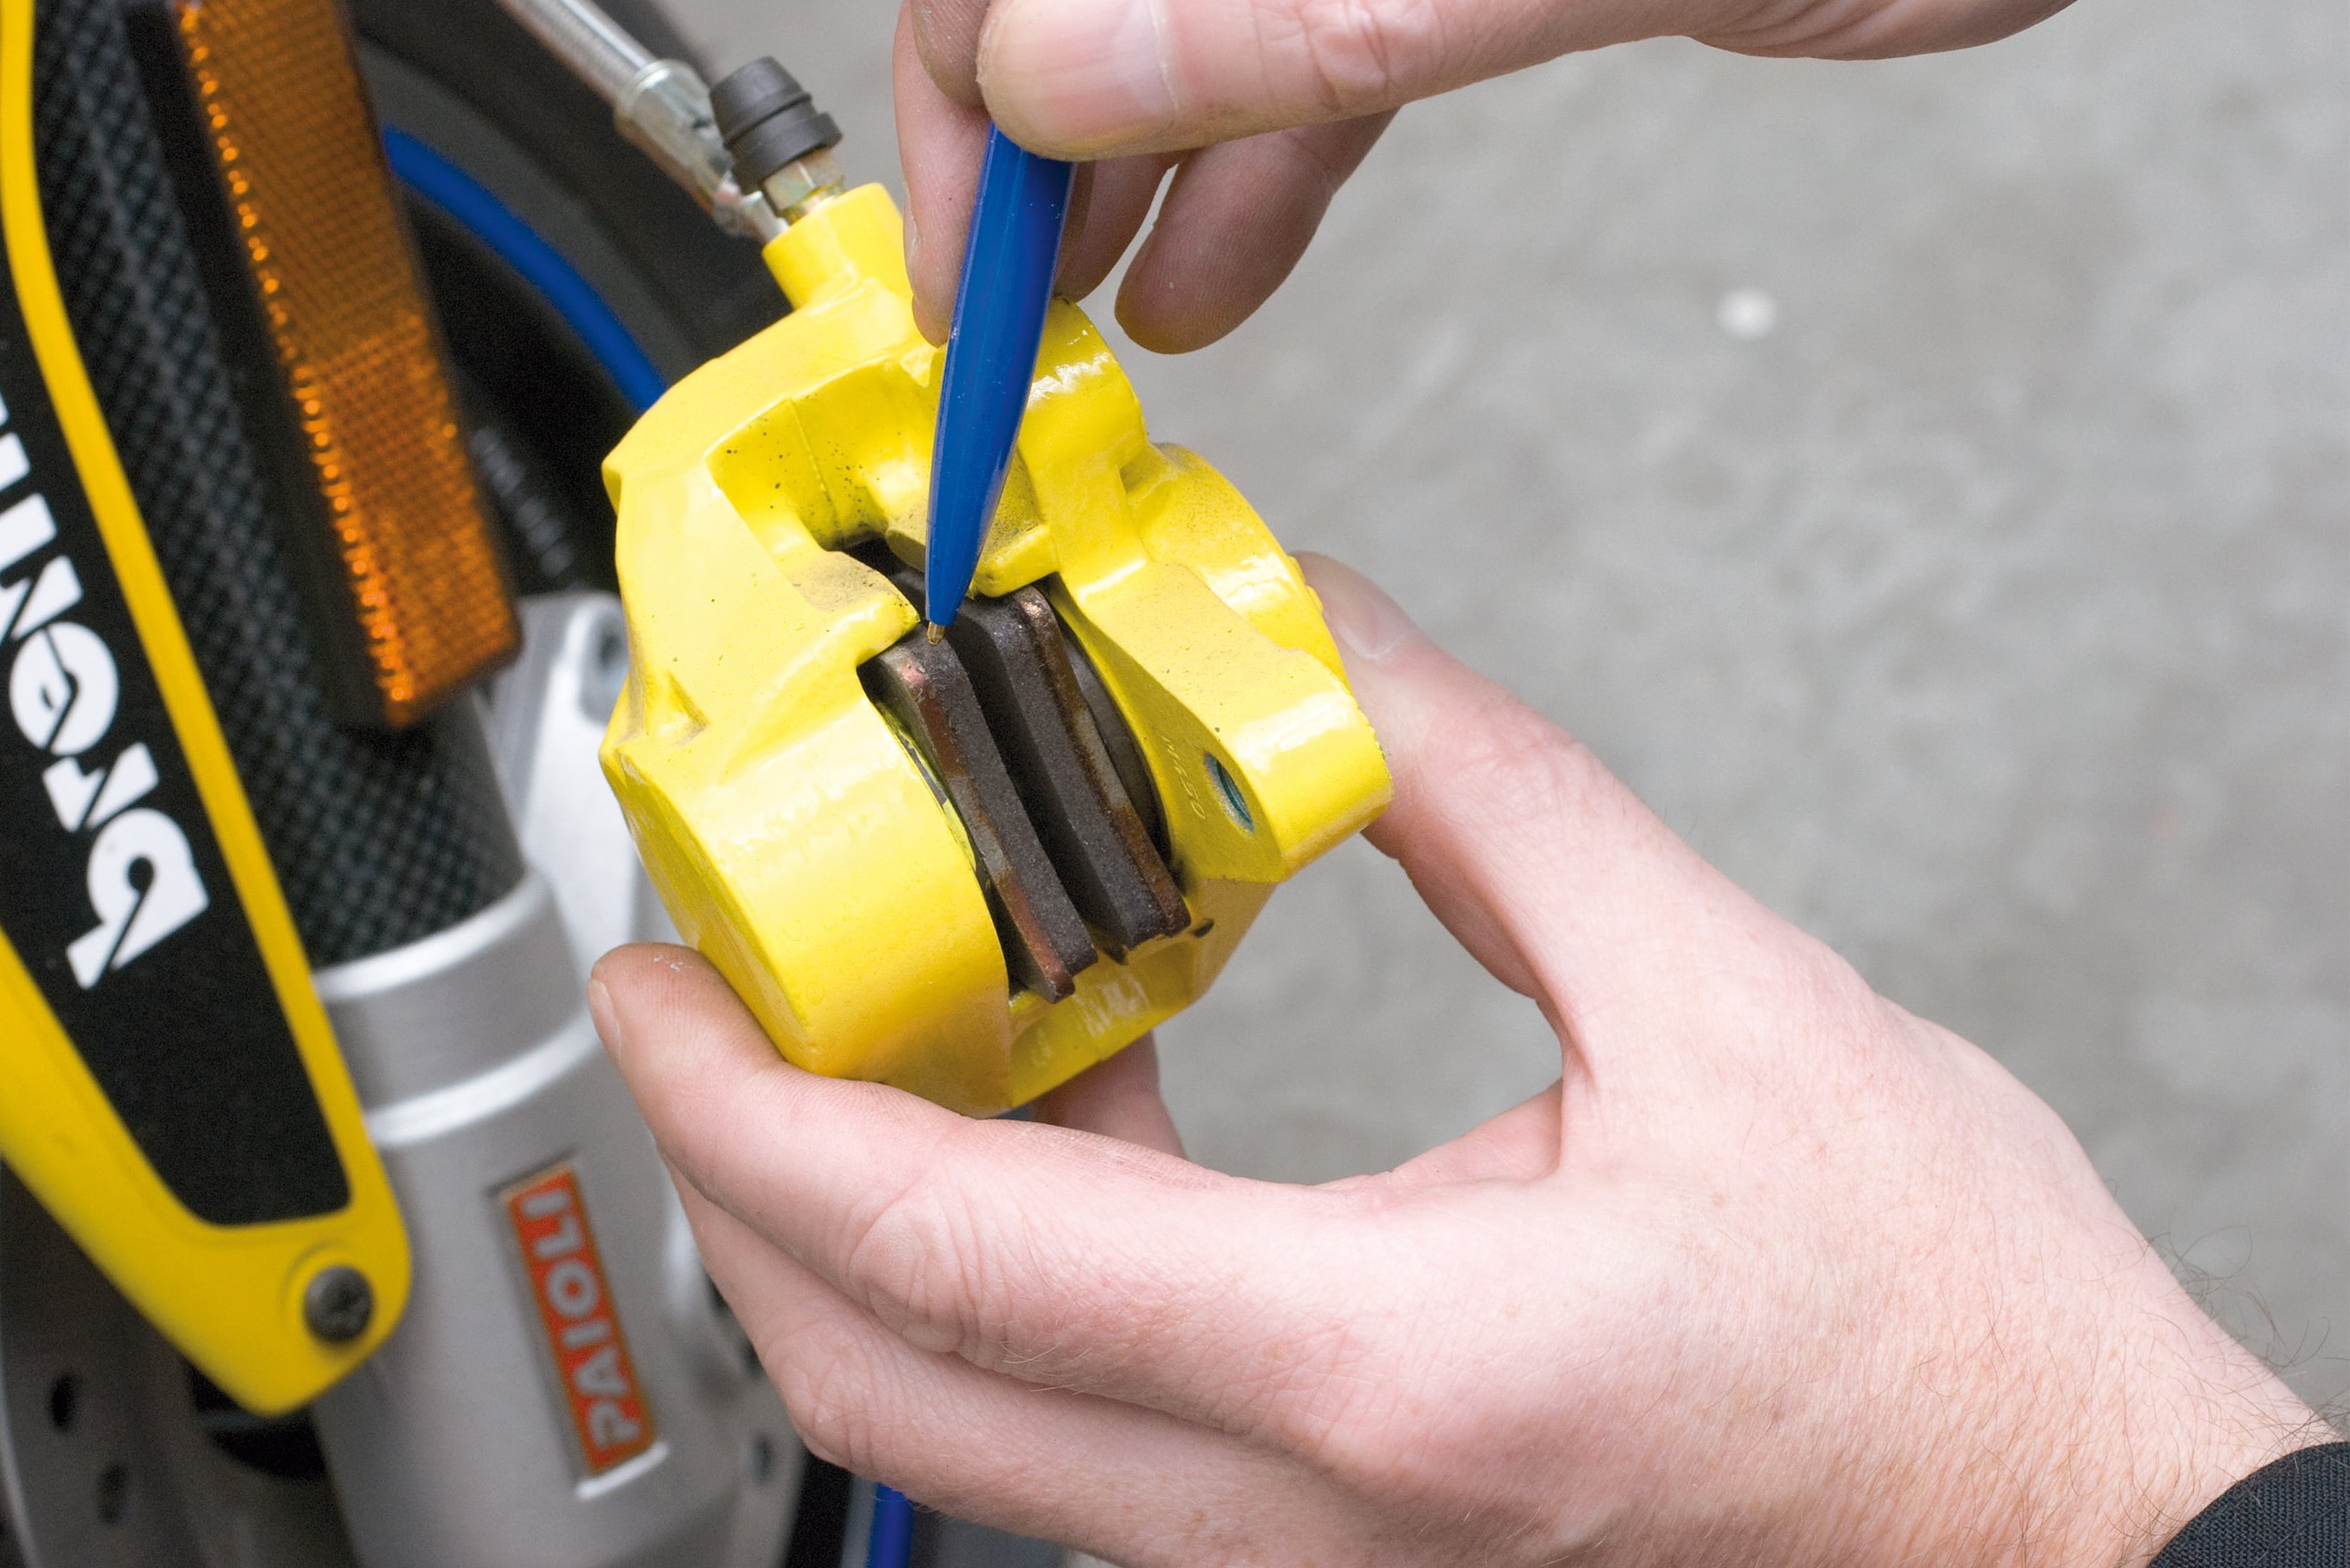
Check the condition of your brake pads. On a disc brake, check the wear indicator groove on the surface of the pad facing the brake disc. If the groove is no longer visible, you need to replace the pad. The same applies if any part of the pad is below the minimum thickness of 1.5 mm. Drum brakes often have a pointer on the brake lever. You can also tell the state of the brakes from the setting of the brake rod or cable adjuster, or you may need to look inside the drum itself.
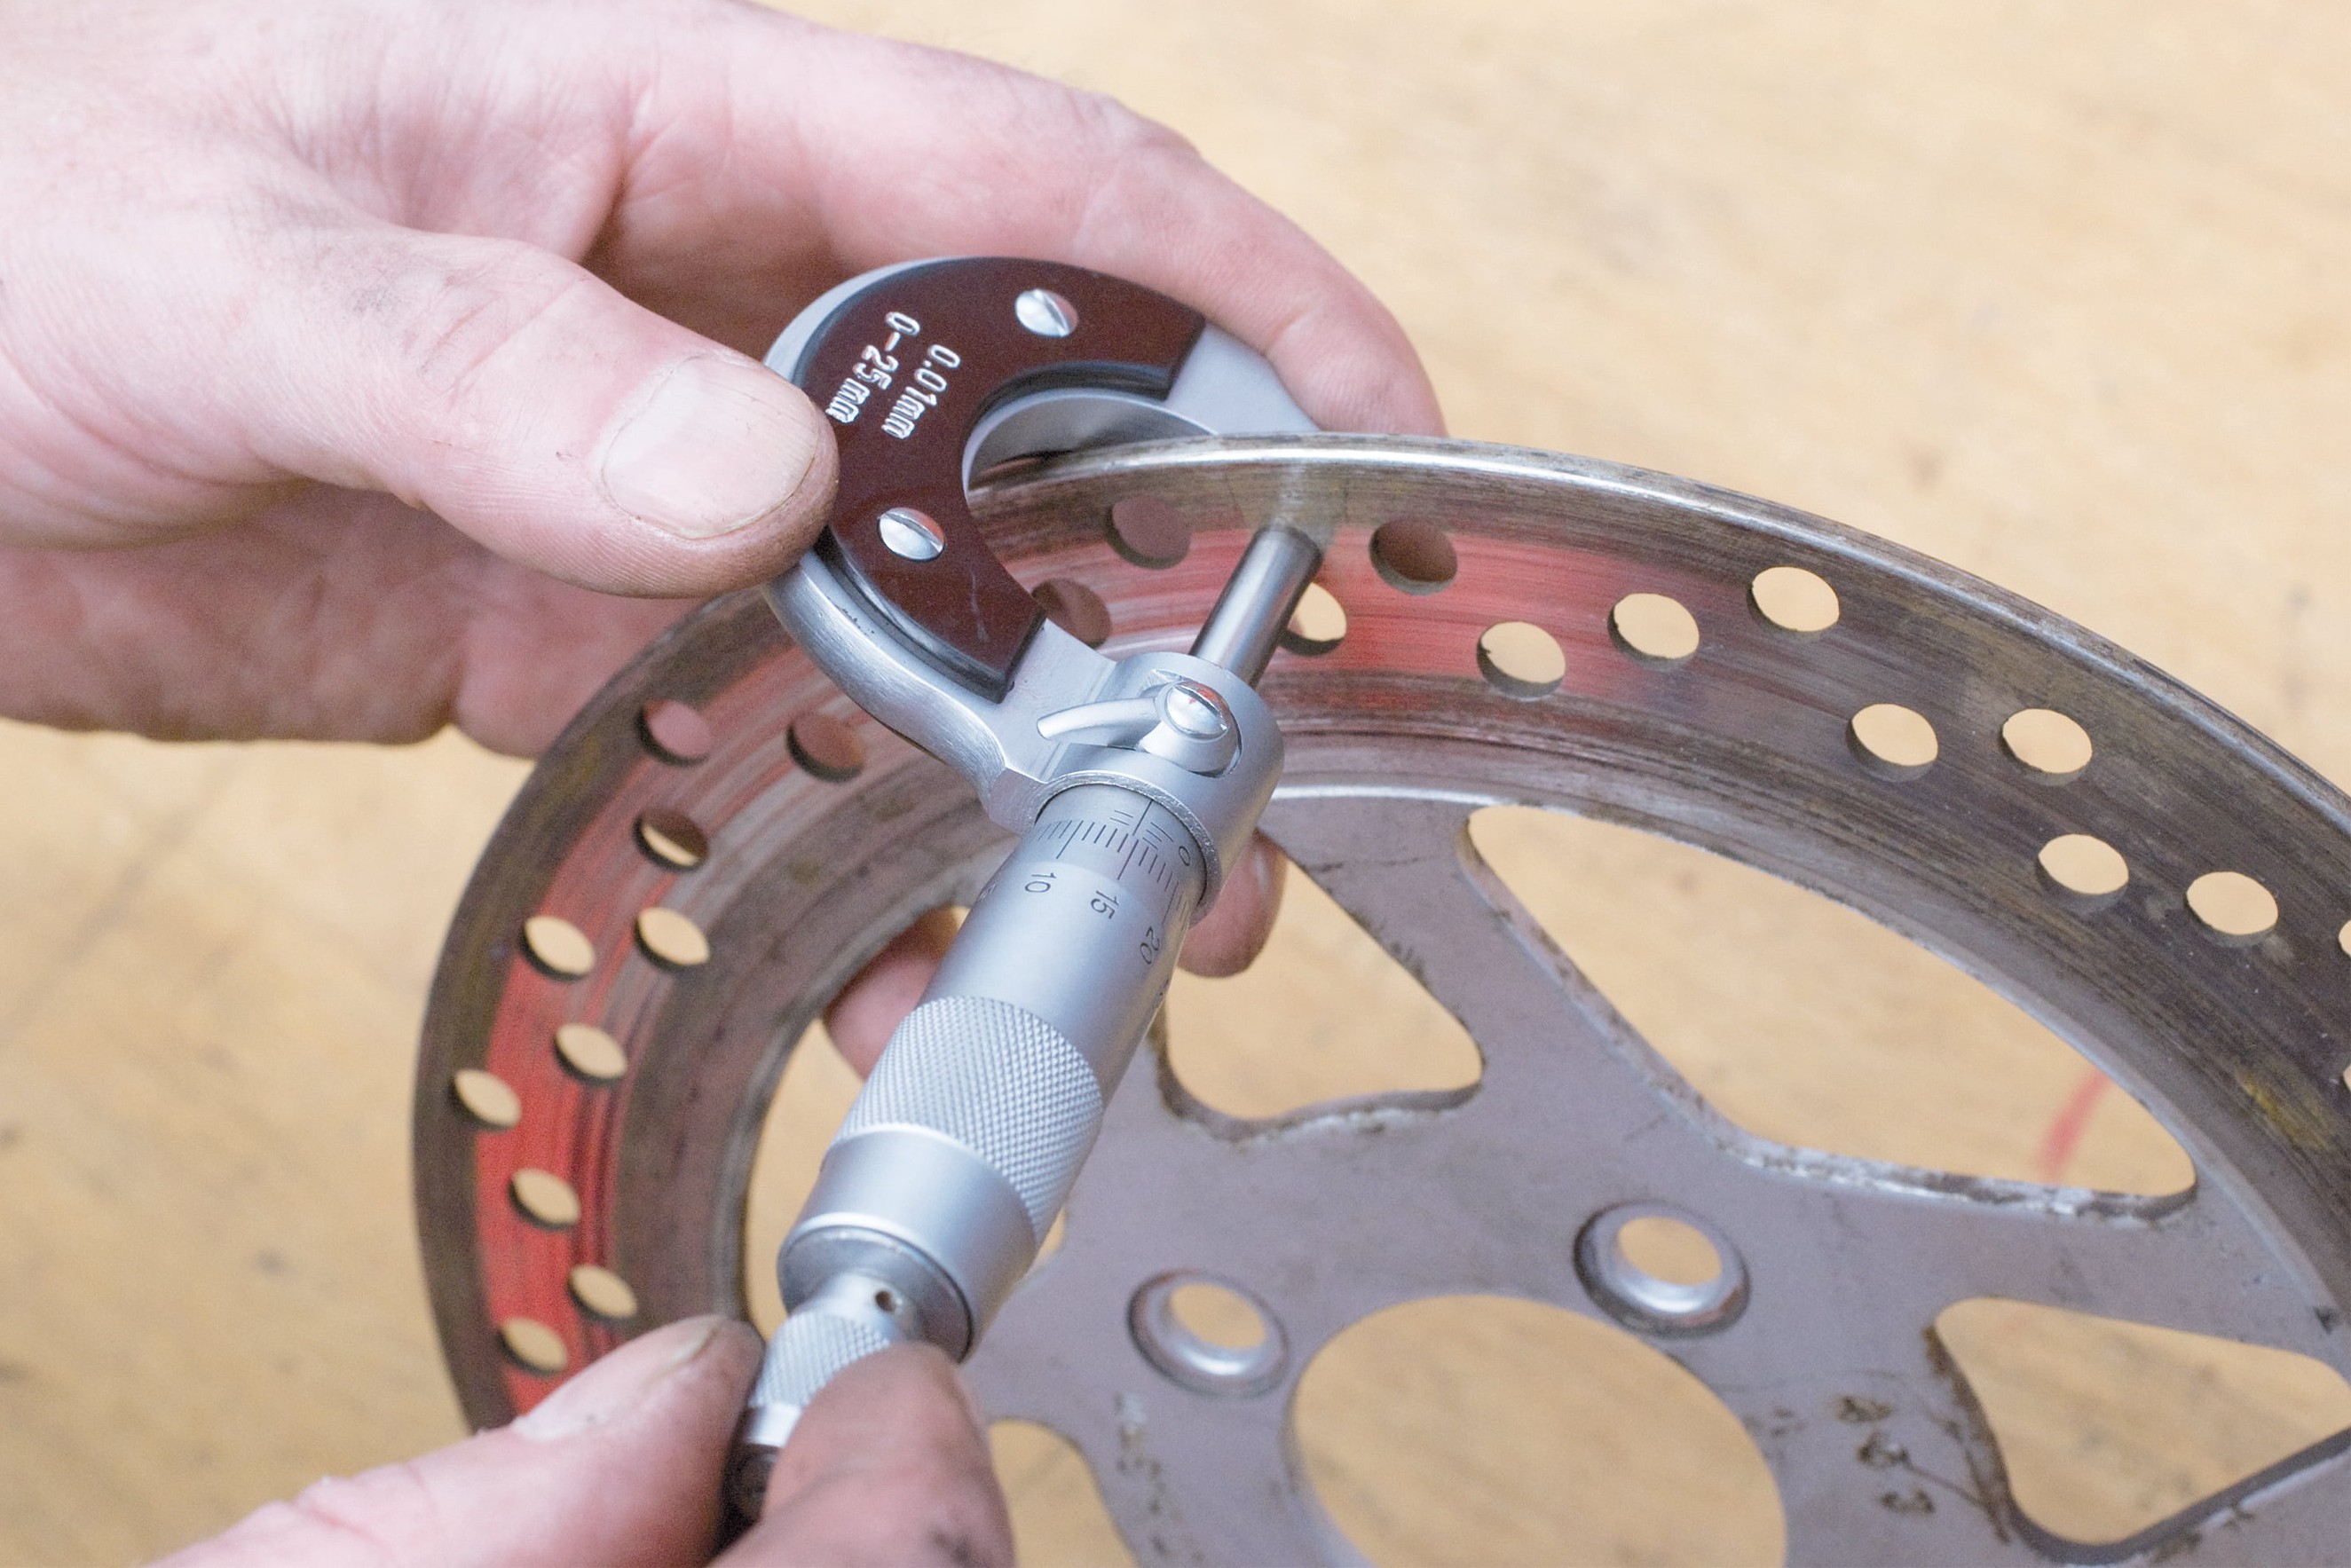
Step 4: Use a micrometer to check the brake disc
04 – Check brake discs
Check your brake discs. Are they badly worn (clear recess at the edge), or is there deep scoring? Scoring impairs the efficiency of your brakes, brake discs that are worn beyond the service limit will run hot and must be always be replaced.
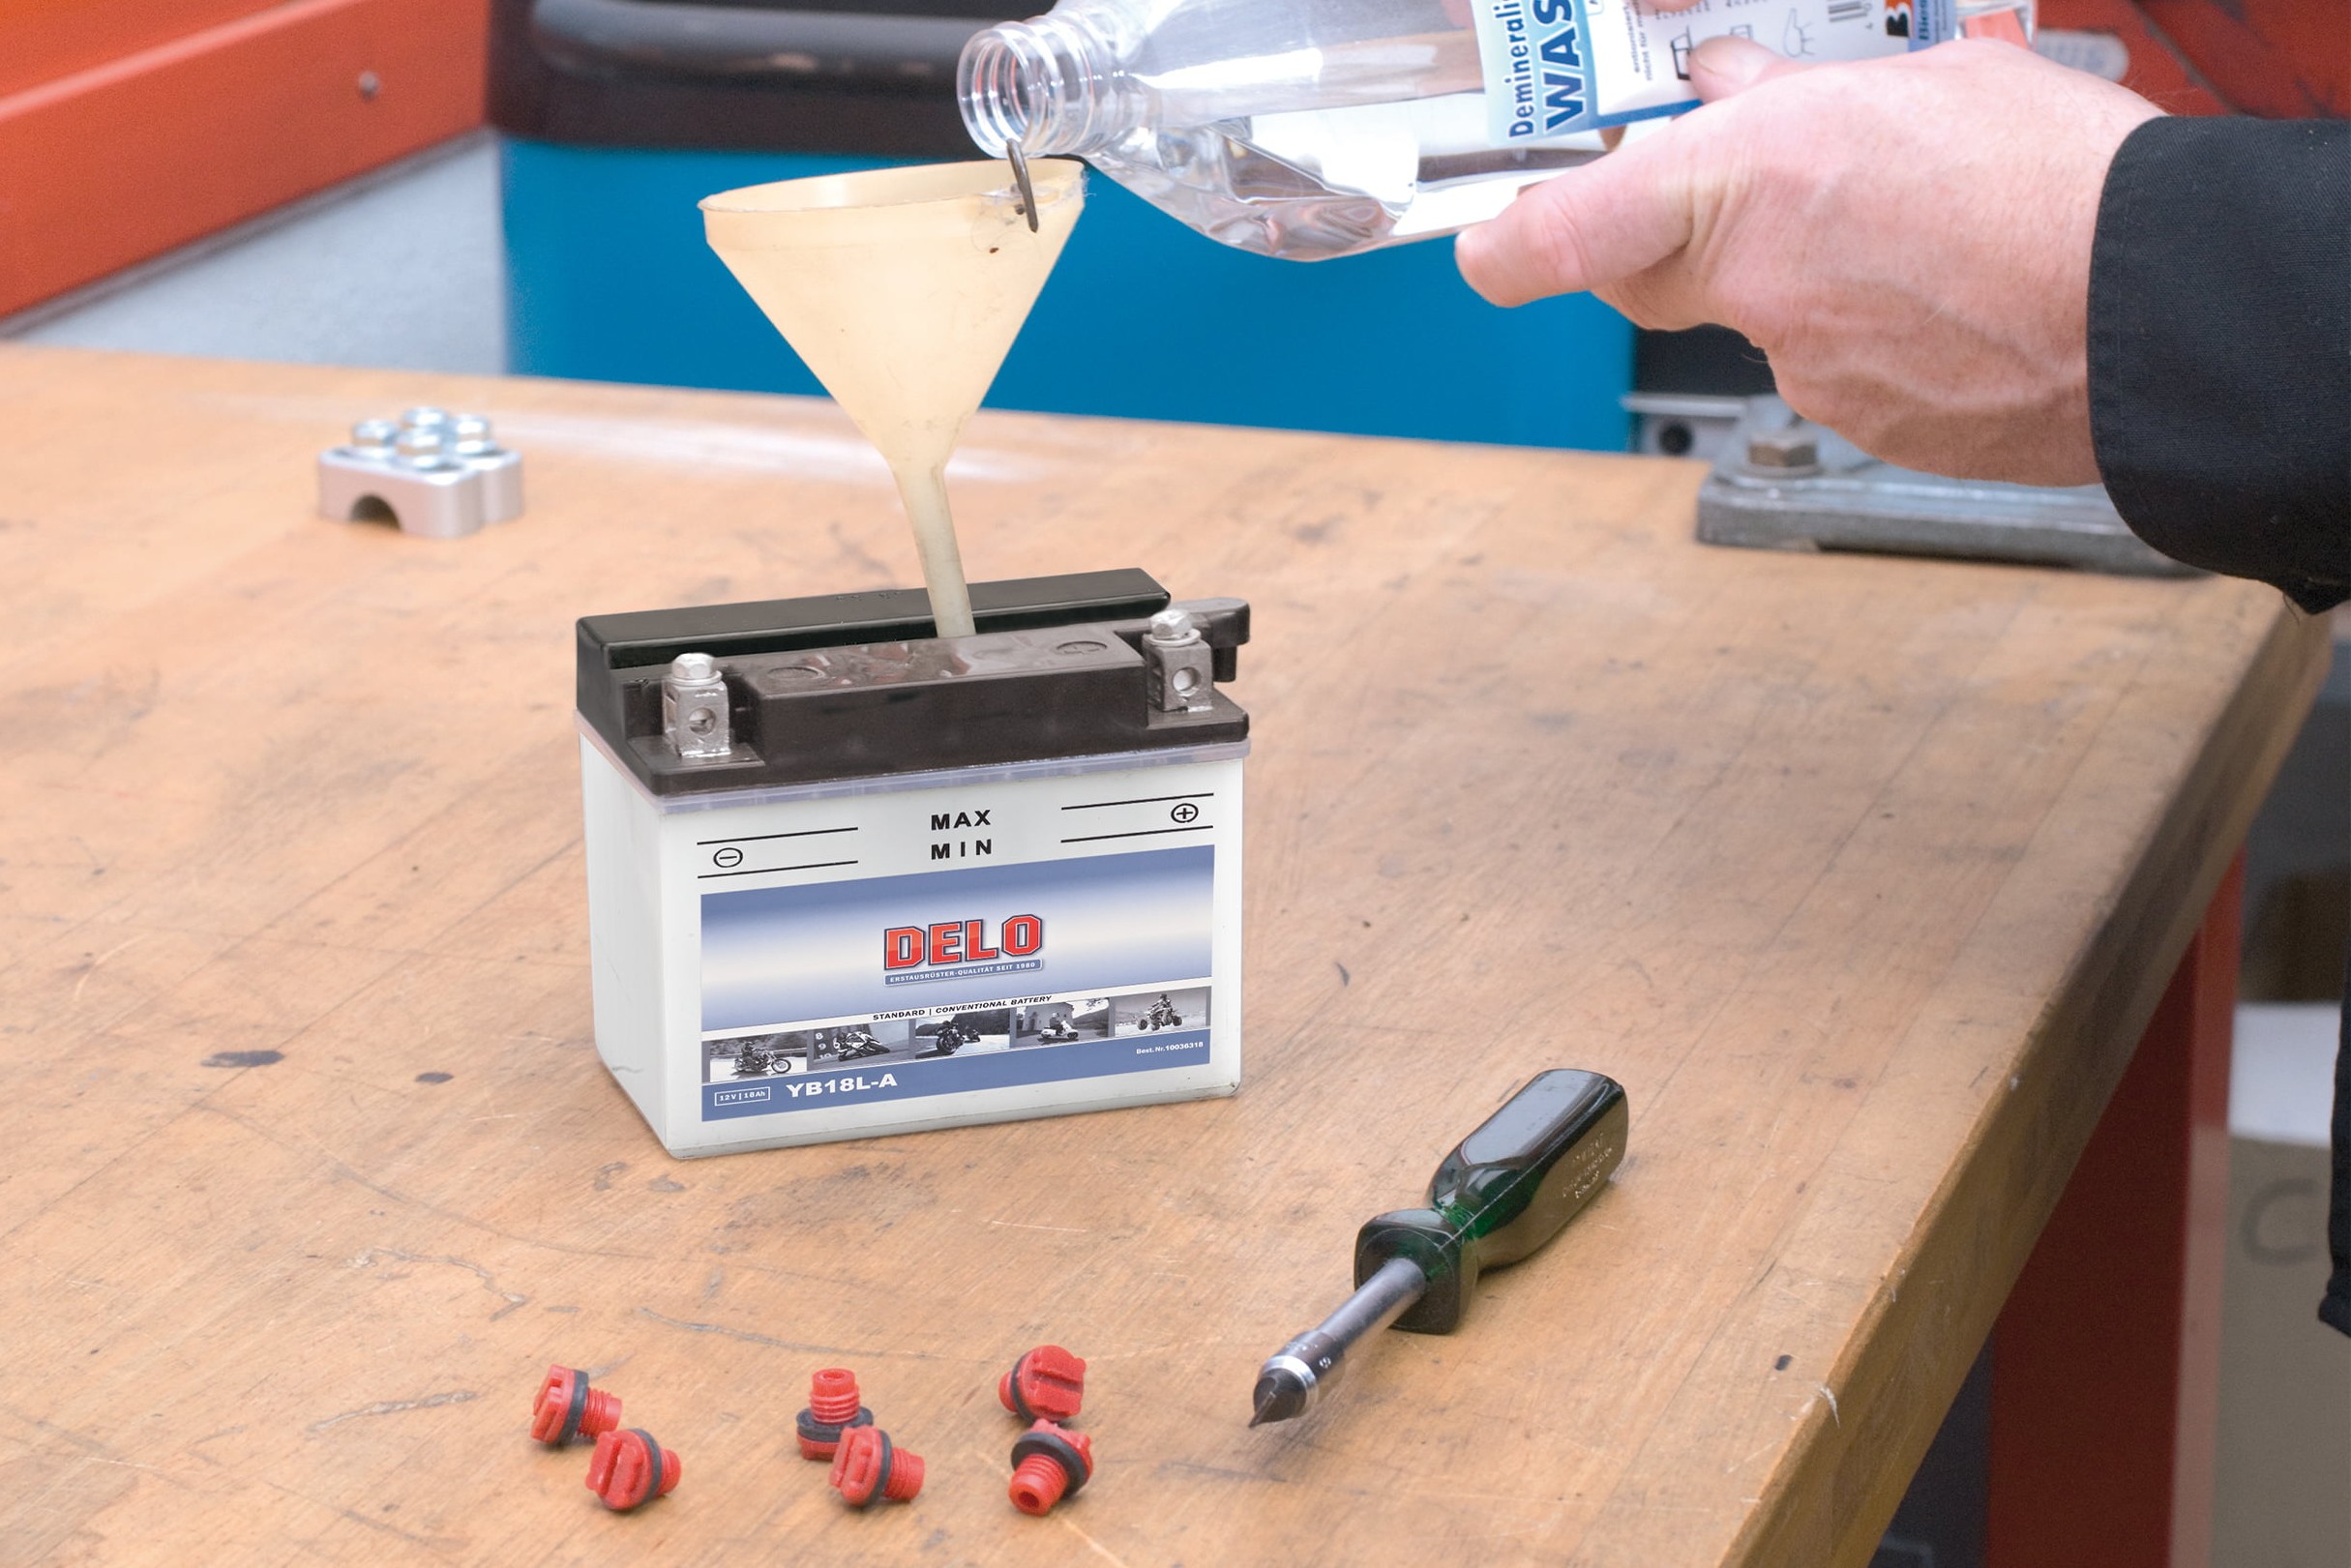
Step 5: Regularly top up acid battery with demineralised water
05 – Check the battery
Check the battery. Does it need topping up with demineralised water? (This does not apply to sealed, maintenance-free batteries). The battery is located underneath the seat, or in a compartment of the front fairing, or in the step-through area of your scooter (check your owner's manual).
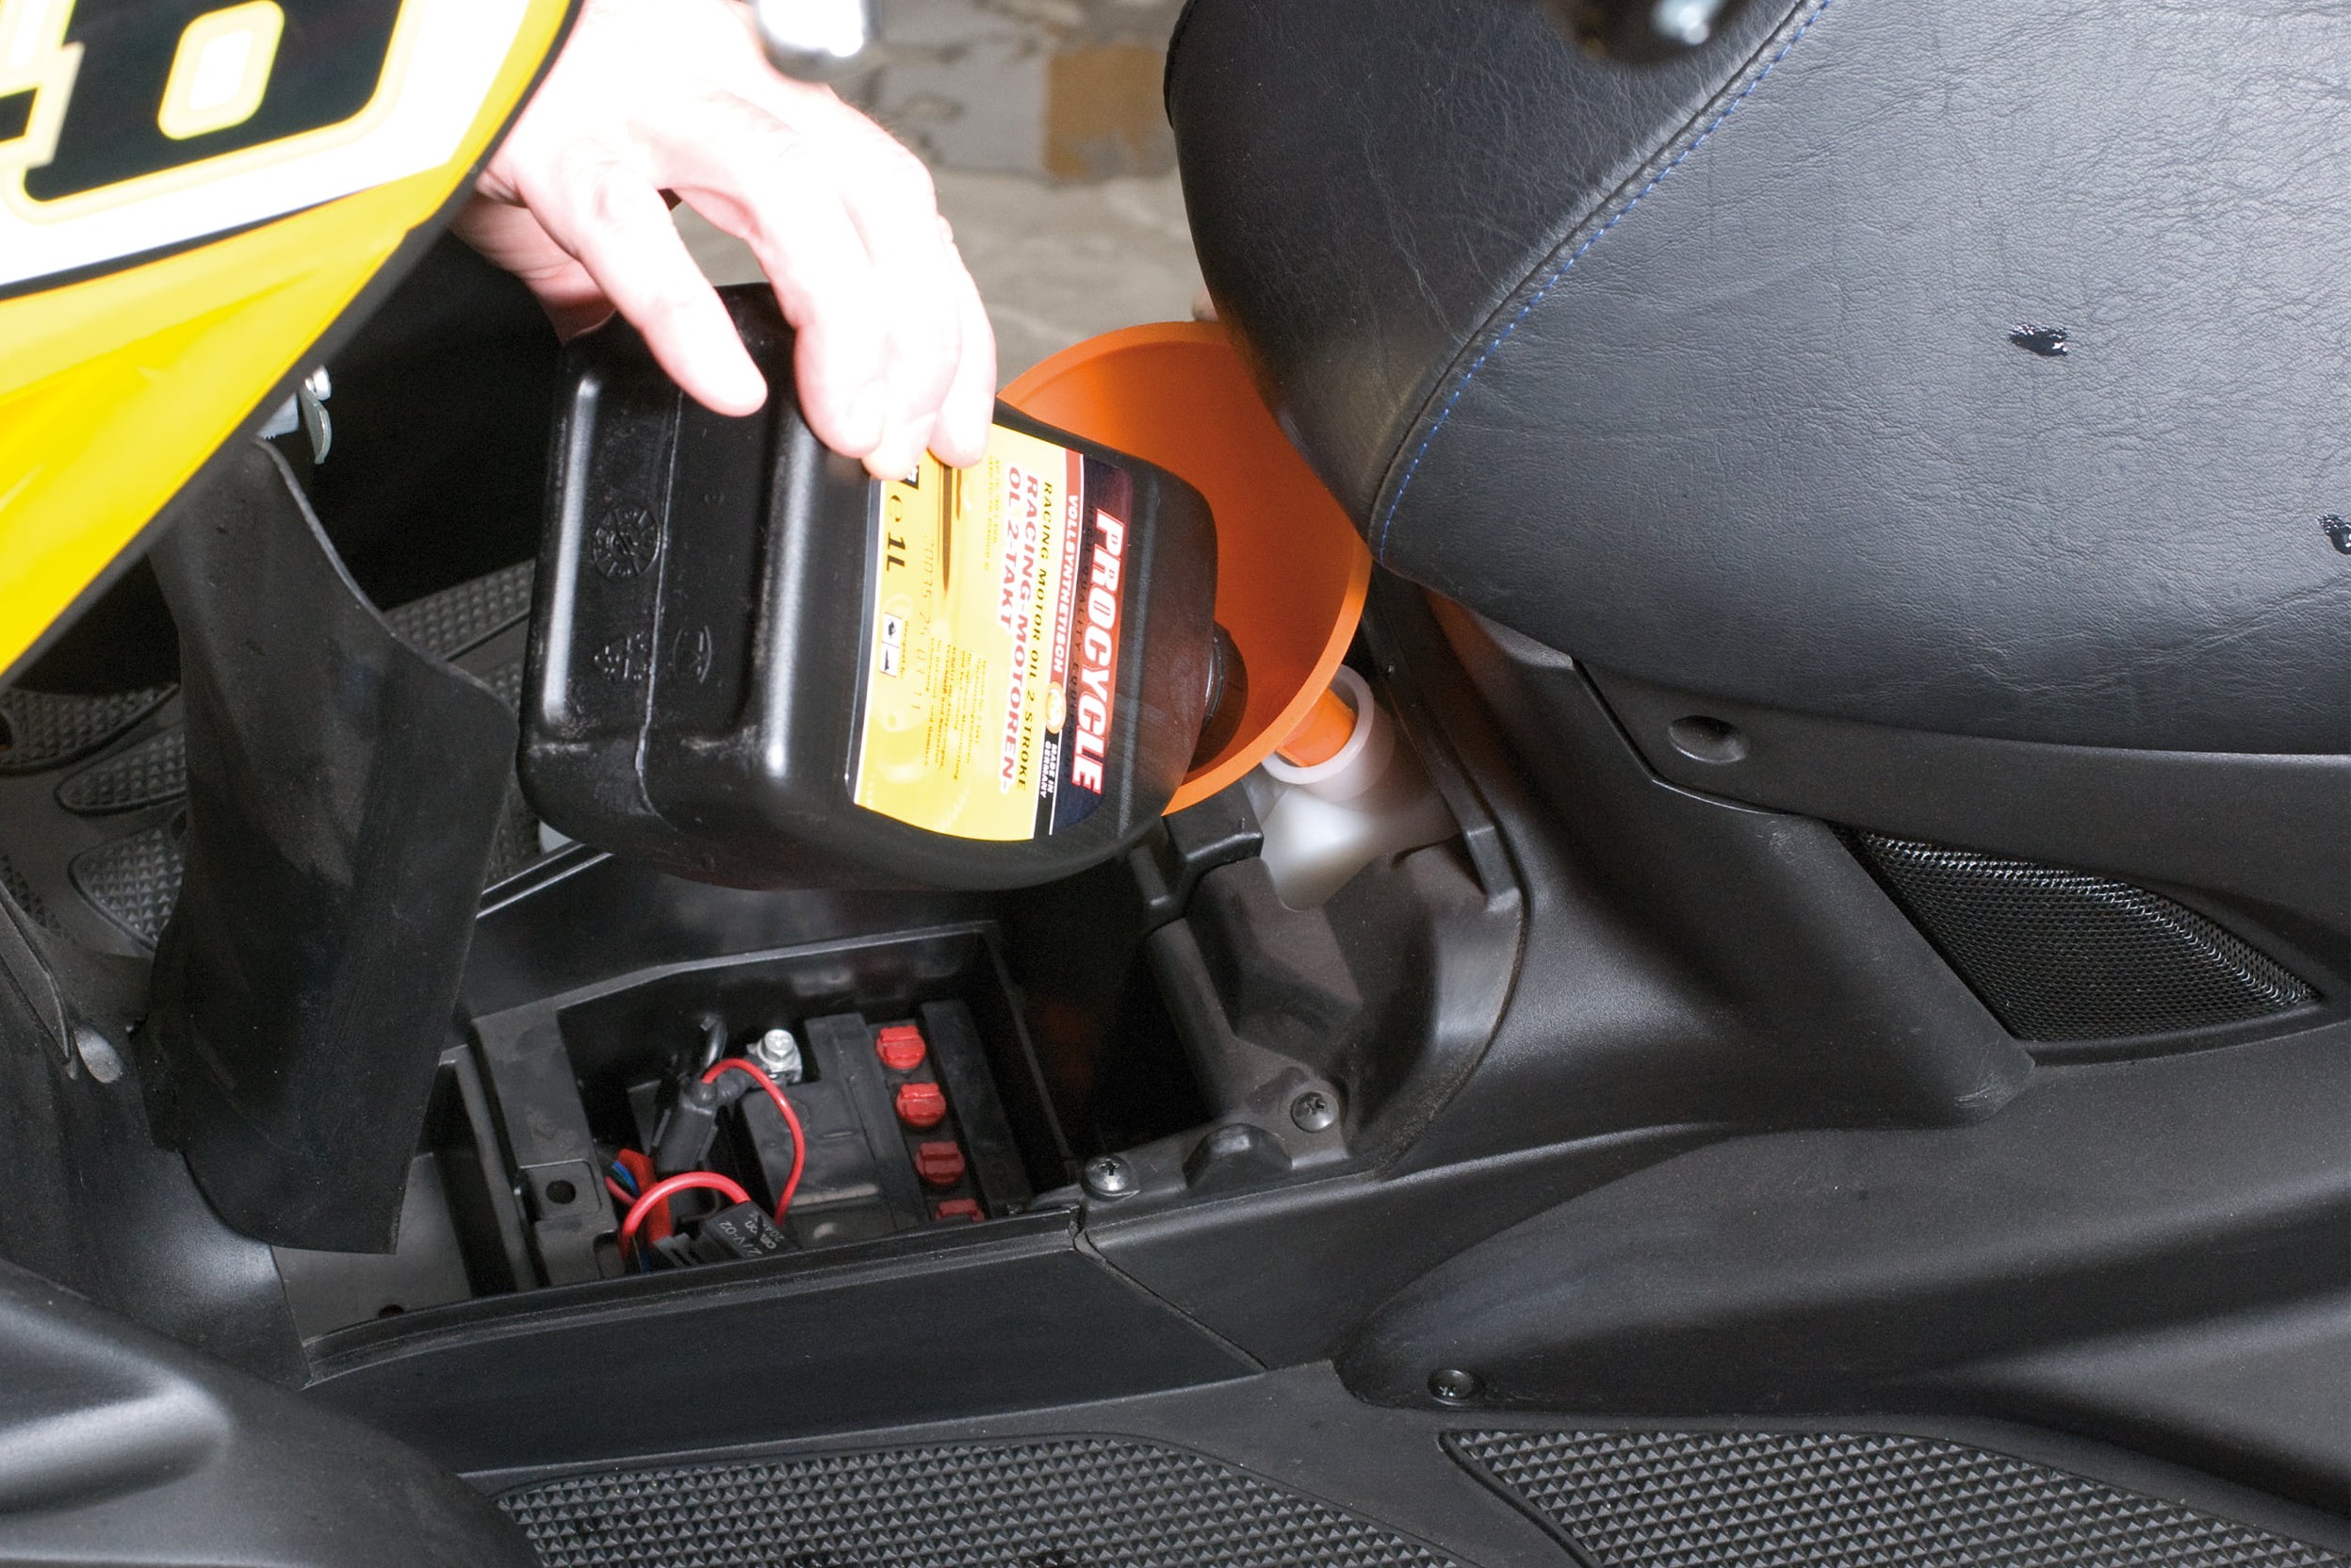
Step 6: Don't forget to regularly top up two-stroke oil
06 – Regularly top up two-stroke oil
Check the oil level and, if your scooter is water-cooled, the coolant level. Have you noticed any leaks coming from the engine? If yes, it's best to get a vehicle workshop to check it out – scooter engines only have a small oil capacity, so any loss of oil can easily result in engine damage! Are any of the brake hoses cracked, brittle or damaged? If yes, you should definitely go to a professional workshop. Are the control cables still in good condition? Or are there breaks in individual wires? (If yes, replace cable). Do the cables or levers need to be adjusted? Any sign of rust on metal parts? The quicker you get on top of rust with sandpaper and paint, the better! Have vibrations caused any of the mounting brackets to show signs of cracking? Are all screws securely tightened? If any screws are rusty, it's best to replace them. Are all lights working properly, including the brake light, or do you need to replace any of the bulbs?
Particularly if you have a two-stroke scooter, you should check the oil level in the two-stroke oil tank every time you stop for petrol. It may be too late when the oil level indicator lights up, and riding your scooter without oil will very quickly damage the engine! To prevent this from happening, the ignition is automatically switched off on some scooter models when the warning light comes on. Only use two-stroke engine oil specially formulated for scooters/motorcycles.
Four-stroke engines also require the occasional top-up, so it's important to check the oil level every now and then. Only top up with motorcycle four-stroke engine oil (check your owner's manual for the correct oil type).
Additional maintenance jobs
You should read your owner's manual thoroughly to familiarise yourself with the maintenance intervals recommended by the scooter manufacturer, or ask at your local scooter dealership.
As with any car or motorcycle, you should always replace the brake fluid in your scooter's hydraulic braking system every two years because even in a closed system, the fluid absorbs moisture over time, which means you may no longer have a reliable brake pressure point when the brakes are hot. All work on your brakes directly affects the safety of your scooter, and brake fluid can damage your paintwork, so you should only change the brake fluid yourself if you are an experienced DIY mechanic. You will find more information on this topic in our DIY tip Brake fluid for motorcycles. If the hydraulic brake no longer has a defined pressure point when stationary, e.g. the brake lever can be pulled right back to the handlebar, there is something wrong – you probably need to bleed the brake. Please check with your local motorcycle workshop.
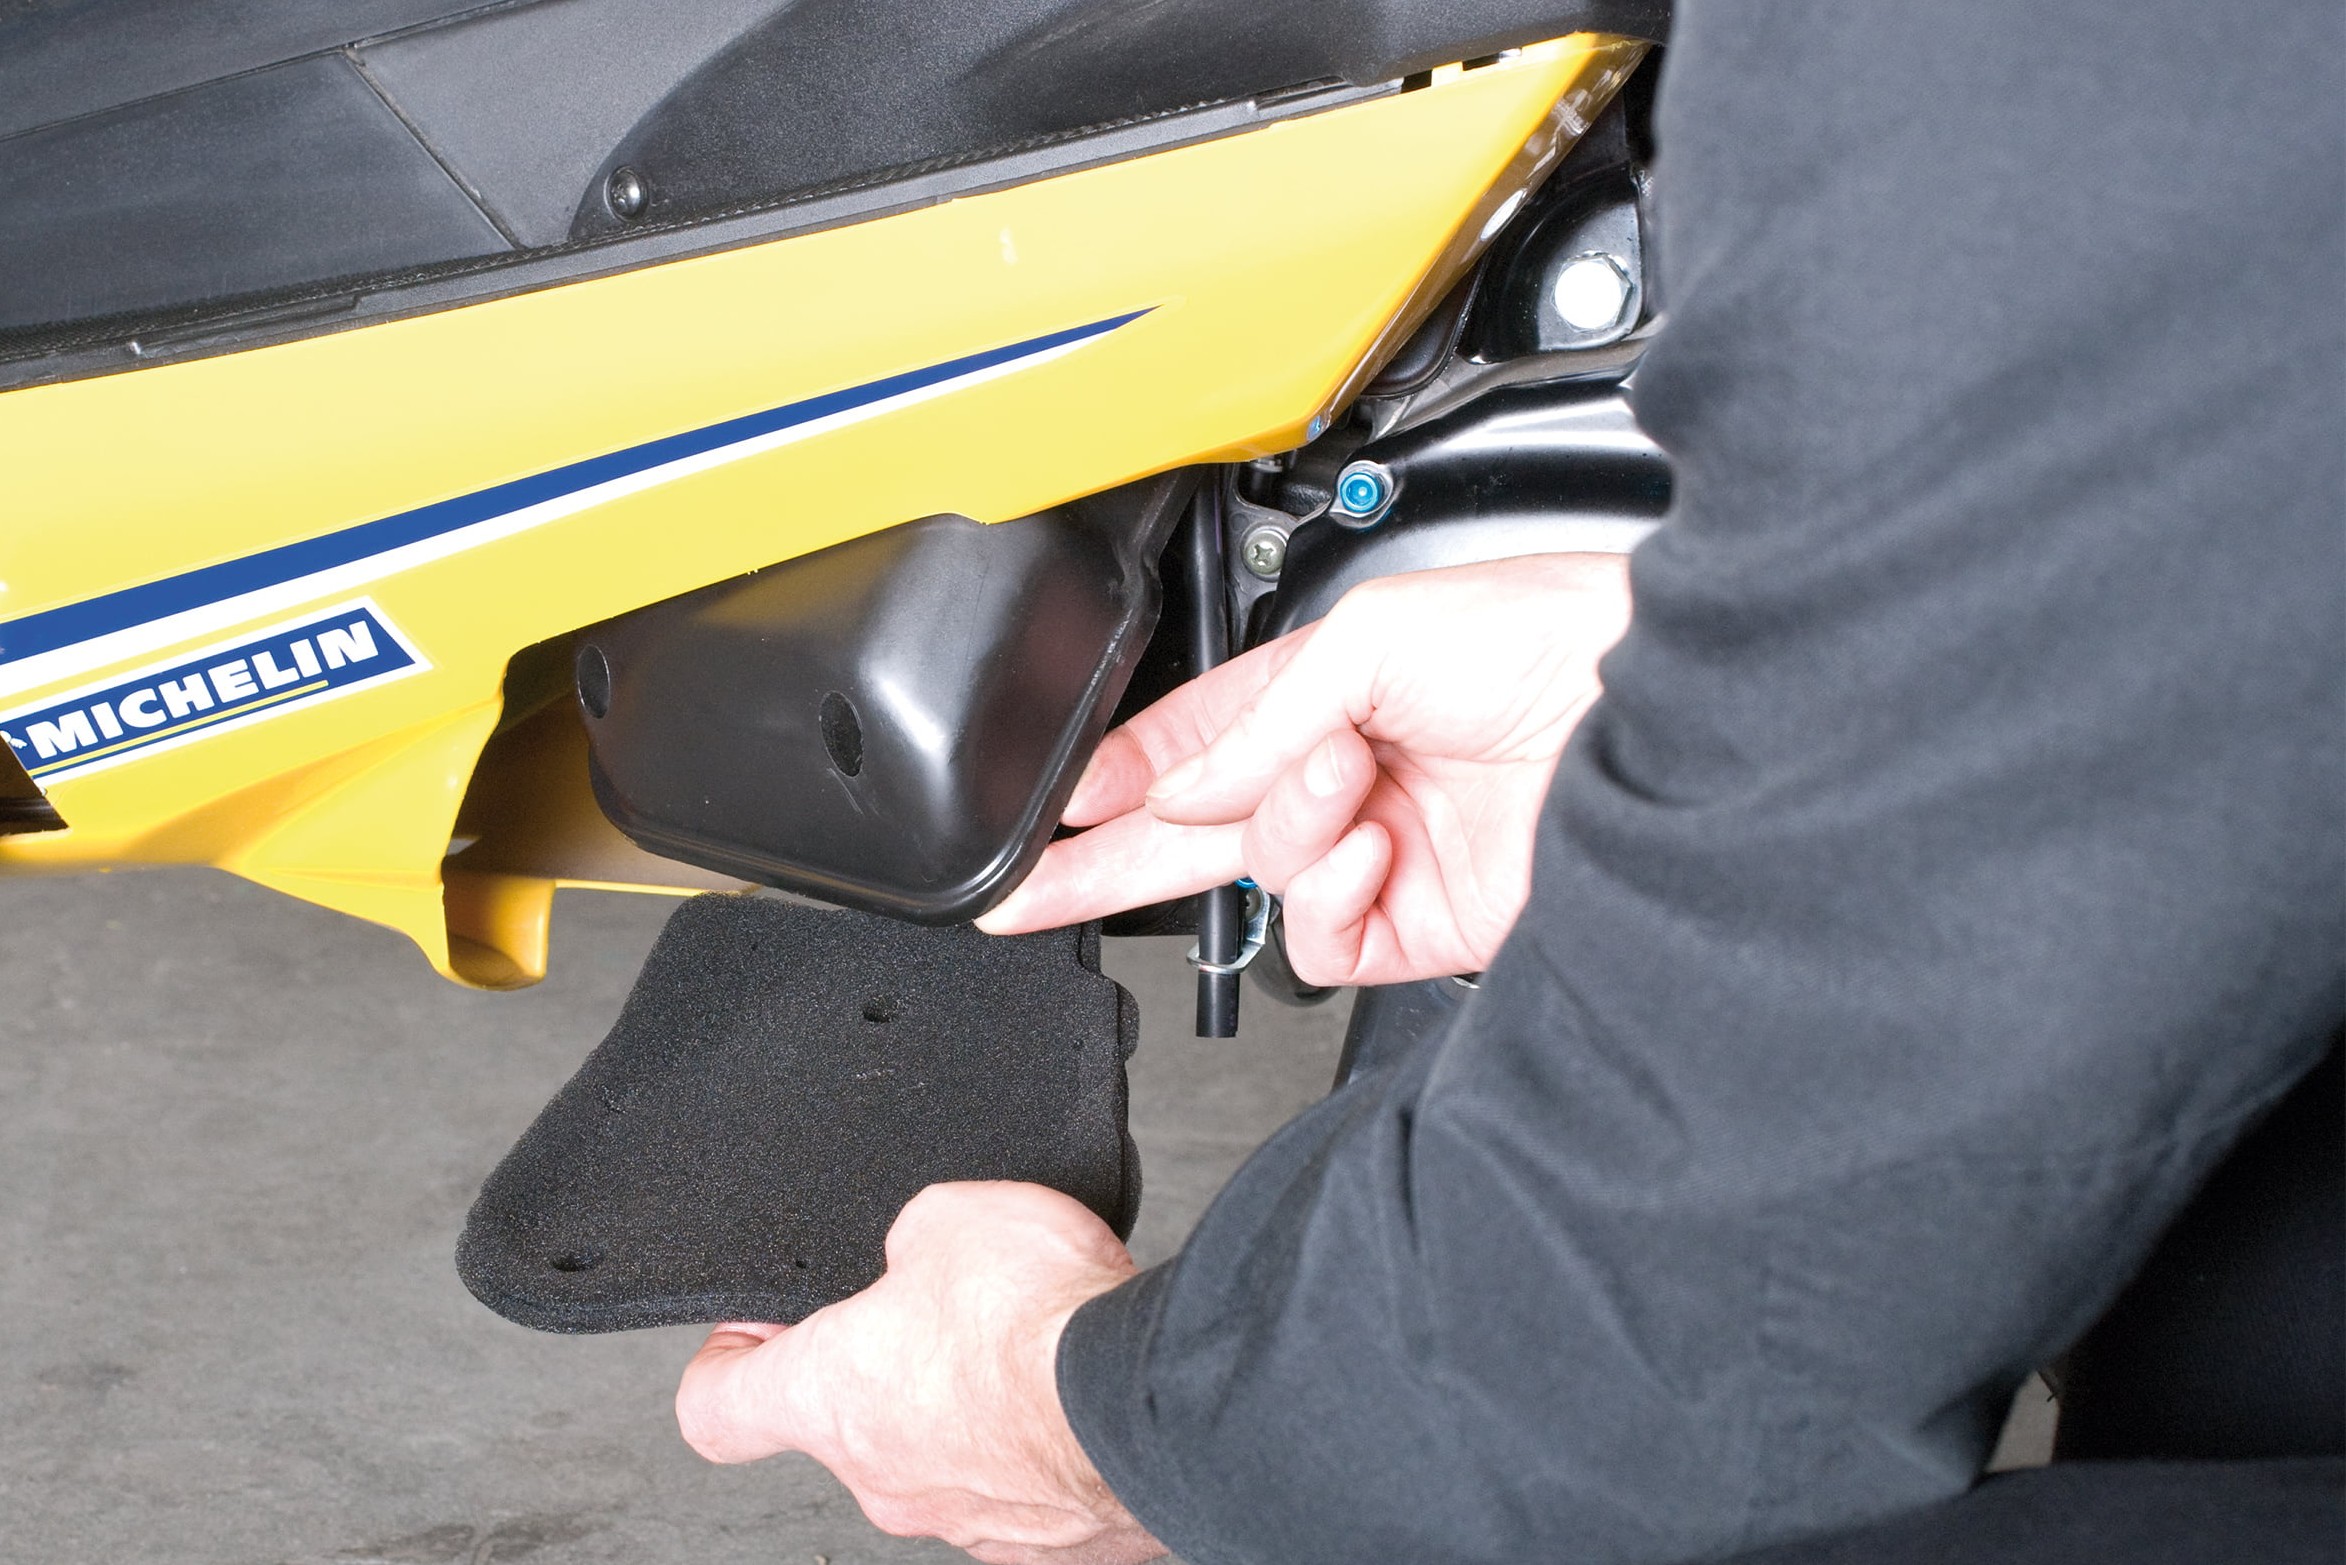
Step 7: Remove & clean air filter; lightly lubricate foam filter
07 – Check air filter
Checking the air filter is an easy job, which should be done roughly every 4,000 km (2,500 miles). A clogged air filter not only reduces road performance, but may also allow dirt into the scooter's fuel supply system, making the engine run irregularly or causing starting problems. If this happens, cleaning the carburettor or fuel injection system is a time-consuming job. The air filter is located either behind a side fairing or in a box near the scooter's variator. If it's made of foam and is undamaged, it can be washed in water with a little dishwashing liquid, then lightly lubricated and placed back in the box. Paper filters will need to be replaced.
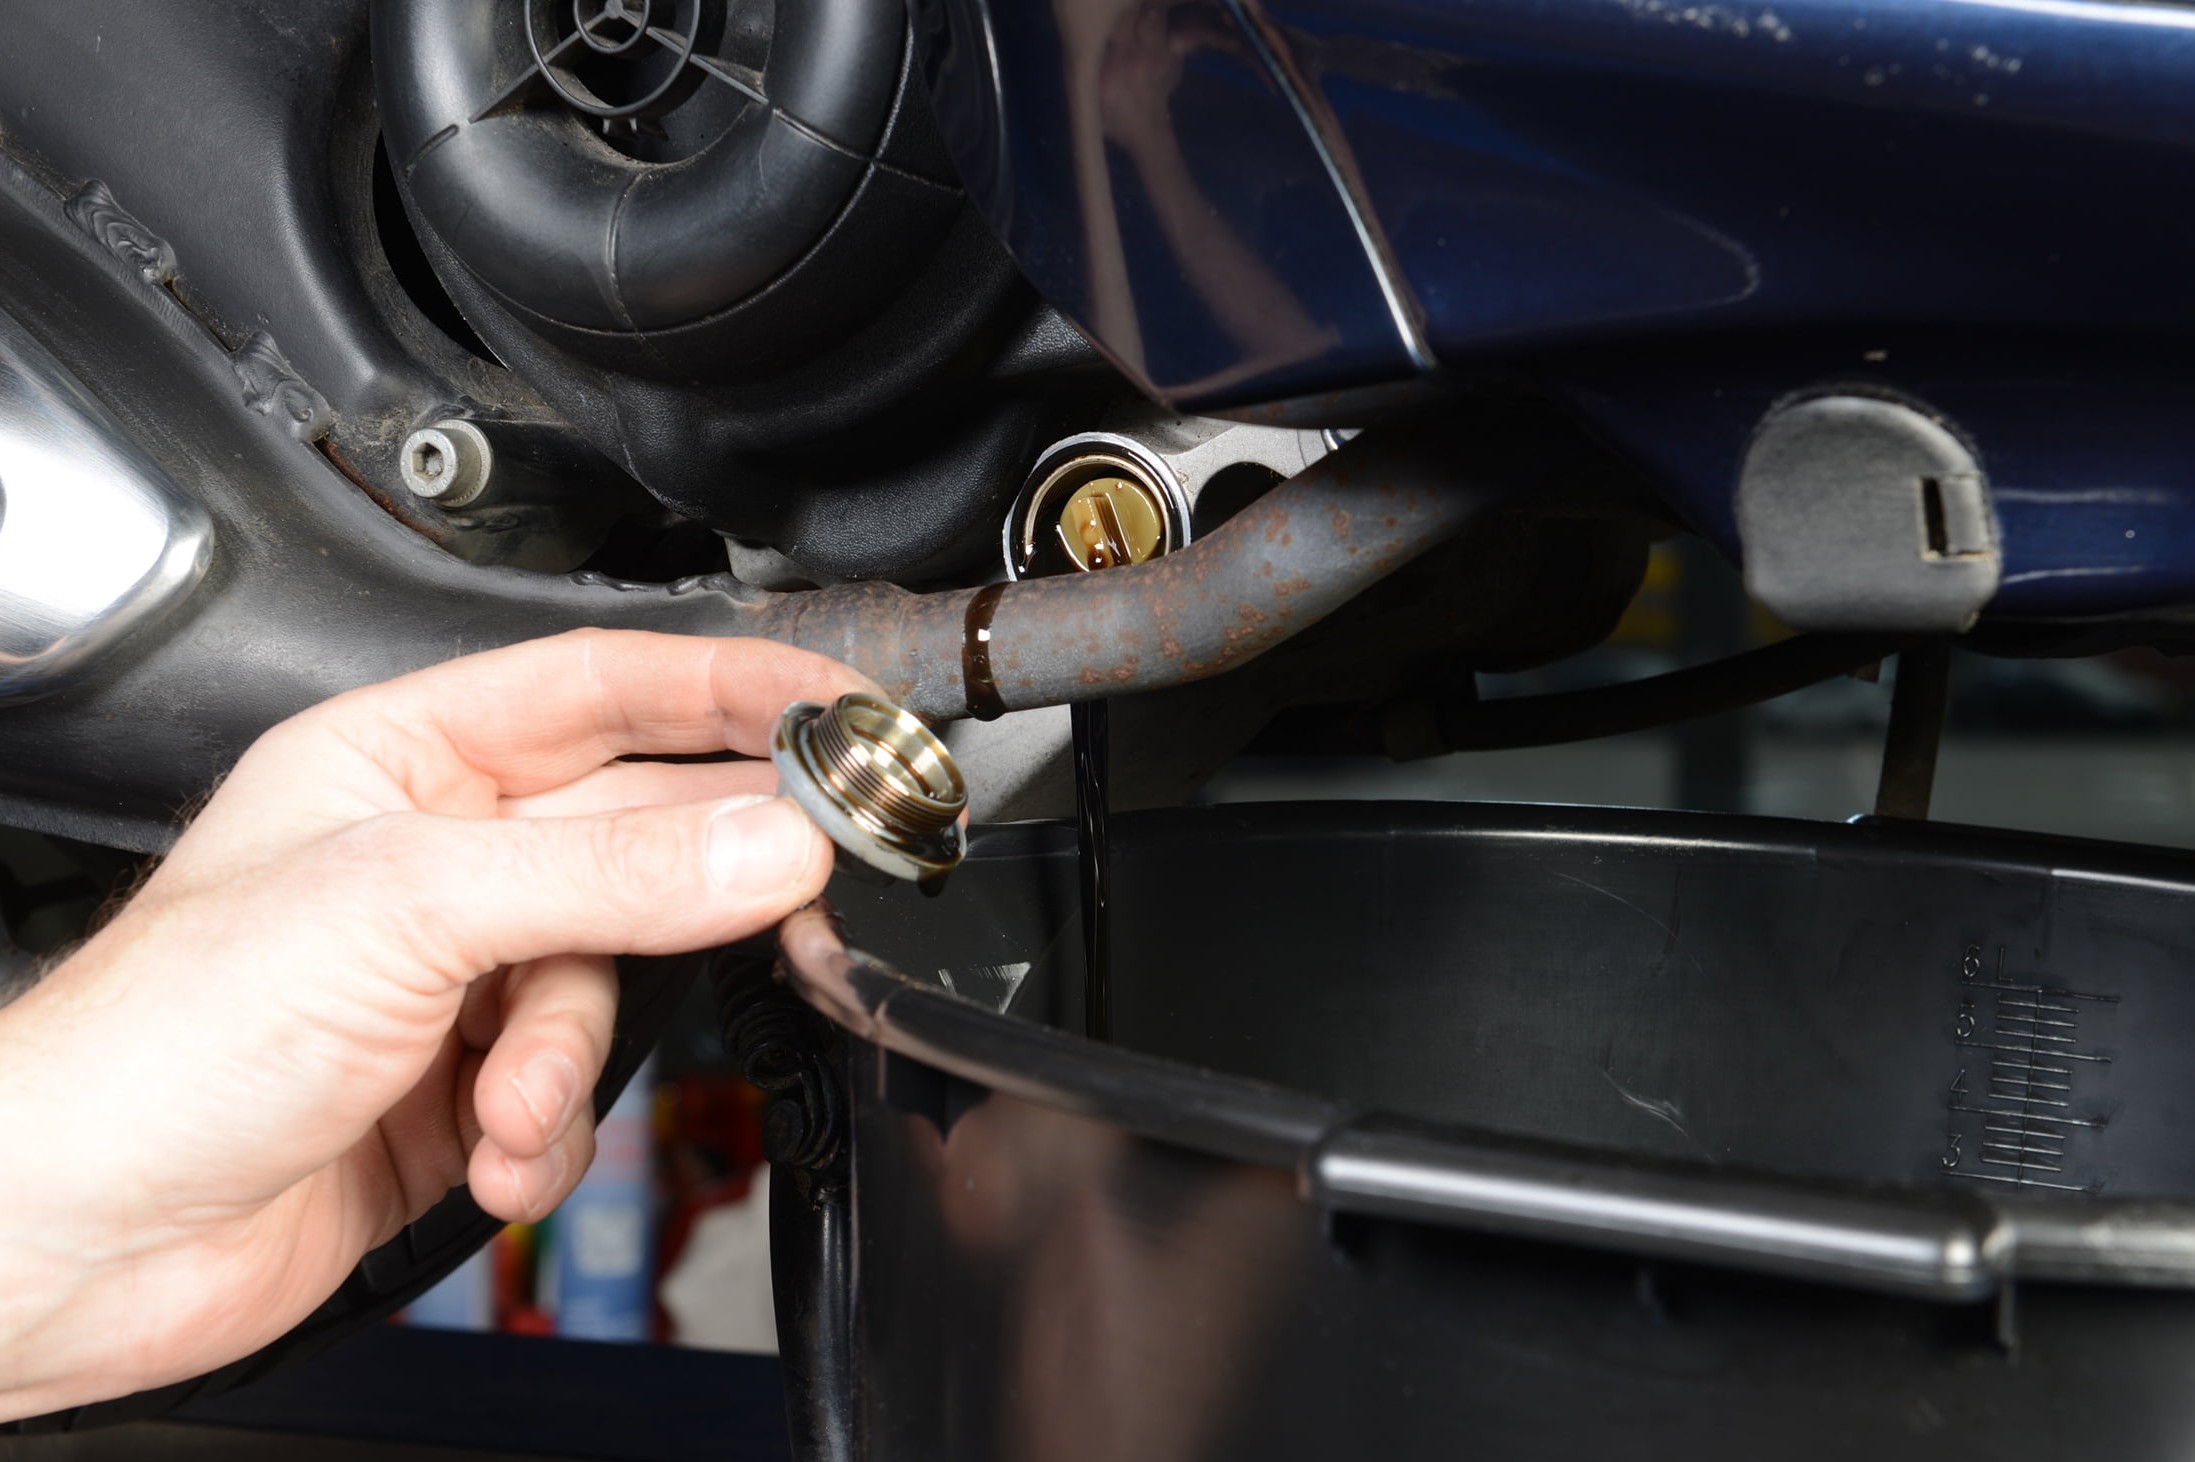
Step 8: Open drain plug and drain oil into pan
08 – Drain engine oil
You should also change the oil and oil filter of four-stroke scooters approx. every 4,000 km (2,500 miles). First warm up the engine so that the oil drains out more easily. Stand your scooter on level ground, place a plastic sheet or cardboard underneath it and a big enough drain pan underneath the engine, then open the drain plug so that the hot oil can flow into the pan. When the oil has completely drained, clean the drain plug and the sealing surface on the engine and reinsert the drain plug complete with new seal. Tighten the drain plug with care to avoid stripping the thread in the aluminium engine case!
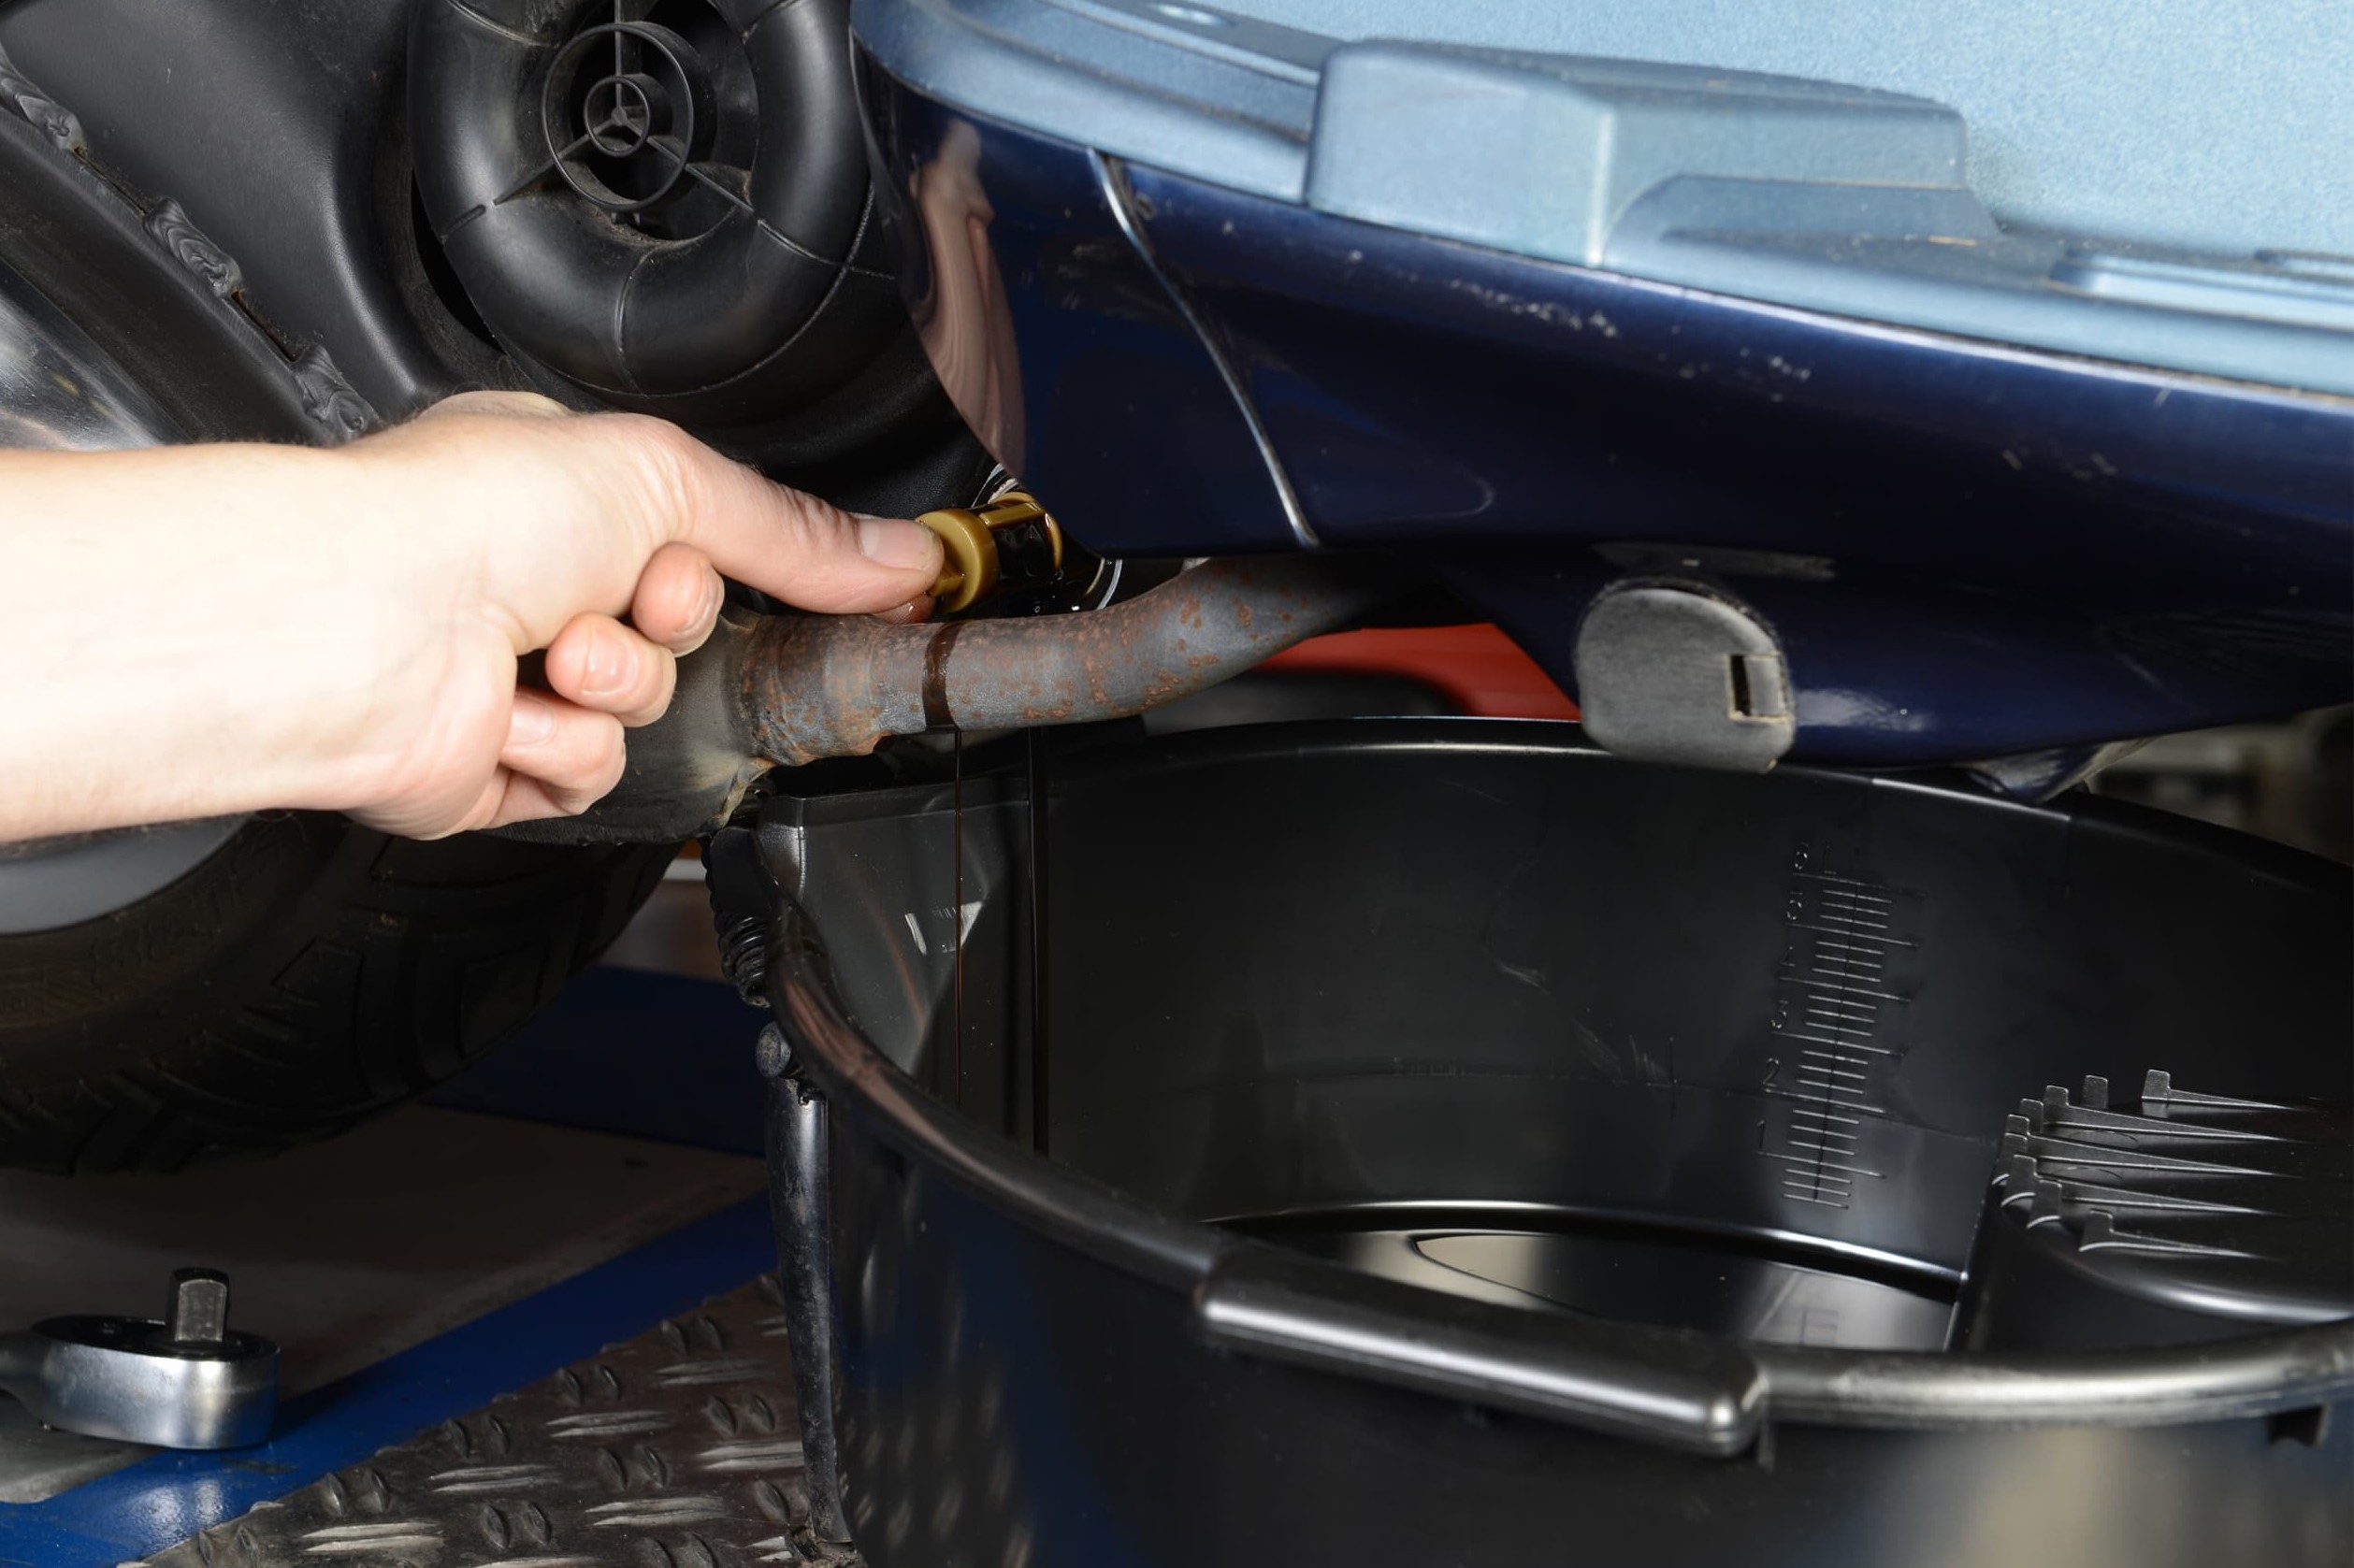
Step 9: Unscrew oil filter & drain residual oil into pan
09 – Remove oil filter
Now push the drain pan underneath the oil filter housing and remove the filter – make an exact note of the correct location of the individual components. A little remaining oil will drain out. If your scooter has a sieve filter, clean it with brake cleaner. Disposable filters must be discarded.
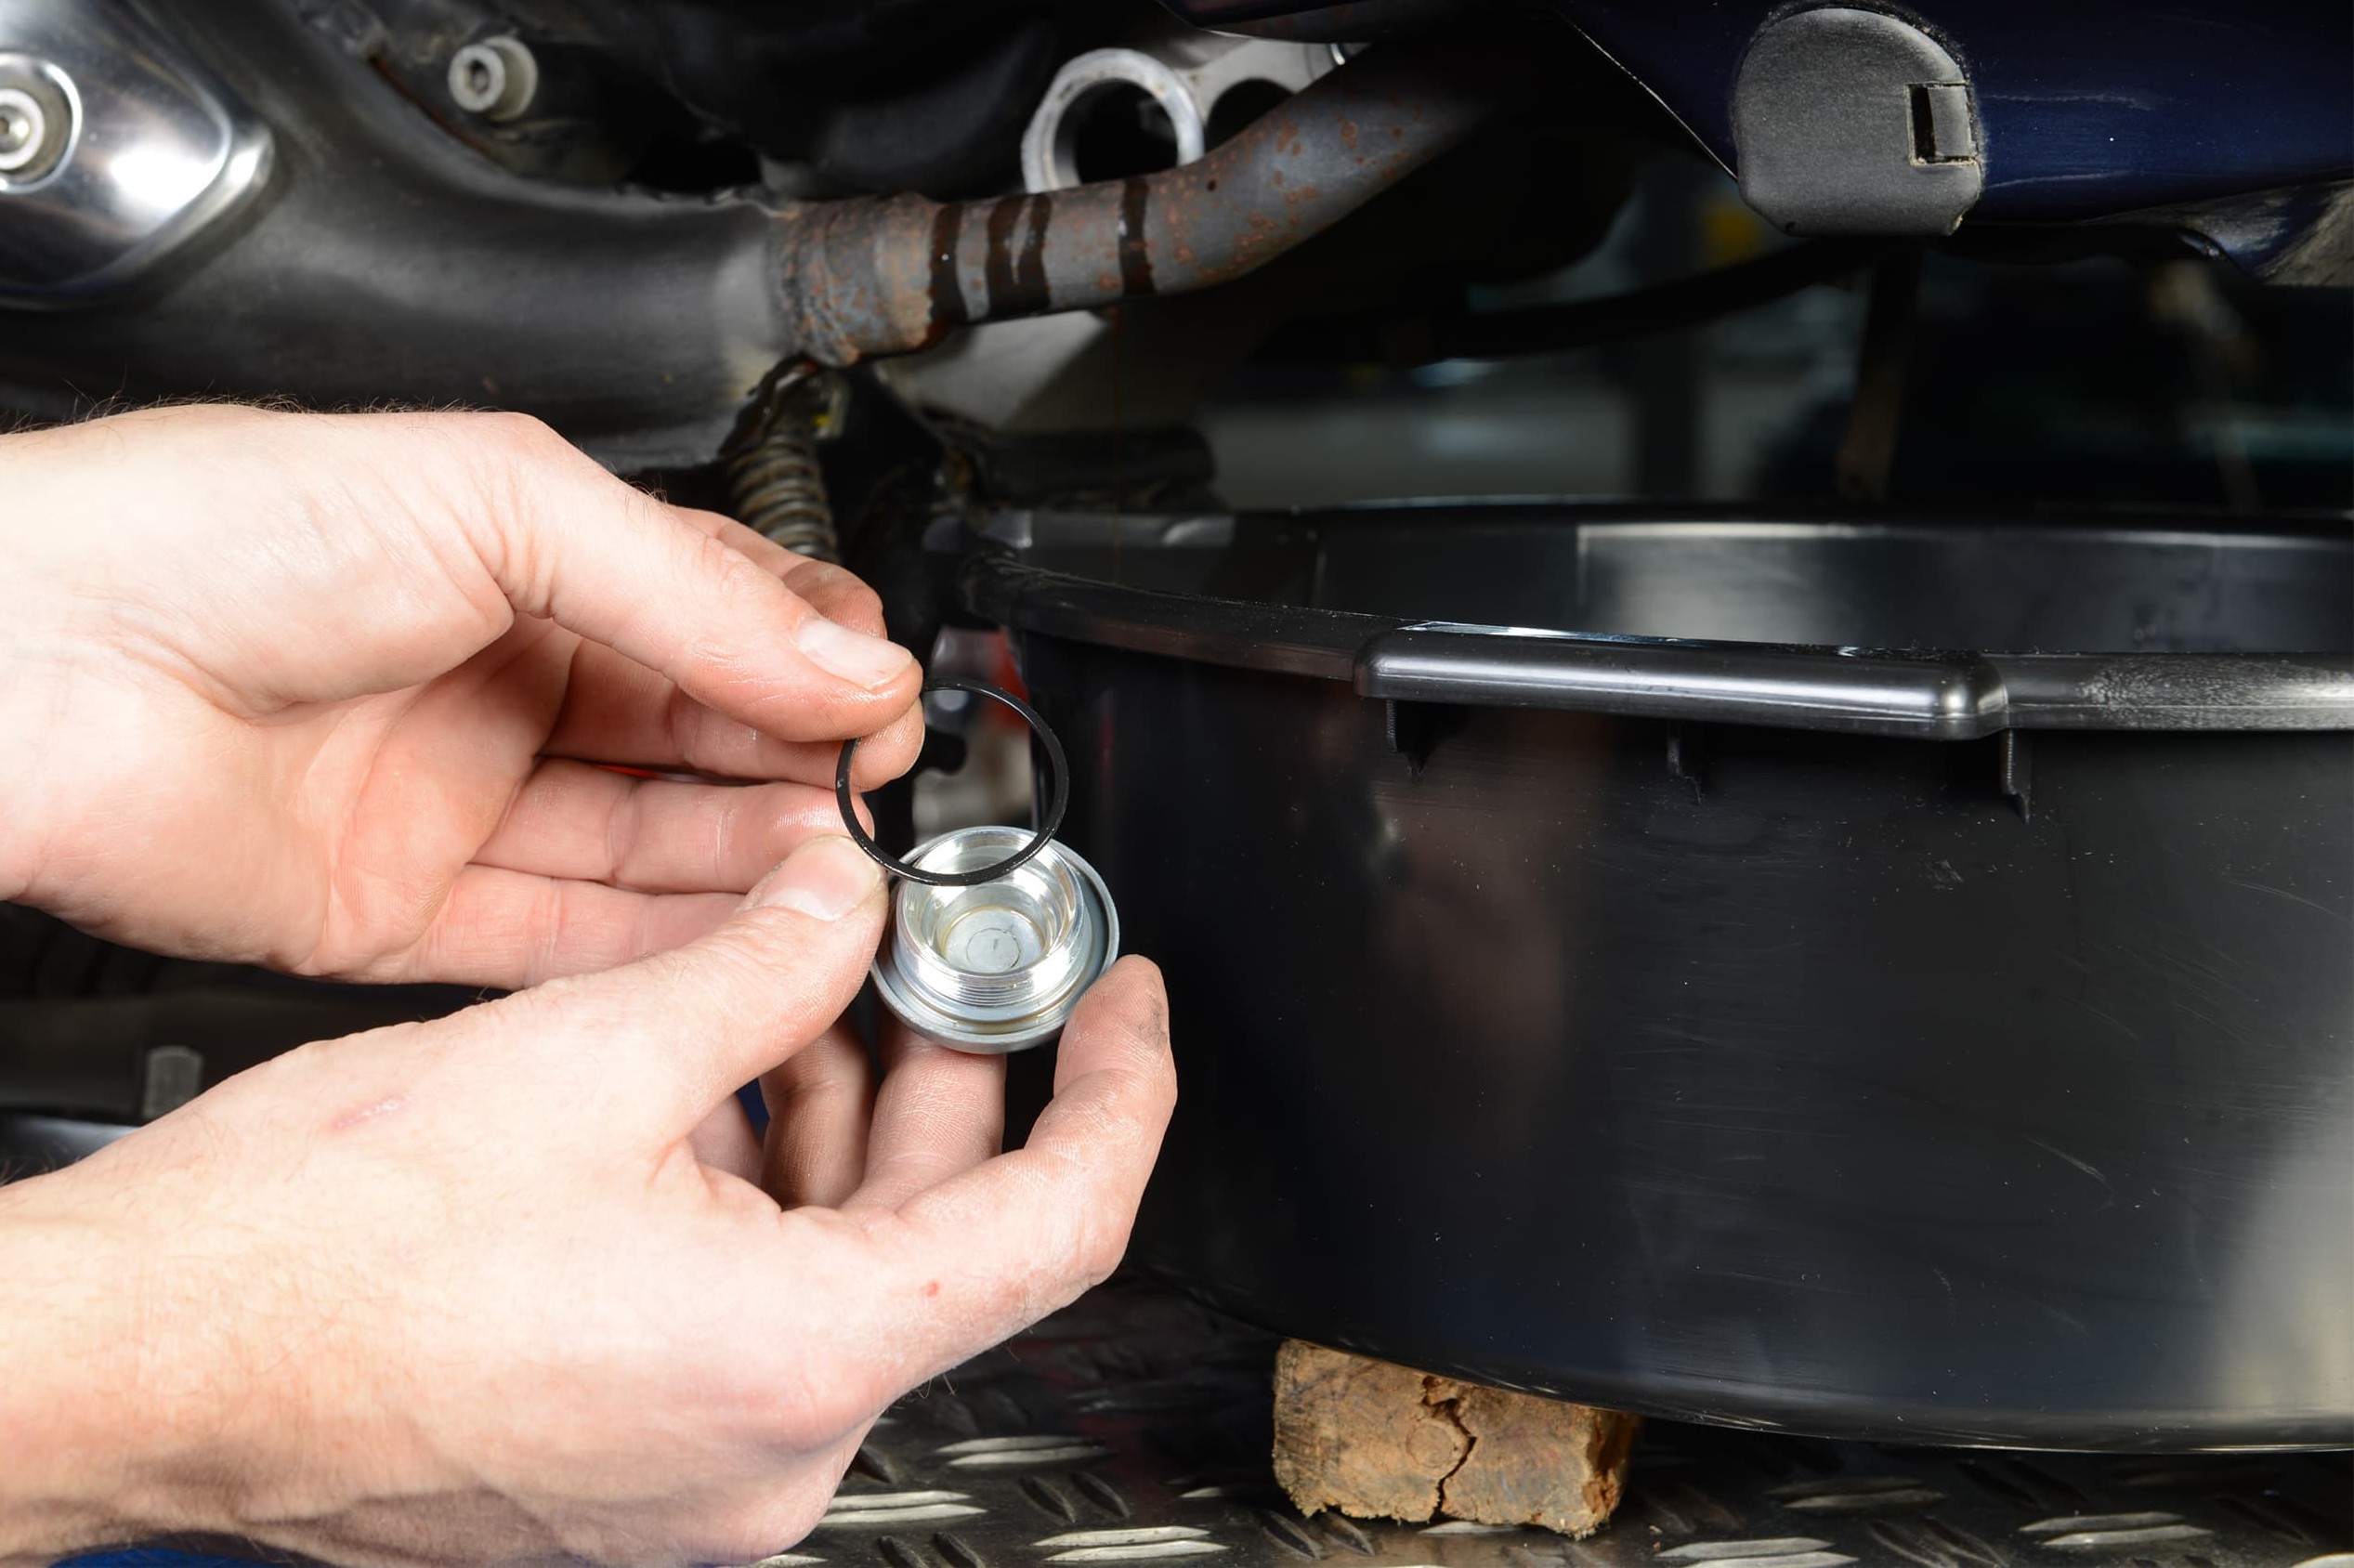
Step 10: Lightly oil the new seal & install
10 – Install new seal
Reinsert the oil filter plug with a new seal in reverse order (seal is included with cartridge filter), taking care not to damage the thread.
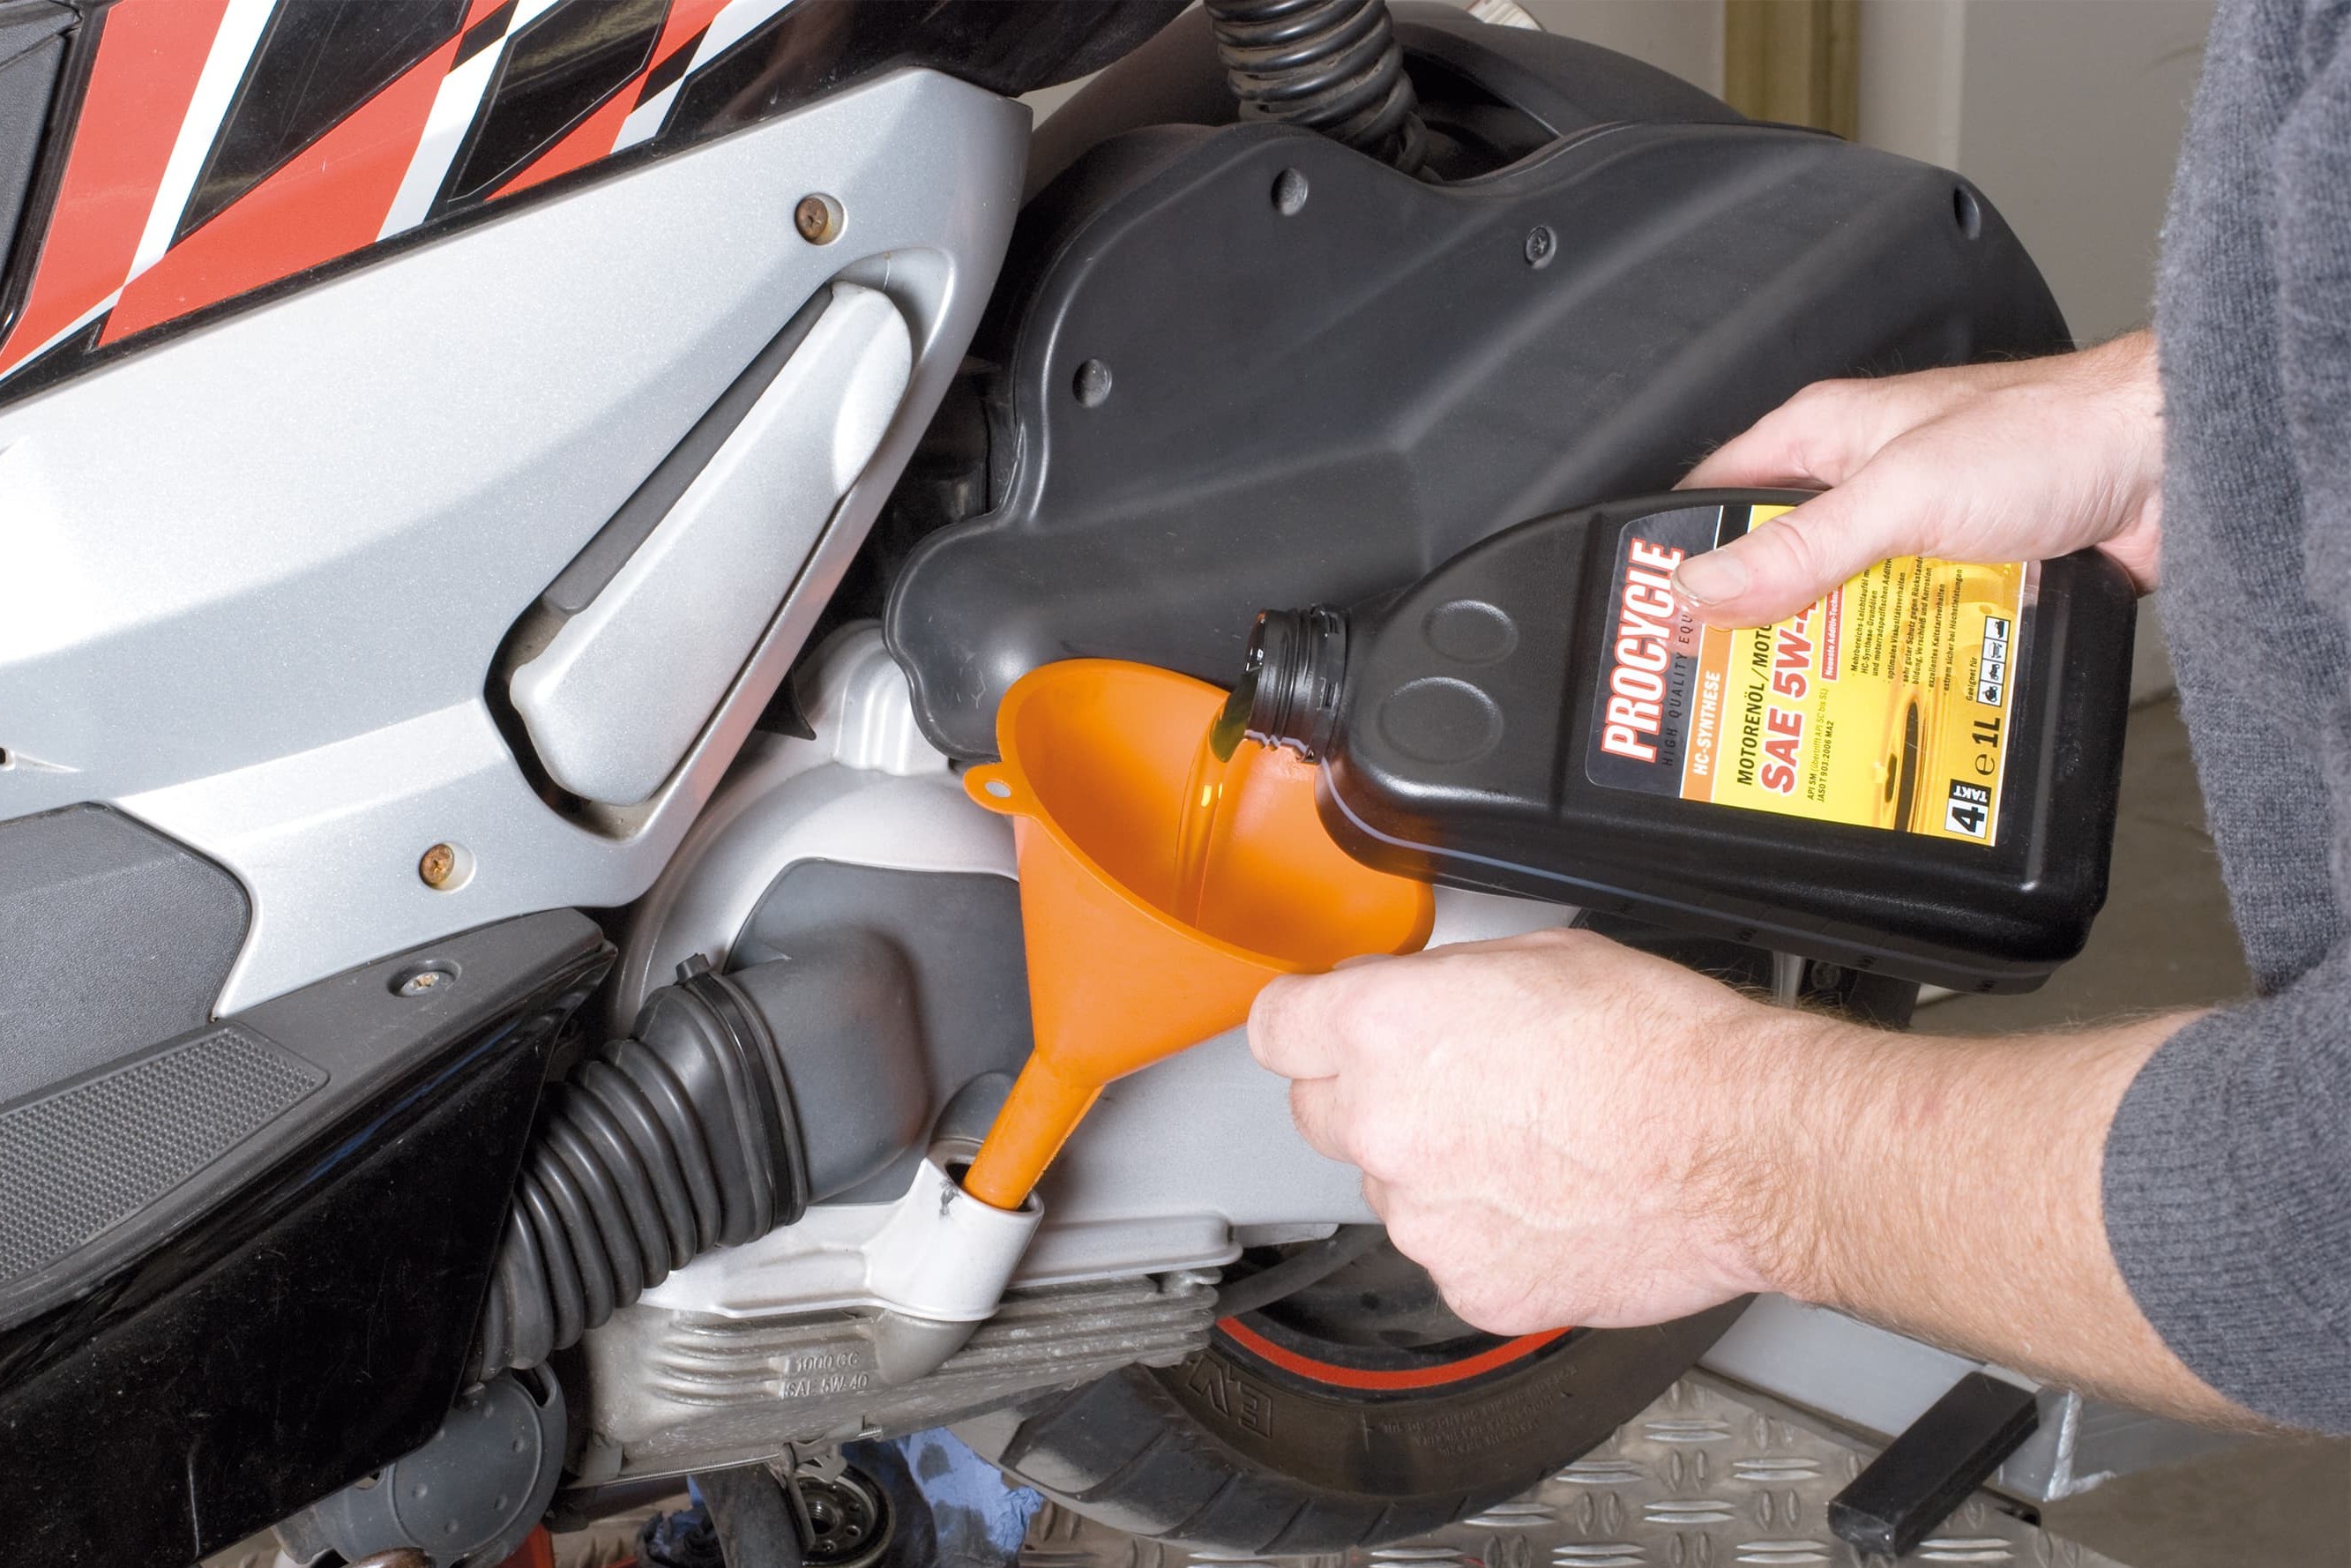
Step 11, Fig. 1: Fill with correct viscosity and quantity of oil
11 – Correct viscosity and quantity of oil
Now fill the engine with the prescribed type and quantity of four-stroke engine oil at the filler nozzle. Start the engine, making sure the scooter is standing straight and on level ground, then check the oil level again through the sight glass or using the dipstick. Check the old, drained oil for metal deposits. If you do find any metal fragments, ask your scooter workshop where they could have come from in order to prevent any serious damage. Dispose of the oil at a recycling centre or take it to your local Louis store. If you have a two-stroke engine, you will not need to change the engine oil. However, the two-stroke oil pump is essential for the engine's oil injection system, so you should regularly check that it is working properly if it is cable-controlled, i.e. operated via a split throttle cable.
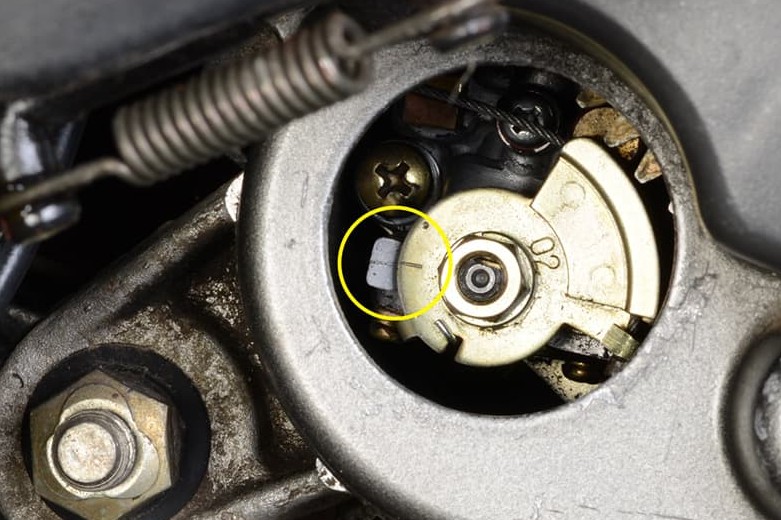
Step 11, Fig. 2: Check the marking
To get to the oil pump, remove your scooter's side fairing and/or storage compartment. In some cases, you will also need to remove an air baffle. The oil pump is fitted with a cable pulley, which should respond as soon as the throttle twistgrip is turned. There must not be any play, as this would mean that the oil pump is not working synchronously with the carburettor, and thus temporarily failing to supply oil to the engine.
There are usually markings on the oil pump housing and the pulley. If the oil pump cable is correctly adjusted, the mark on the housing must line up with the mark on the pulley when the throttle twistgrip is fully open or fully closed (depending on model).
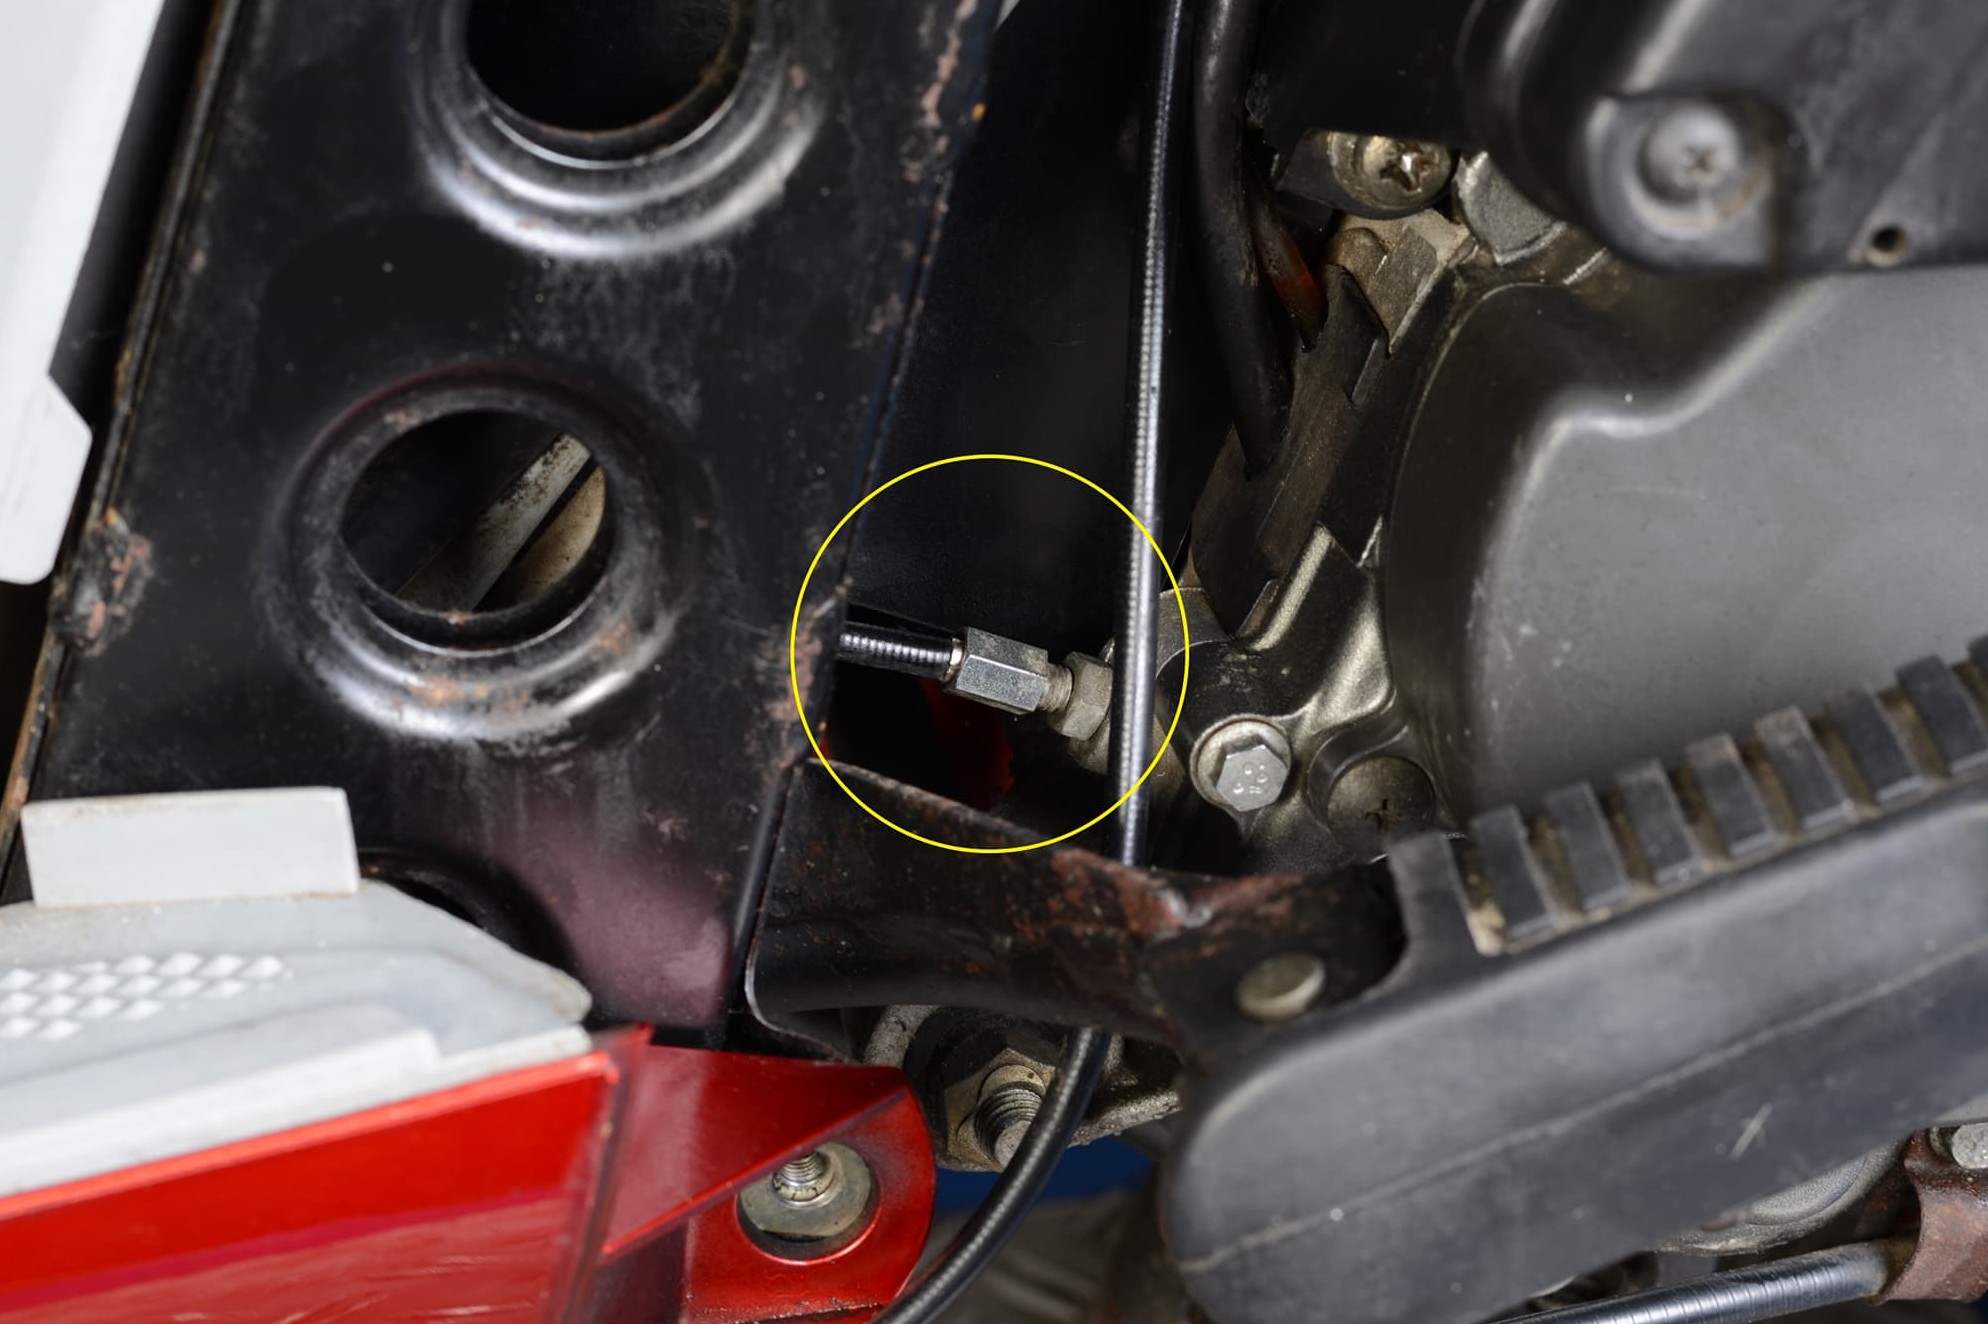
Step 11, Fig. 3: Adjusting the screw of the oil pump cable
Because the throttle cable tends to stretch with use over time, you will need to re-adjust it every now and then. But take care not to overtighten the cable pulley – this would make your scooter burn too much two-stroke oil, which would cause rapid carbon build-up (coking) in the exhaust port and exhaust system.
It goes without saying that correct adjustment is only possible if the throttle cable and the twistgrip are working properly. The twistgrip should always return automatically when you release it. The play between the twistgrip and housing should be 2–6 mm (mark with chalk if it helps – the cable can be adjusted at the throttle cable adjuster), and the cable must not be under tension at full lock. Replace fraying cables immediately.
There is often a flow filter between the two-stroke oil pump and the engine, and this filter also needs to be replaced at specific intervals or when it is visibly soiled. To do this, use a hose clip to interrupt the oil flow. Pay attention to the direction of flow when installing the new filter, and make sure that there are no large air bubbles in the filter.
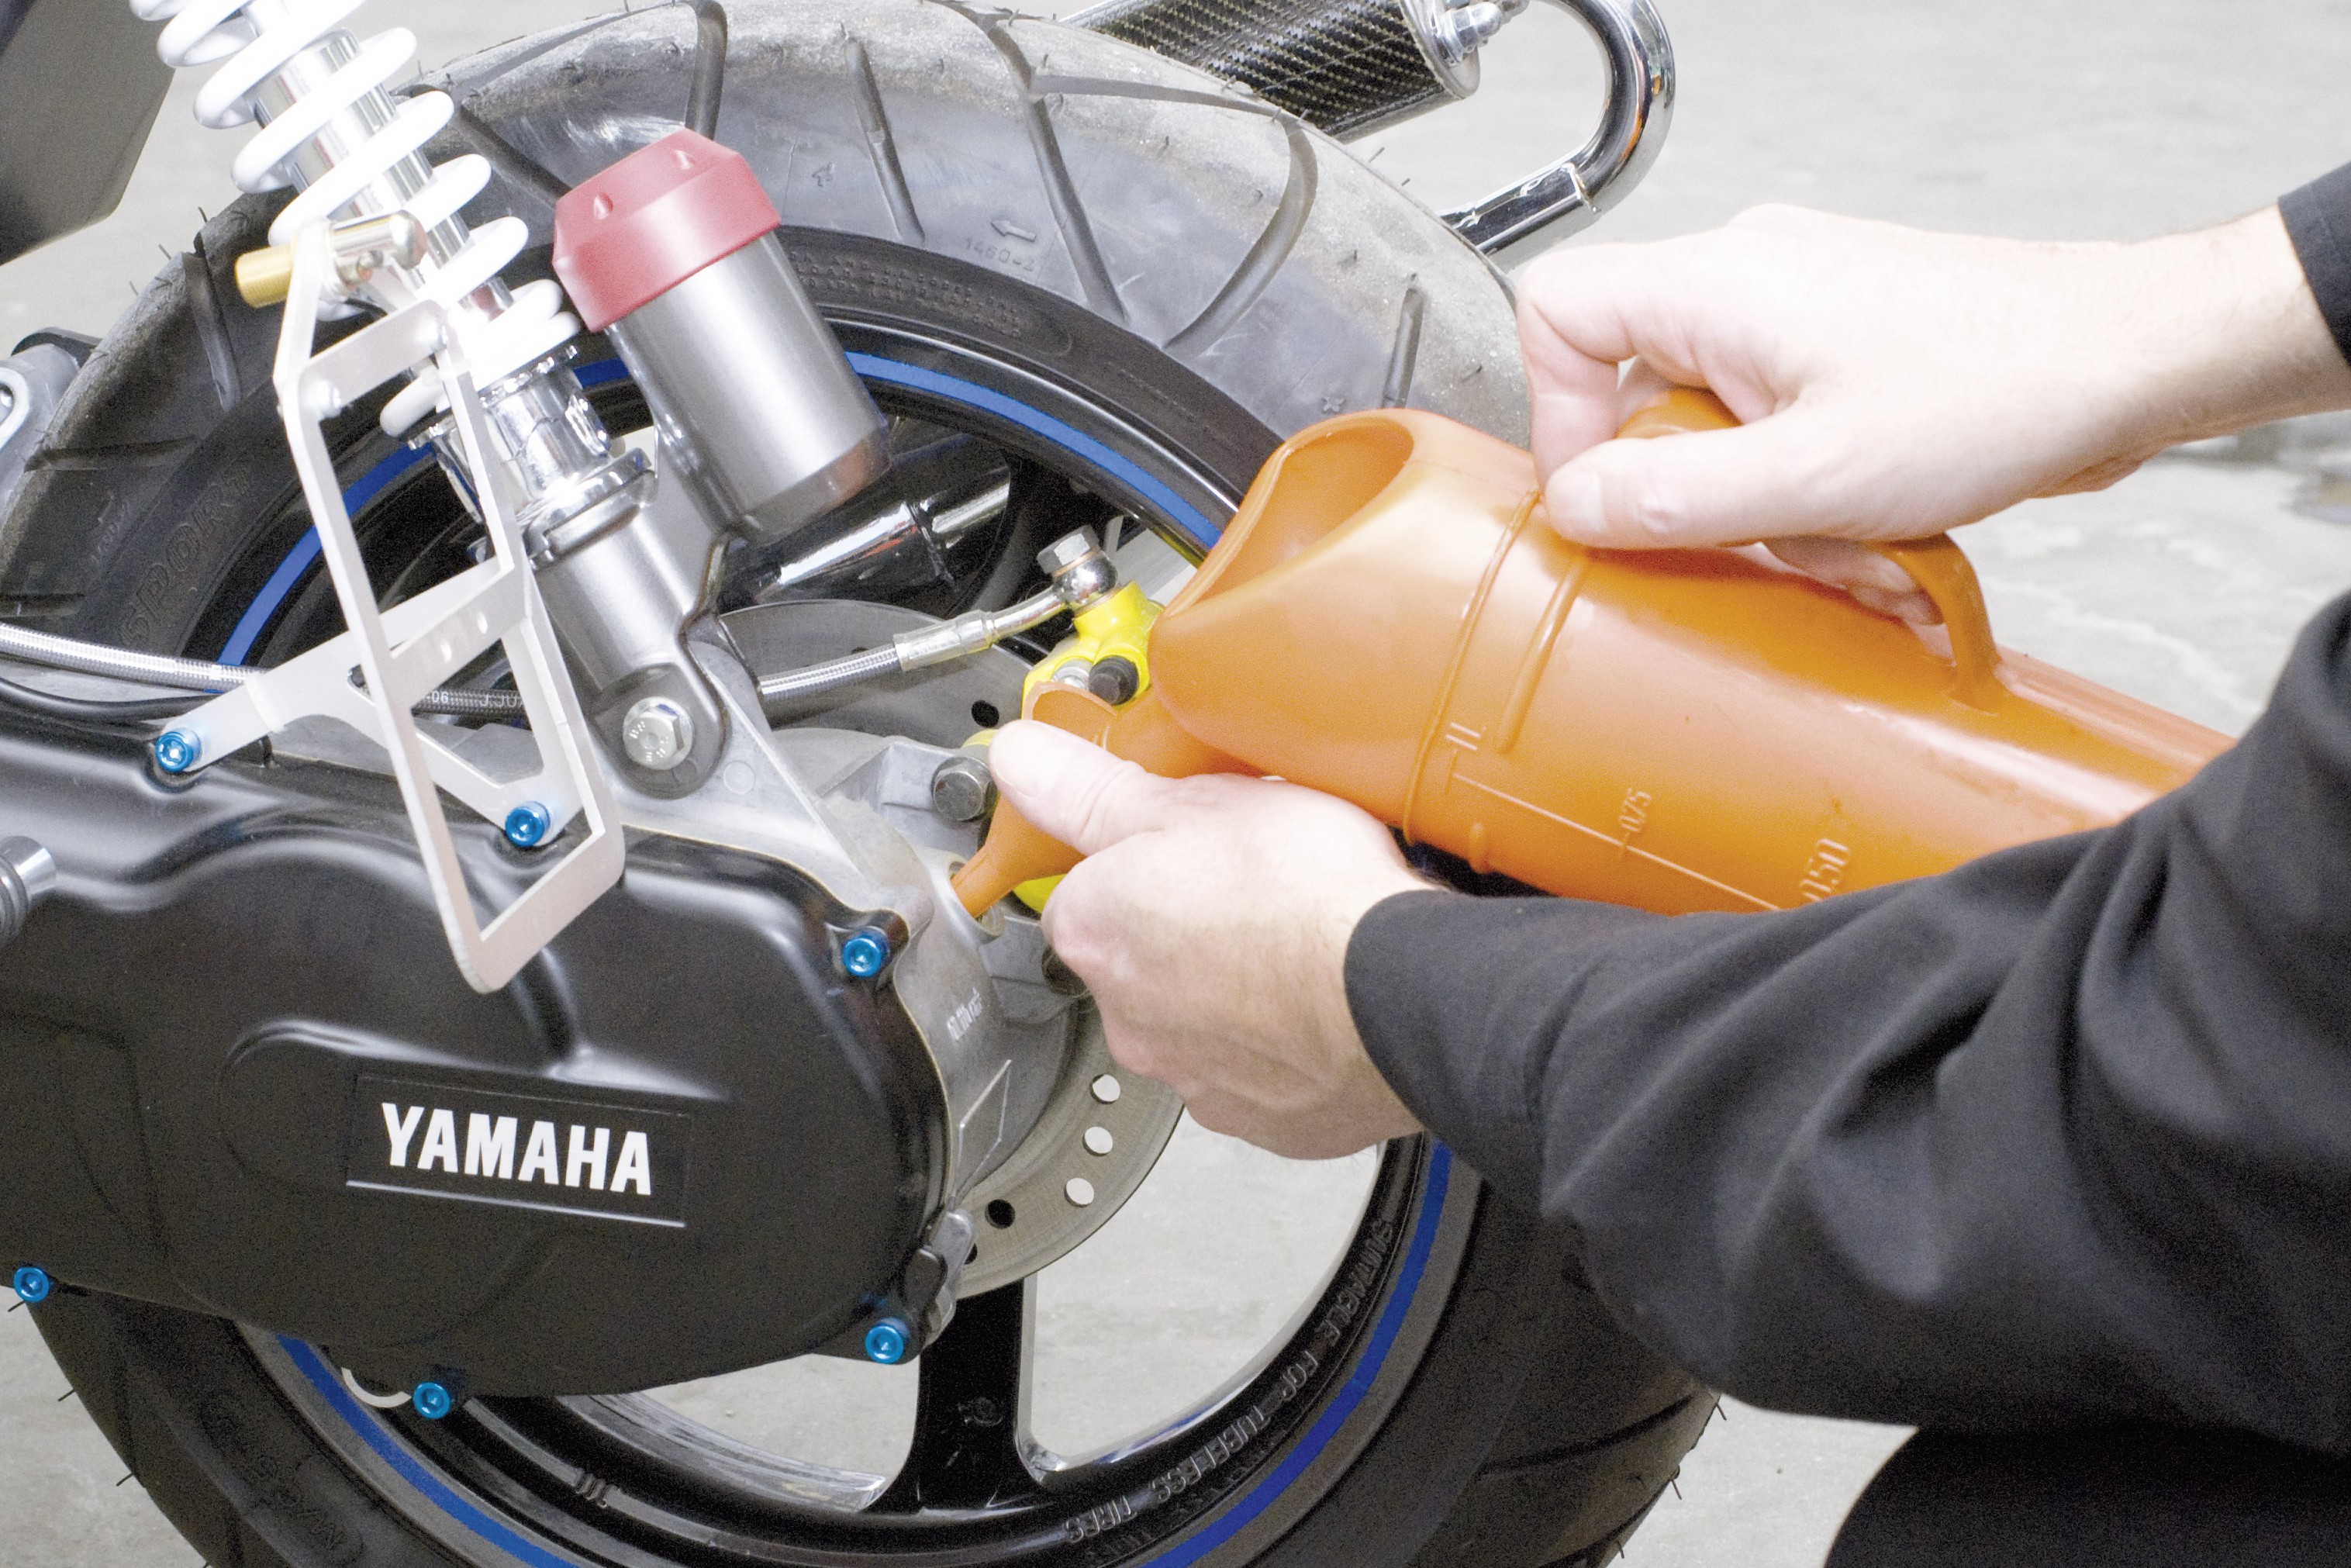
Step 12: Change oil in final drive
12 – Change oil in final drive
Irrespective of whether you have a two-stroke or four-stroke scooter, you need to regularly change the oil in the final drive. (Refer to your owner's manual for maintenance intervals and oil type – you'll find handy small bottles of special scooter gear oil at your local specialist retailer or dealership). To change the oil, put your scooter upright on the centre stand on a level surface and thoroughly clean the final drive around the filling plug and drain plug. Drain the usually small amount of oil into a container by removing the drain plug, clean the plug and reinsert it complete with a new seal.
Gently tighten the plug in the aluminium housing. Now top up the drive with new oil via the filler plug. If your scooter is not fitted with a level probe, ask a specialist dealer about the correct quantity of oil, or look in the Louis Bike Database at www.louis.eu. Clean the plug and reinsert it together with a new seal. Check the oil level again after a test ride.
Dispose of the old oil at a recycling centre or take it to your local Louis store so that it cannot pollute the environment. If you find a leak coming from the drive, go to your local scooter workshop, because if you're losing oil, the drive will quickly run dry.
Important: Adjusting the valve clearance and any other job that involves opening the engine is best left to a specialist workshop.
- You should change the spark plug every 6,000 to 10,000 km (4,000 to 6,000 miles) to ensure that your scooter starts easily and runs efficiently. On some scooters, you will need to remove a cover or the luggage compartment to get at the spark plug. Wait for the engine to cool down before attempting to change the spark plug and always use the correct size plug spanner (usually in your travel tool kit).
- Make sure you don't let any dirt fall into the engine while you're working – if the spark plug is in a deep shaft in the cylinder head (4-stroke engine), it's best to clean the shaft with a vacuum cleaner before you remove the spark plug.
- Only use a spark plug recommended by the manufacturer and check the plug gap with a feeler gauge (refer to your owner's manual). If necessary, bend the central electrode carefully to adjust the gap.
- At longer intervals, approximately every 5,000 to 20,000 km (3,000 to 13,000 miles), depending on scooter model, the valve clearance needs to be checked if you have a four-stroke scooter.
- Generally speaking, you will need to replace an exhaust that is heavily carbonised after long use. Only classic scooters are sometimes built so that you can open the exhaust and burn off the deposits. However, this is not without dangers and, whatever you do, never try and burn carbon deposits off a modern, single-piece scooter exhaust!
Our recommendation
The Louis Technical Centre
If you have a technical question about your motorbike, please contact our Technical Centre, where they have endless experience, reference books and contacts.
Please note!
These tips for DIY mechanics contain general recommendations that may not apply to all vehicles or all individual components. As local conditions may vary considerably, we are unable to guarantee the correctness of information in these tips for DIY mechanics.
Thank you for your understanding.


