Perfect rear vision
Do your mirrors give you the perfect view? Even today, many motorcycle mirrors are far from ideal. So here we show you how to do a very worthwhile upgrade.

Upgrading your rear-view mirror
We often receive emails with questions about rear-view mirrors: What sort of mirror can I use on my bike? How do I install it? Will I need an adapter? Will bar-end mirrors work on my bike? Unfortunately, you can't simply look in a book to find out exactly which mirror can be used on which motorcycle. So it's essential to look at the original mirrors on your machine, how they're secured and what else you need to take into account (e.g. if your bike is fitted with bar-end turn signals or hand guards).
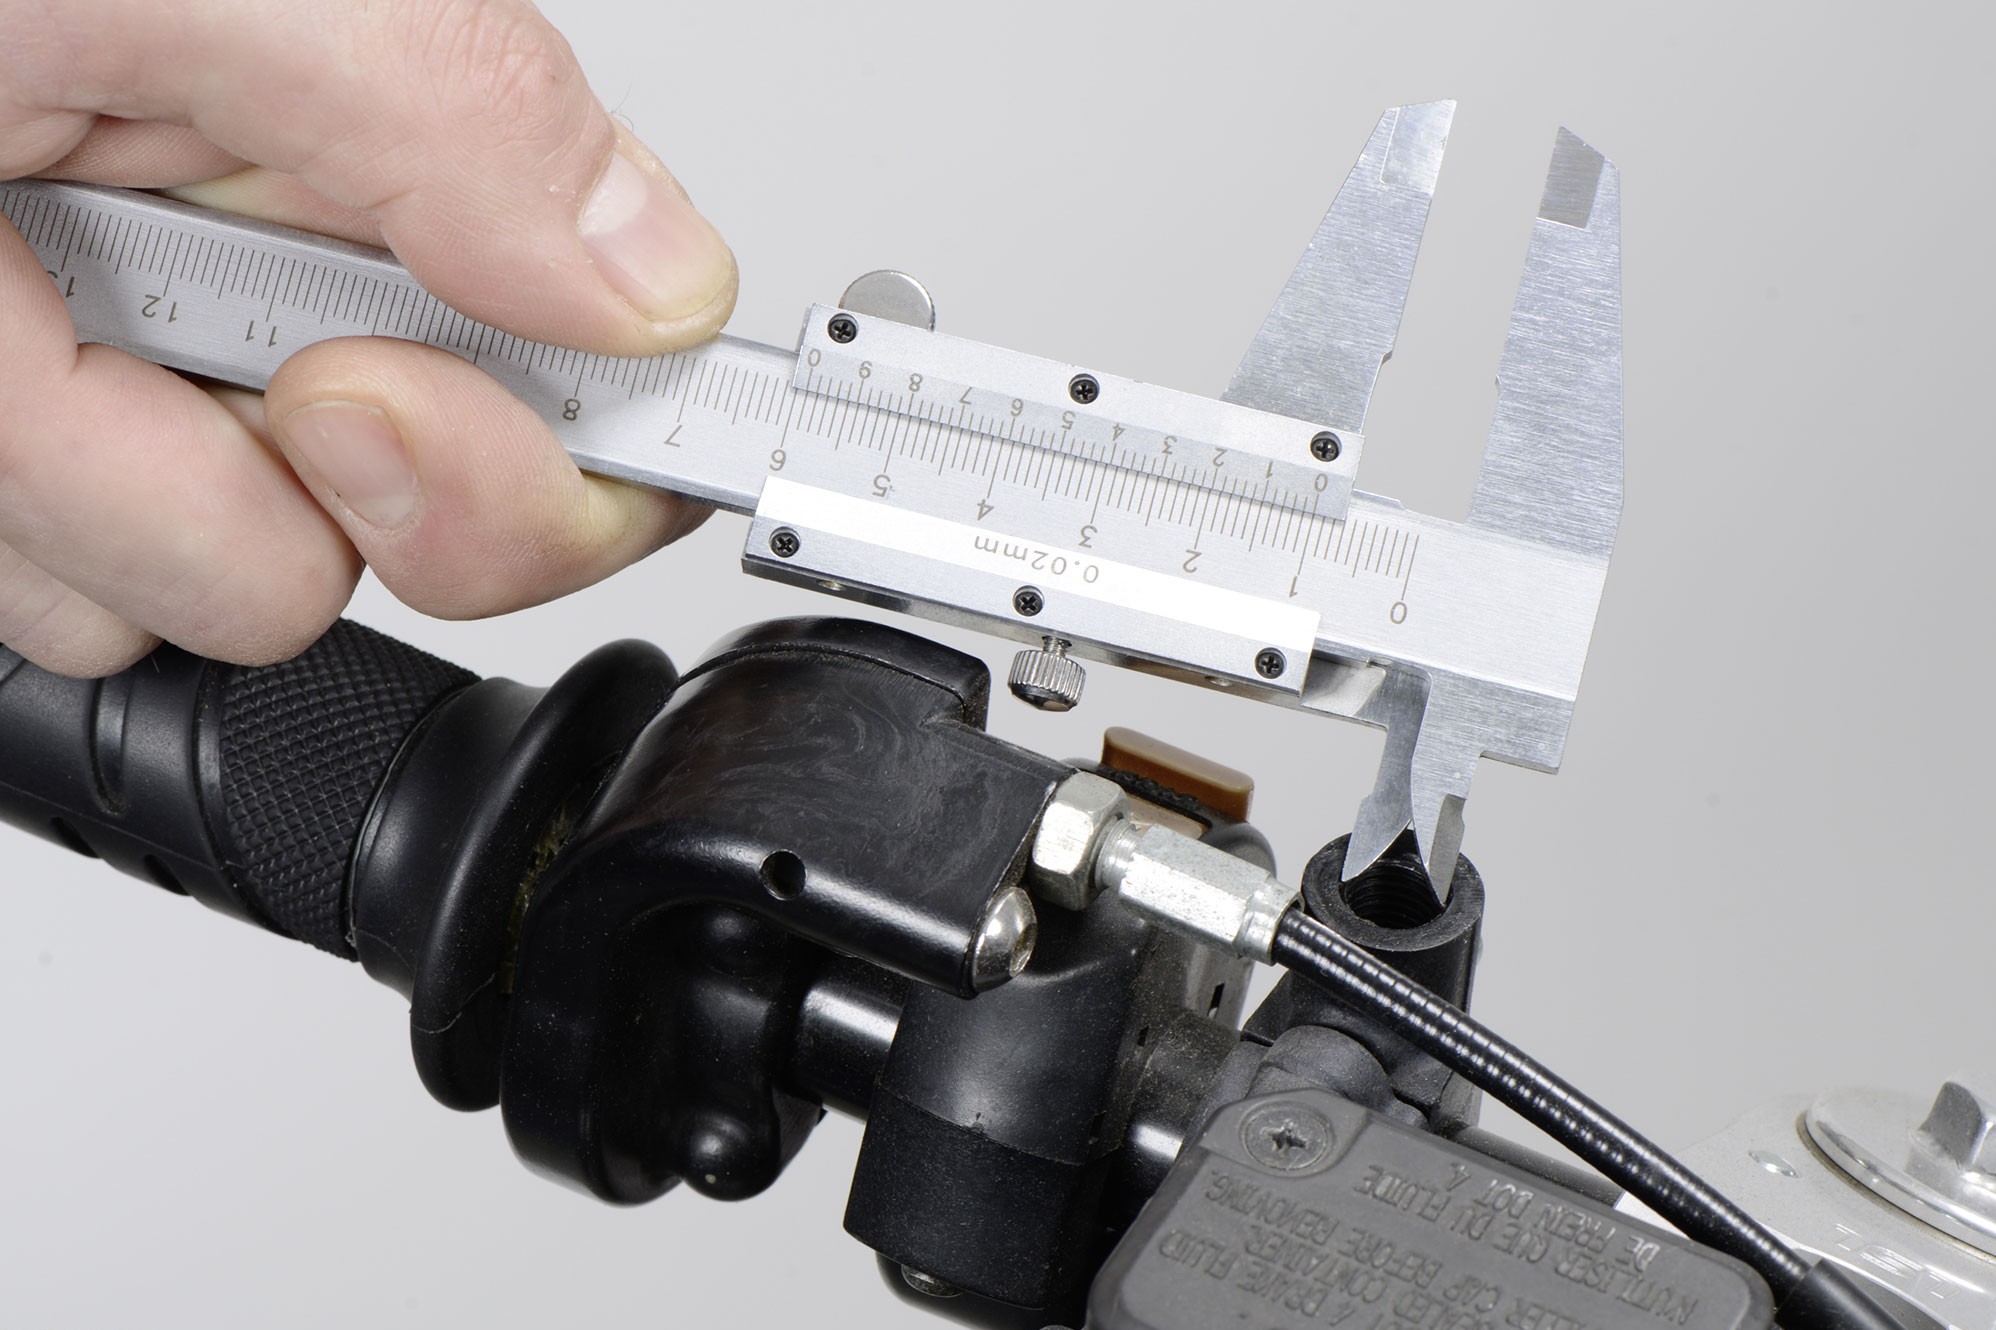
Fig. 1: Measure the diameter
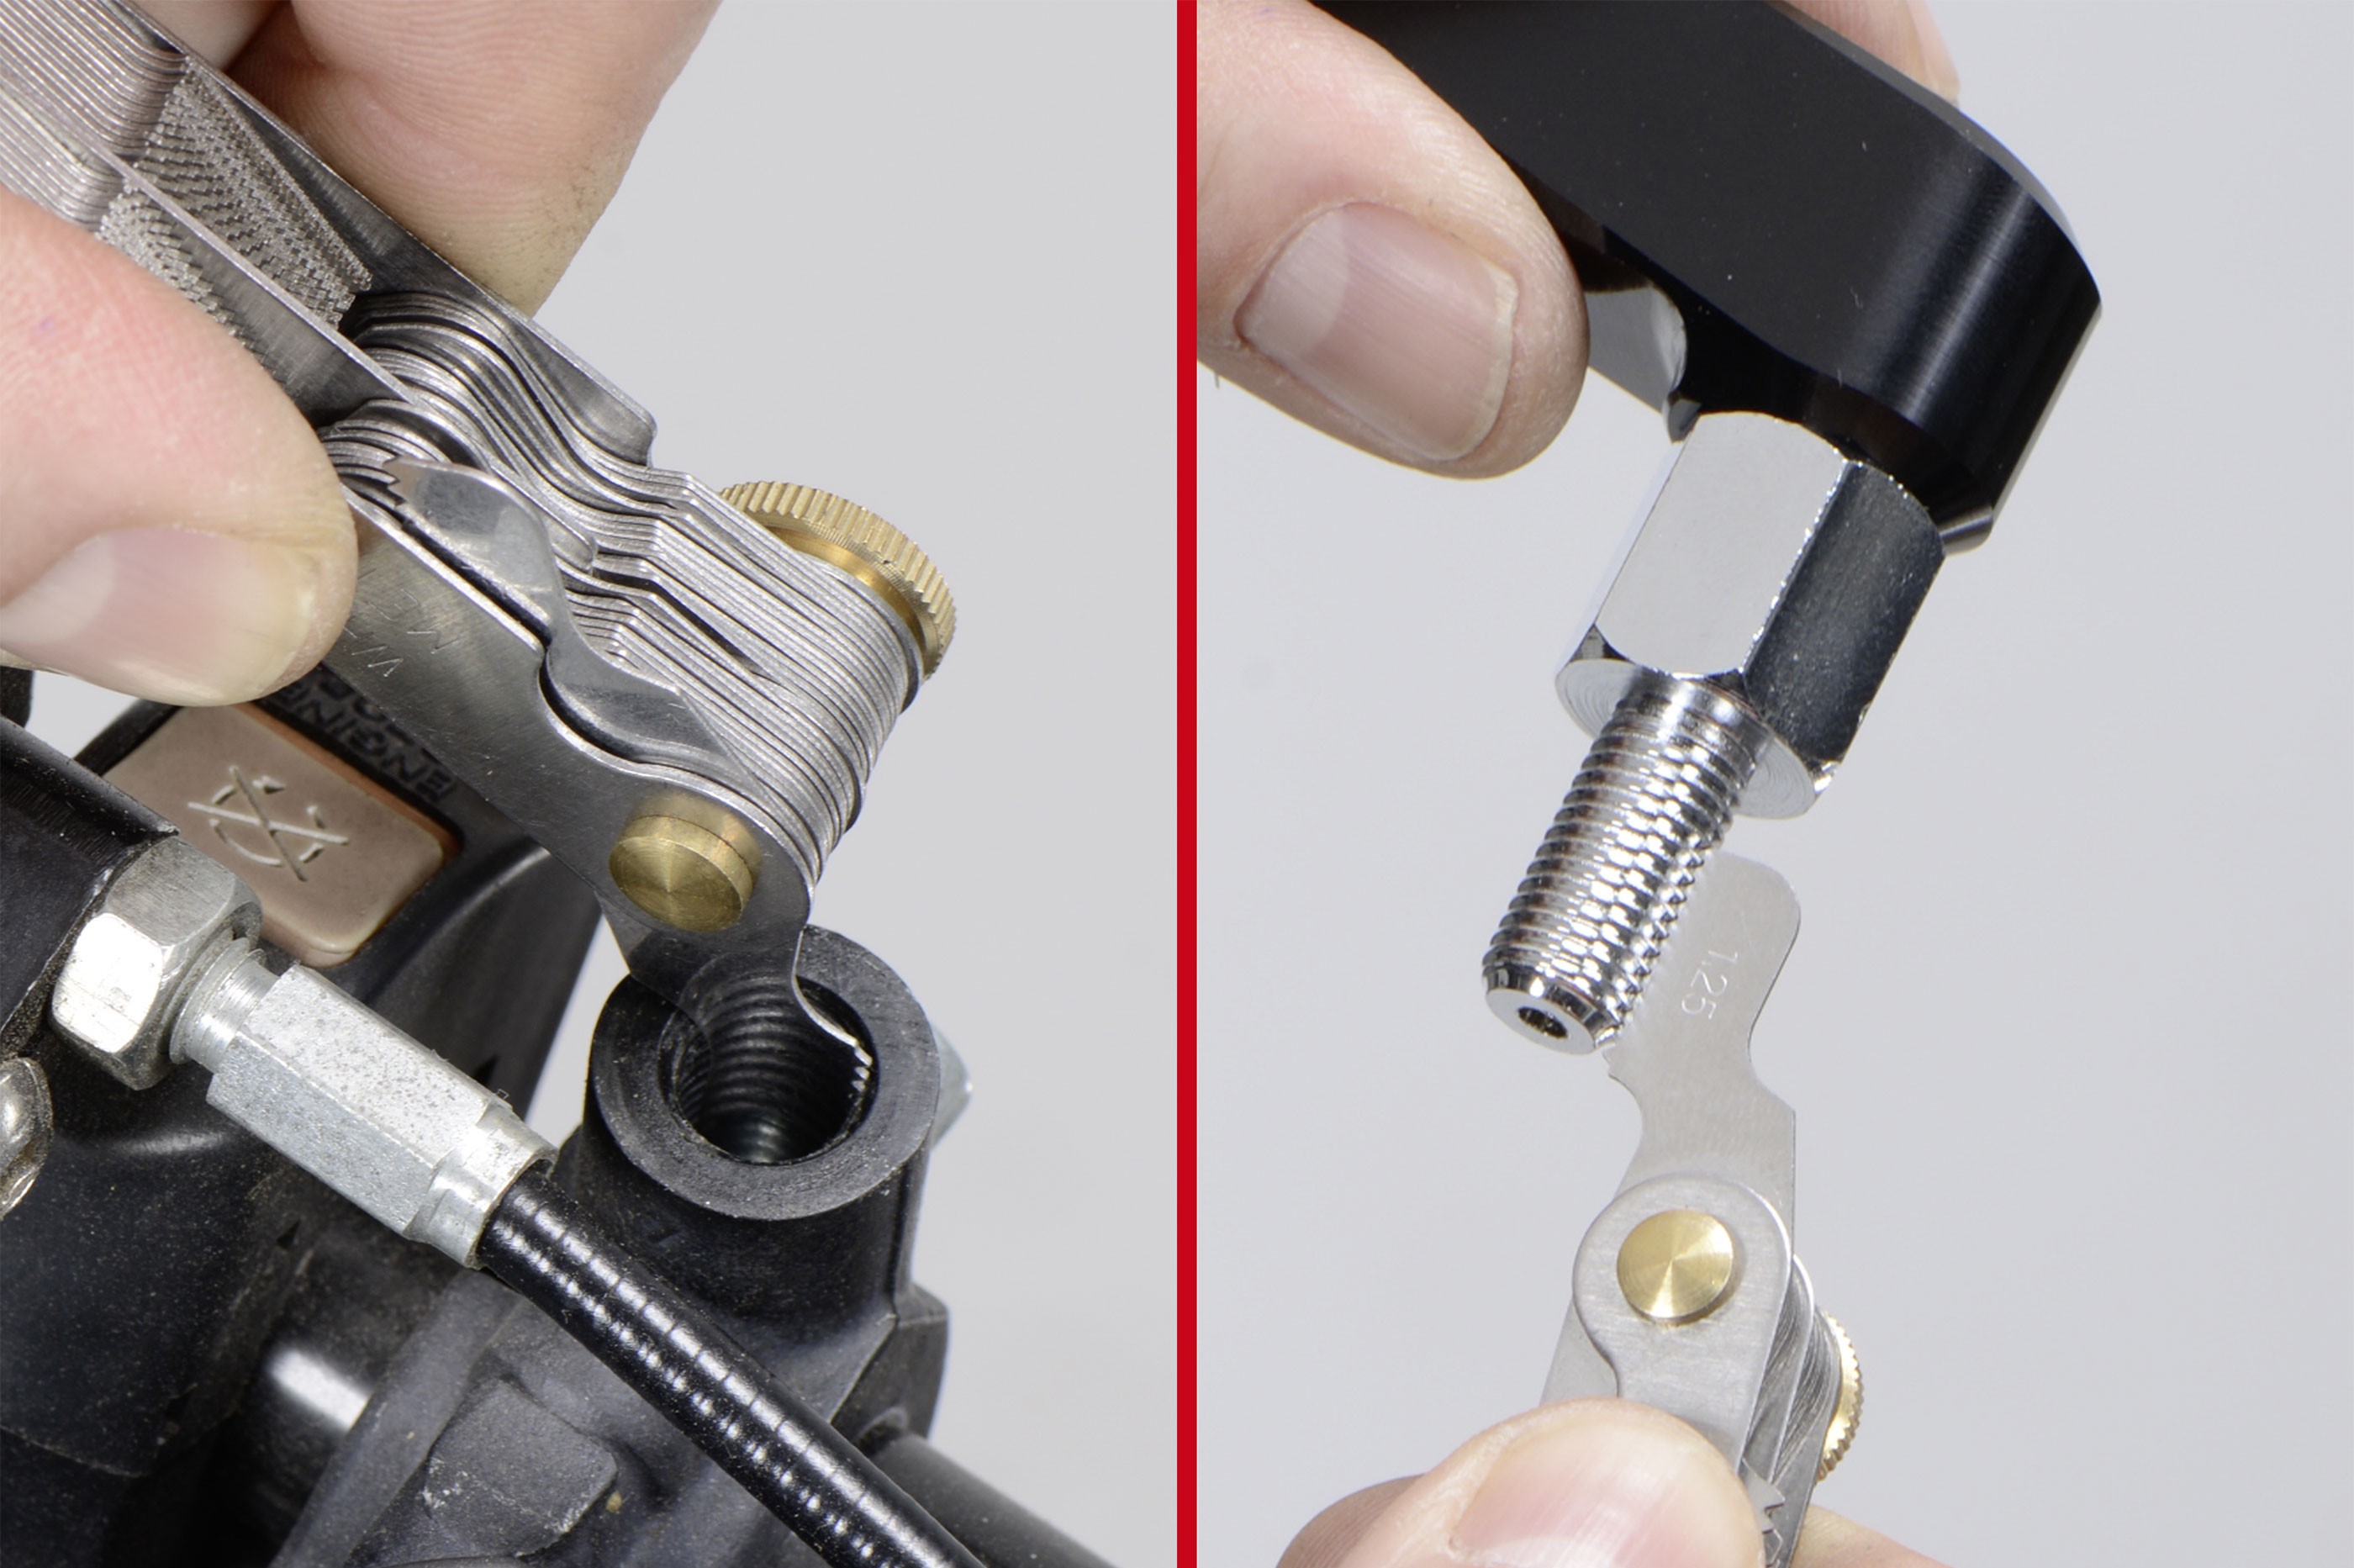
Fig. 2: Measure the thread pitch
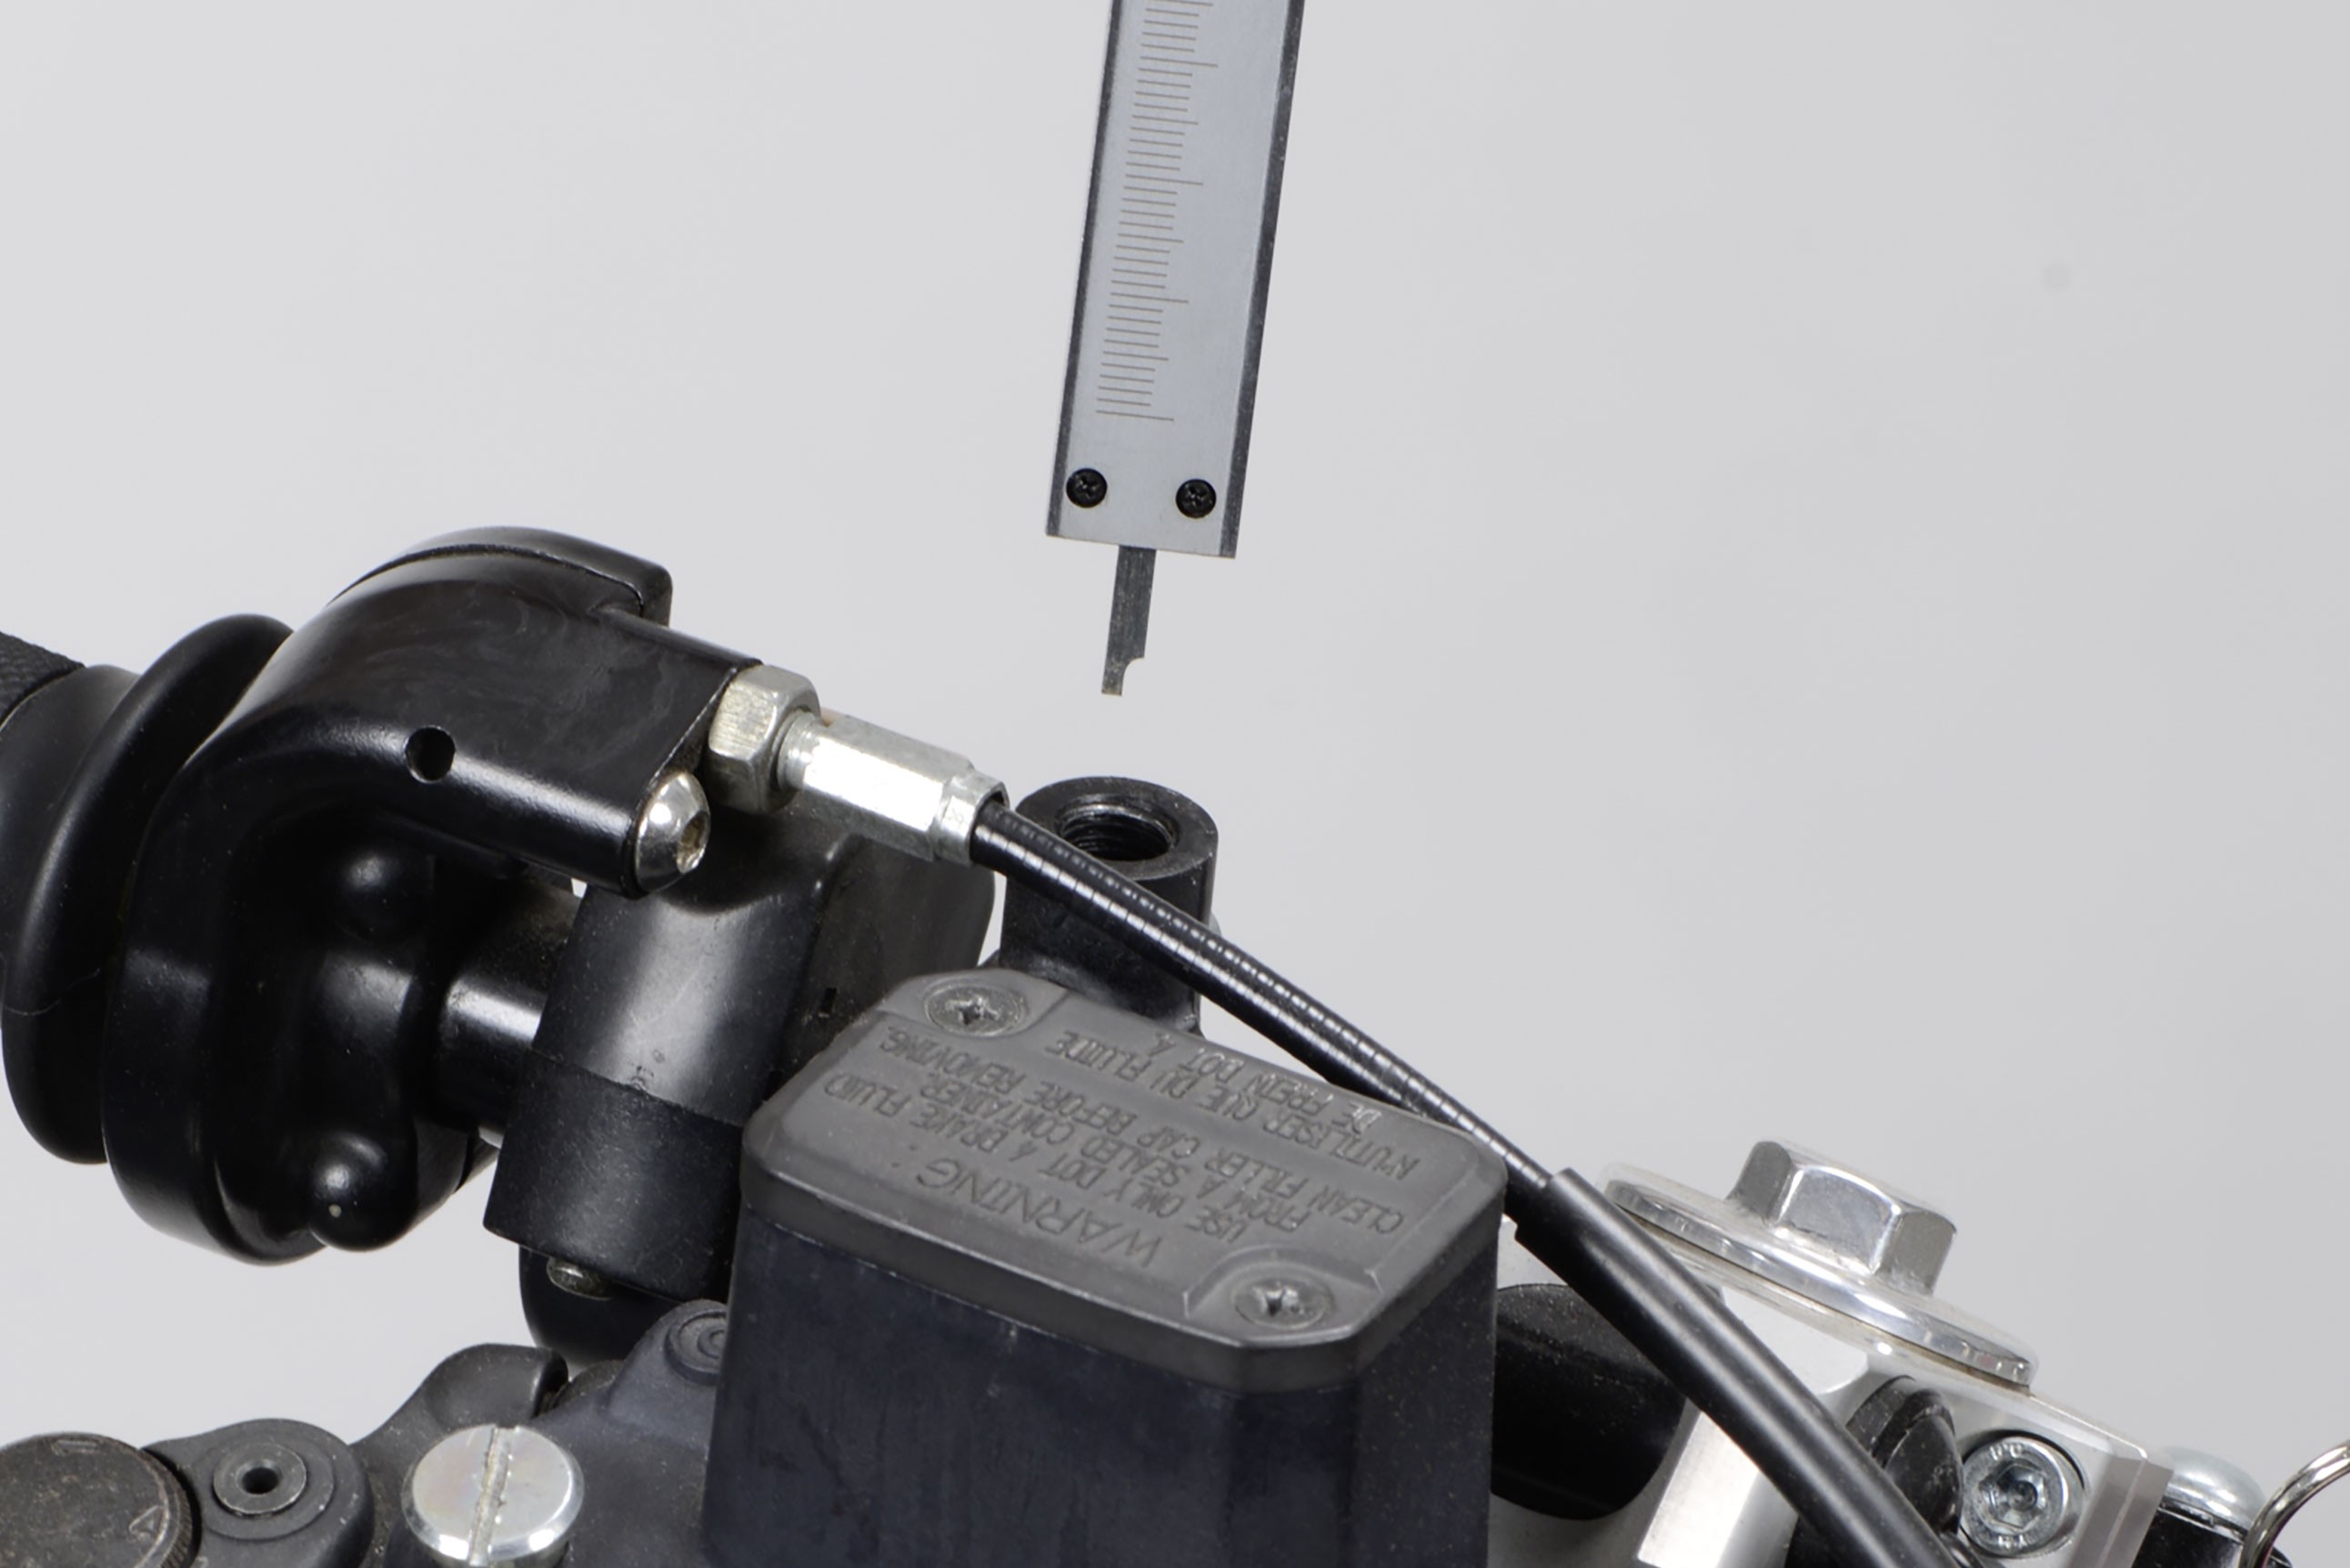
Fig. 3: Measure the thread length with caliper depth gauge
Lever-mounted mirrors
To make certain that an aftermarket mirror can be fitted to your motorcycle's brake or clutch lever, unscrew and remove the existing mirror, then measure the thread diameter using a caliper gauge (Fig. 1), the thread pitch with a thread gauge (Fig. 2) and, if applicable, the length of the neck (thread length, Fig. 3).
You also need to check whether you have a normal right-handed thread. A left-handed thread will be indicated by a groove on the nut. The right mirror on Yamaha bikes, for example, usually has a left-handed thread.
Most Japanese motorcycles over 125 cc have a thread with a 10 mm diameter and 1.25 pitch (written: M10x1.25). Scooters and small motorcycles, on the other hand, often have an M8 thread, sometimes with a "bolt-through" mounting point on the lever (Fig. 5). The bolt-through system is also found on many Harleys (Fig. 6) and older 2-valve BMWs.
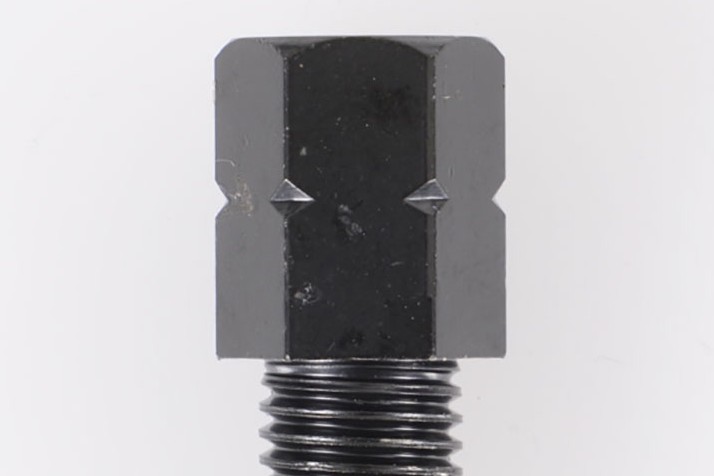
Fig. 4: The central notch identifies this as a left-handed thread
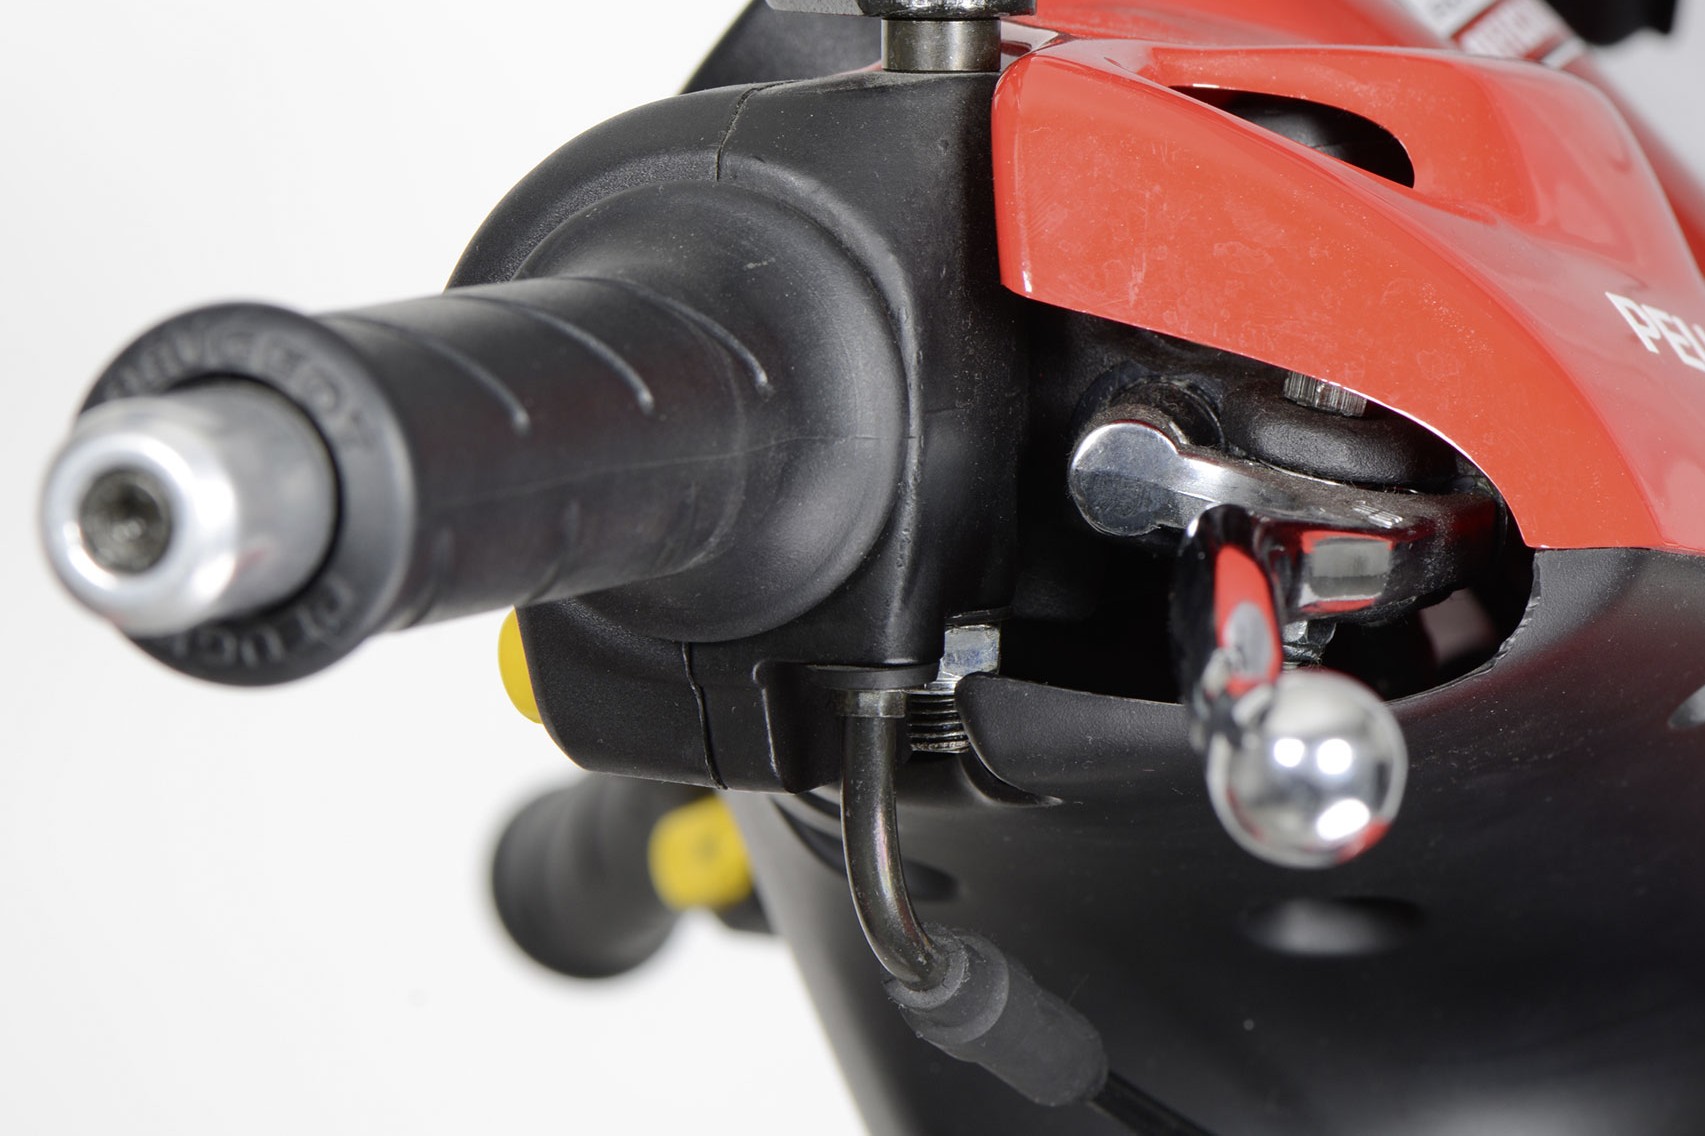
Fig. 5: Mirror with 8 mm bolt-through thread
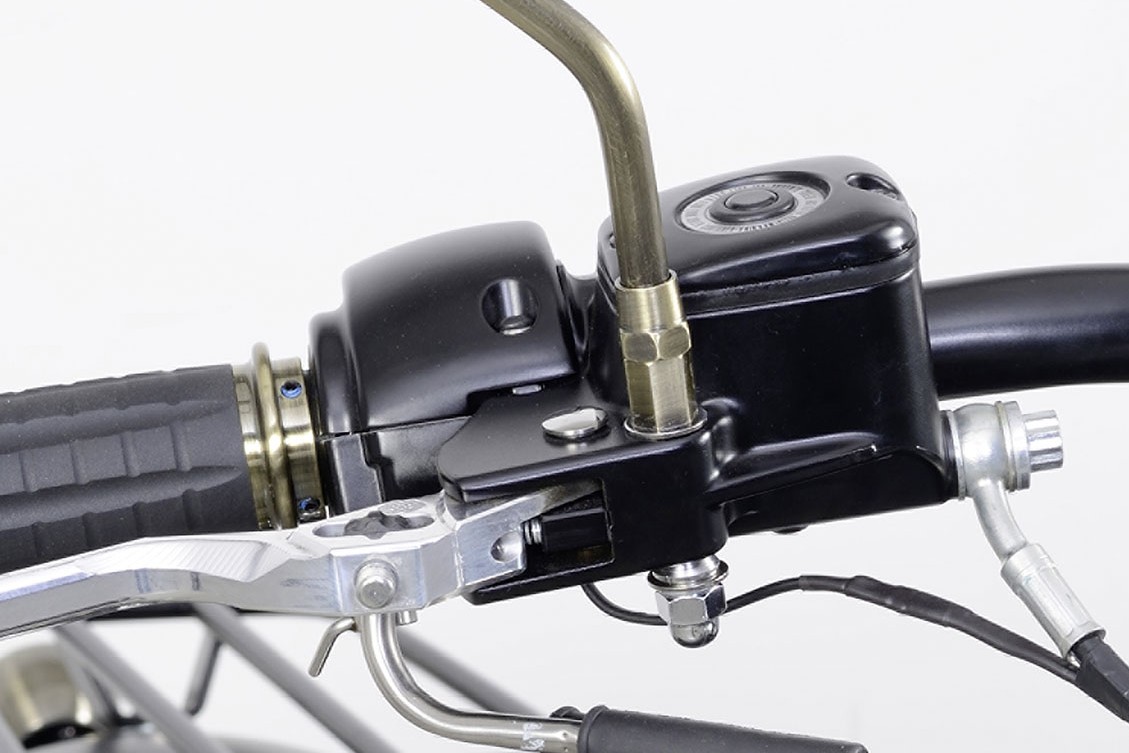
Fig. 6: Mirror with bolt-through mounting point
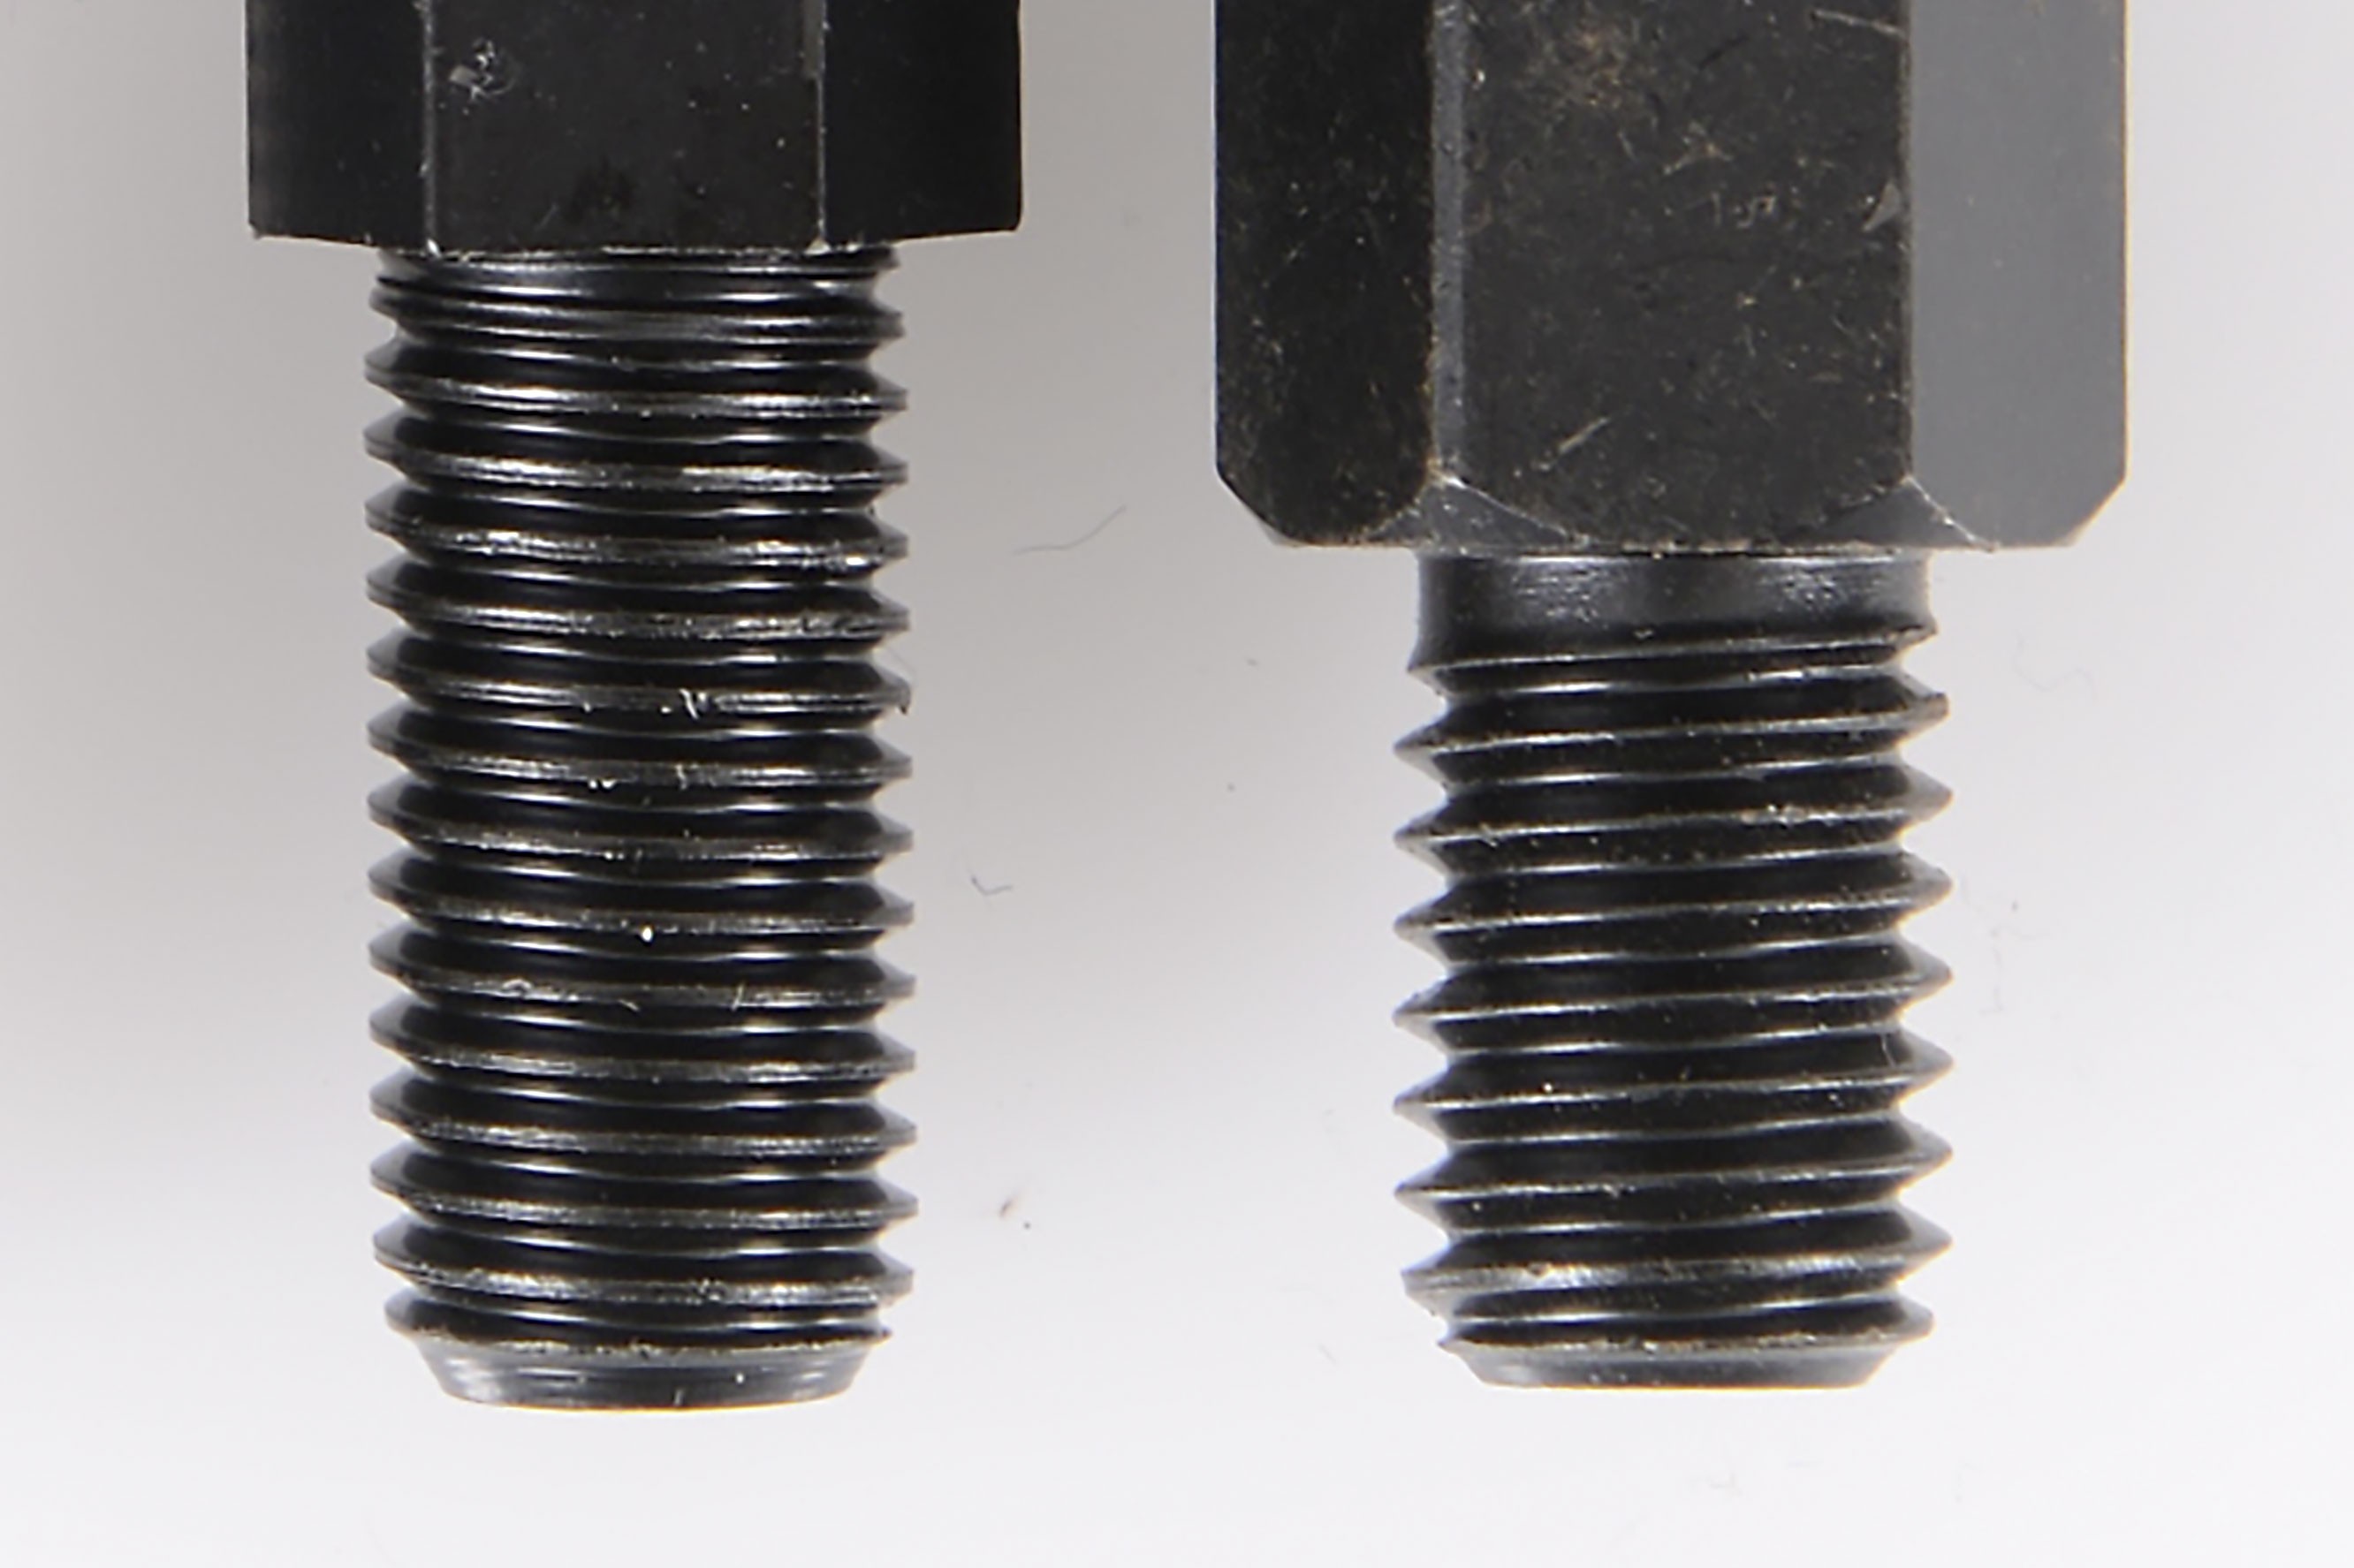
Fig. 7: Mirror threads with different pitches (M10x1.25, M10x1.5)
Newer BMWs with a short thread have a 10mm thread diameter but a 1.5 mm pitch, for which a short adapter can be used.
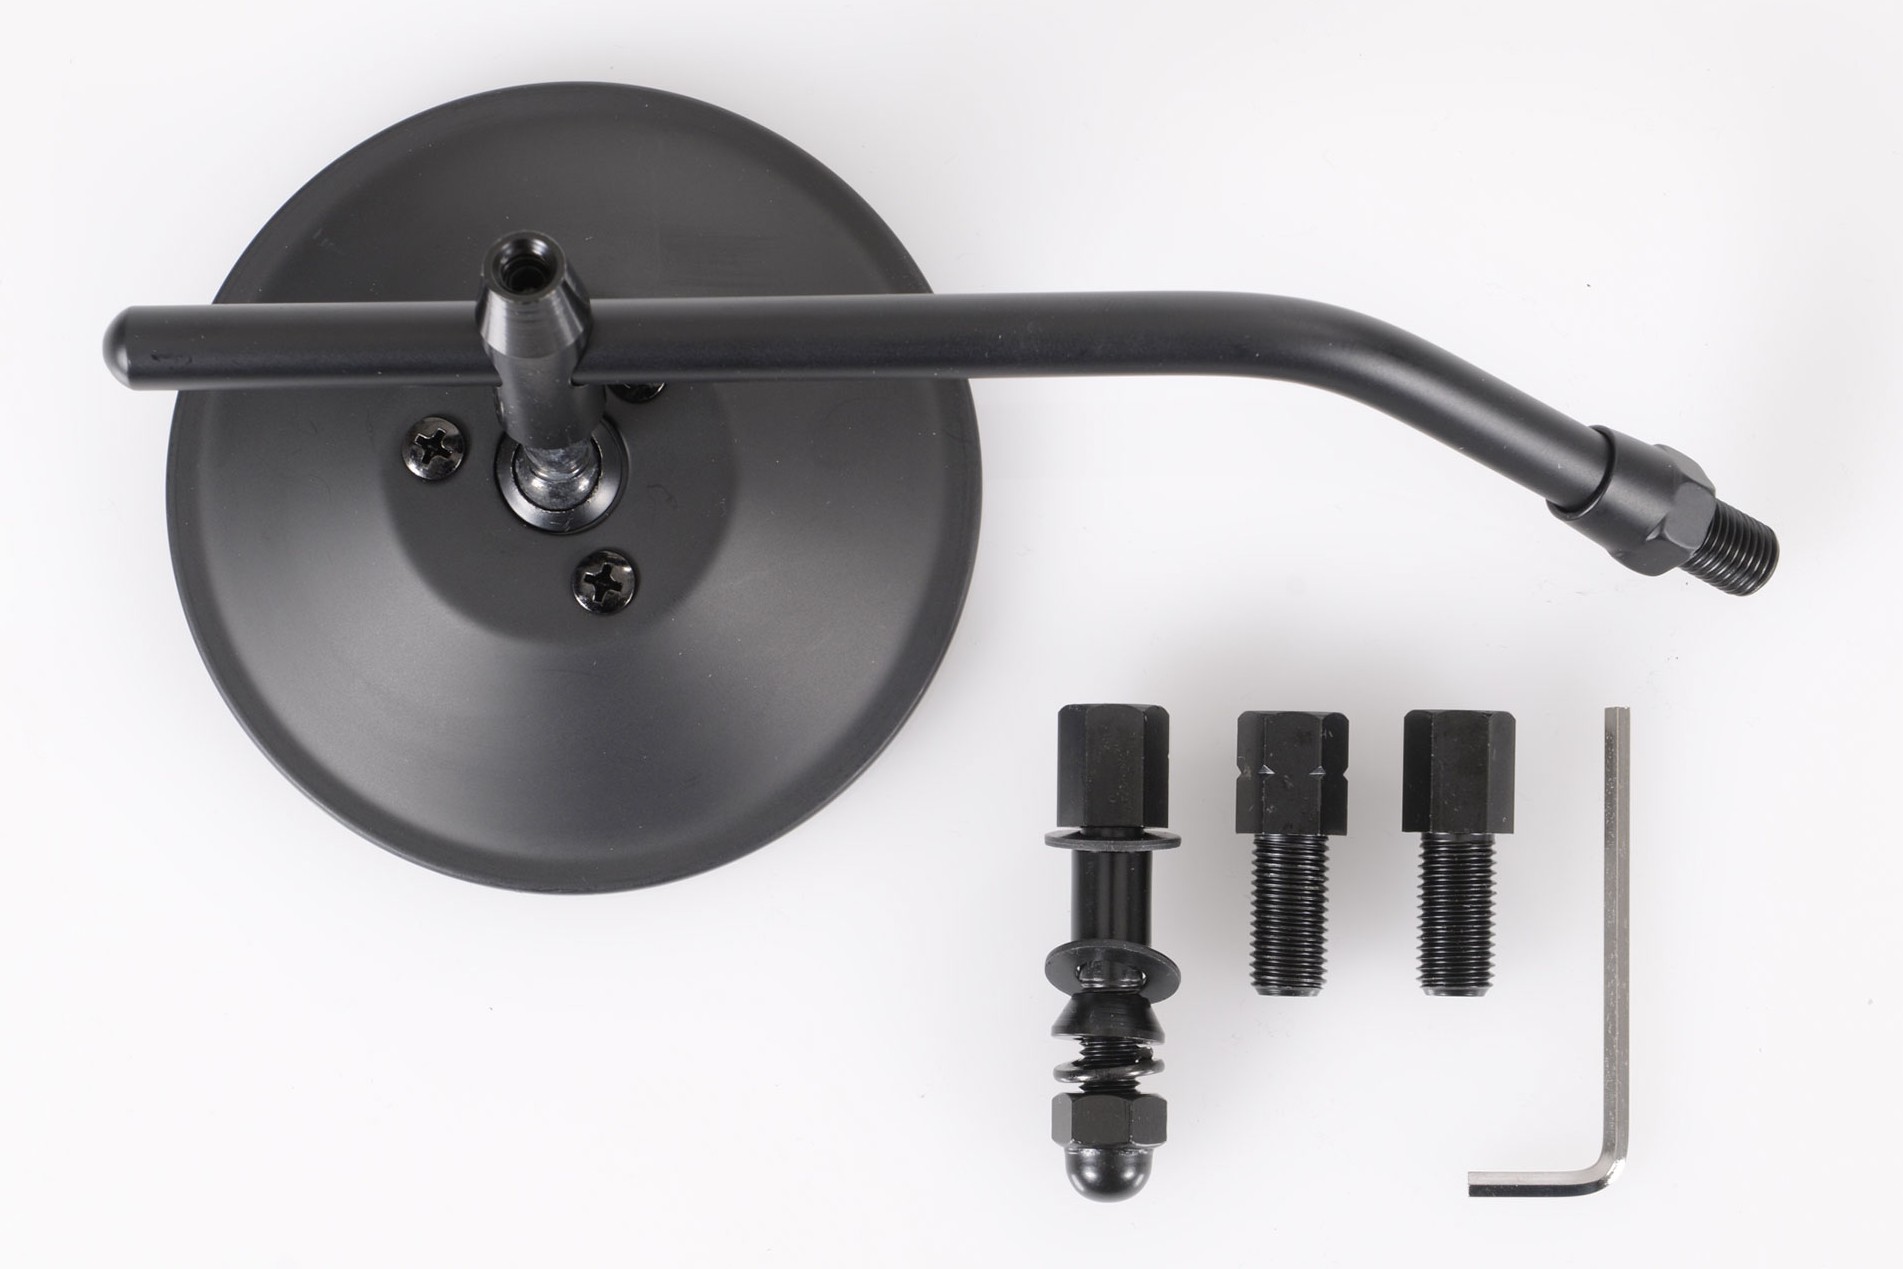
Fig. 8: Aftermarket mirrors from the Louis range complete with accessories
Many of our handlebar mirrors come complete with additional left-hand thread and Harley adapters, so you don't need to buy anything separately.
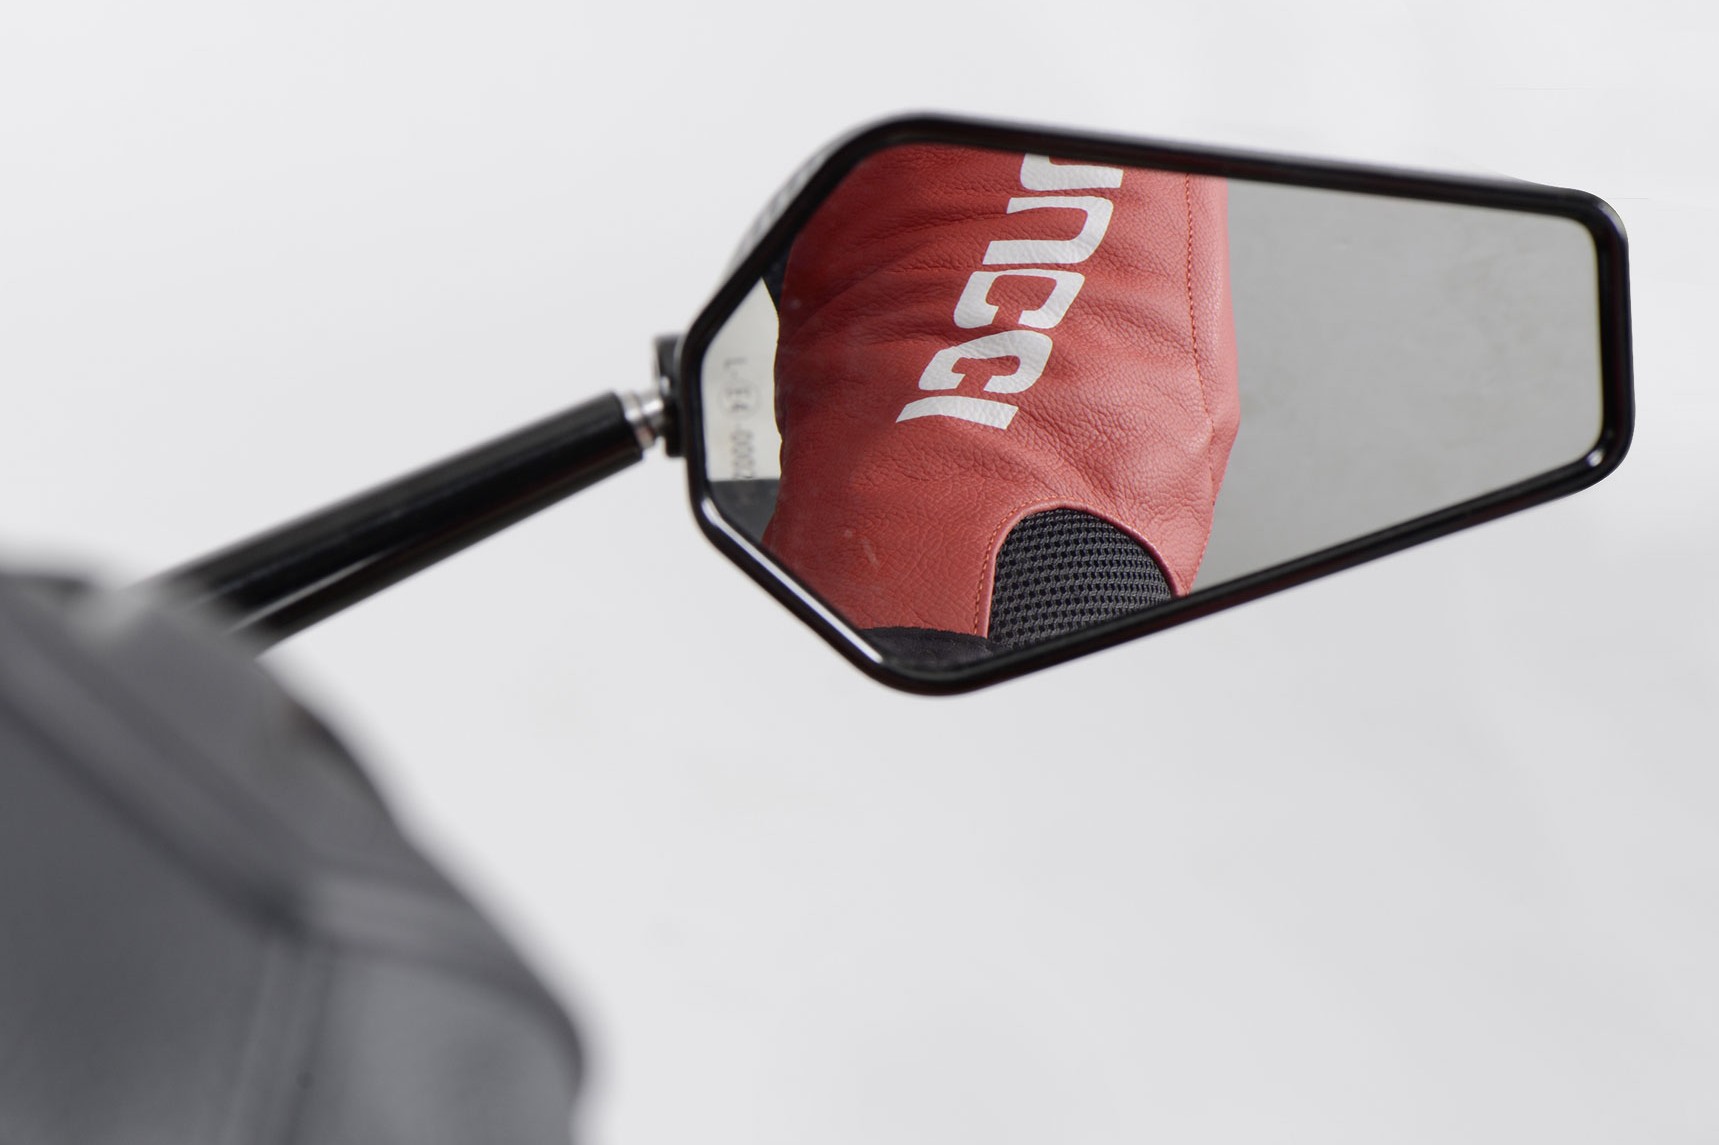
Fig. 9: Not much use: If the mirror stem is too short, all you'll see is your own sleeve
Stem length and correct adjustment are both important to ensure that your mirrors give you perfect vision. Mirrors with a short stem are only suitable for very wide or very high handlebars. On a narrow bar, your jacket sleeve would partly obscure the mirror.
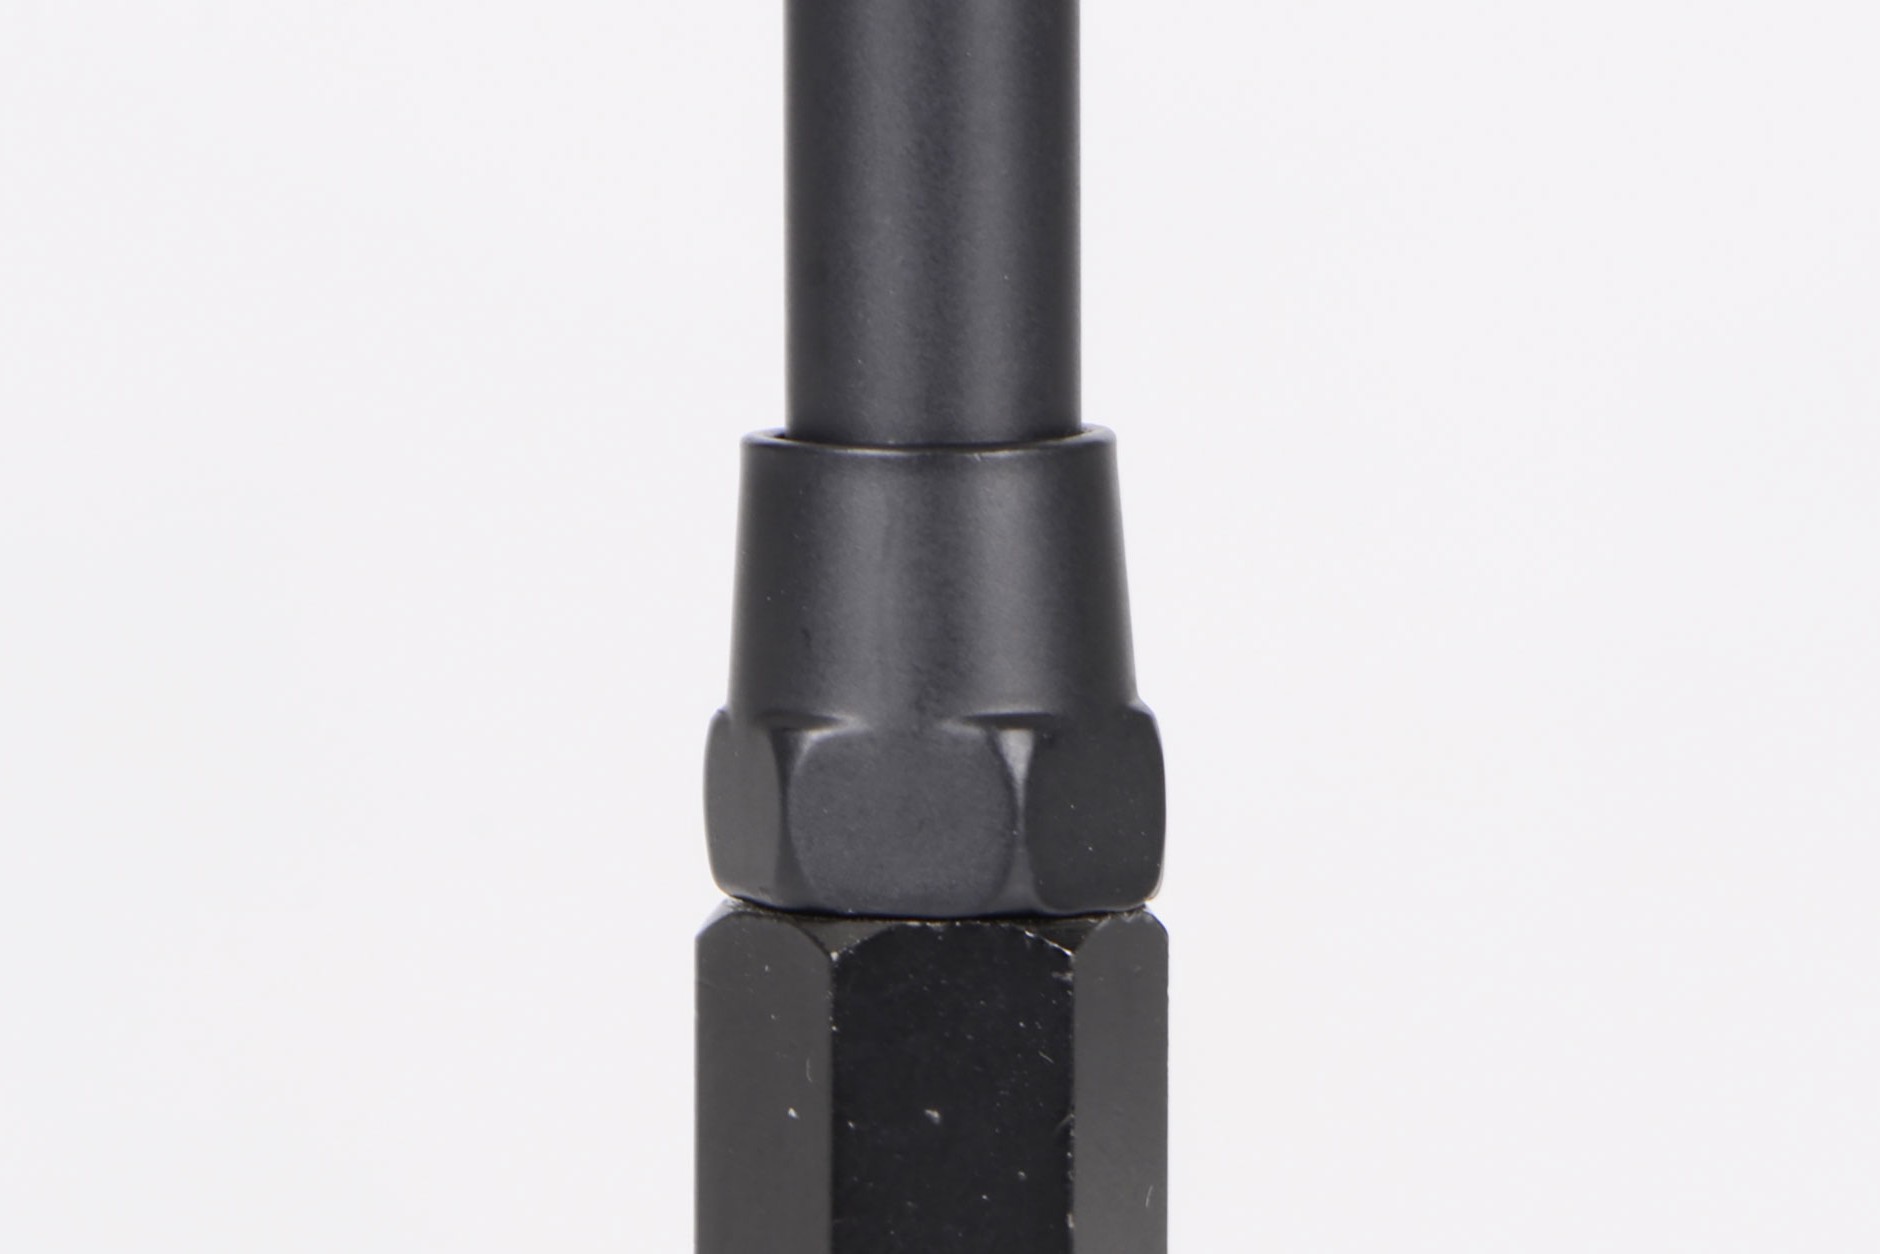
Fig. 10: A lock nut prevents the mirror working loose
Once you've adjusted the mirror, it needs to be properly secured in the lever mount, either from below in the case of a bolt-through mirror, or by tightening the lock nut at the top.
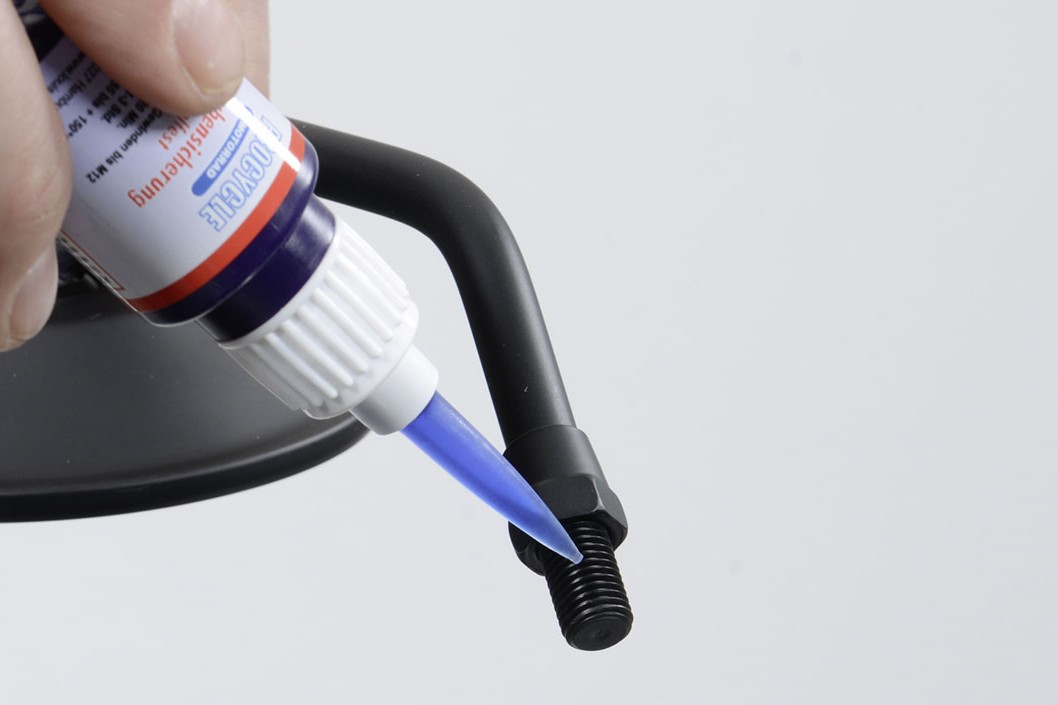
Fig. 11: Threadlocker helps prevent the mirror vibrating loose
On some Harleys, you can also secure a normal mirror without an adapter, by means of a bolt inserted from below, provided the thread matches. A drop of threadlock adhesive (medium strength) will prevent the mirror working loose due to vibrations.
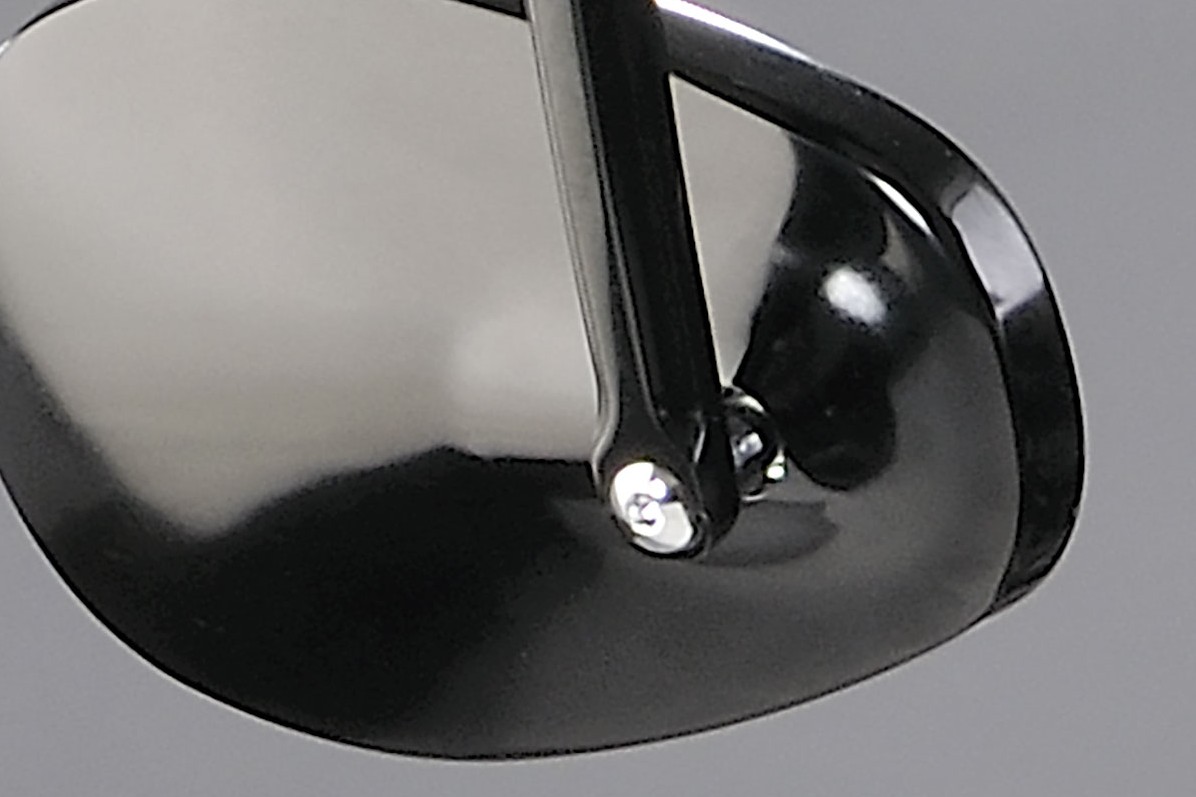
Fig. 12: Ball-head with locking screw
The next step is to adjust the mirror head so that it gives you a good view of following traffic. Some mirrors have an additional lock nut on the ball joint of the mirror head. You can tighten this nut a bit more, but gently, if the mirror head is tending to move in the airstream.
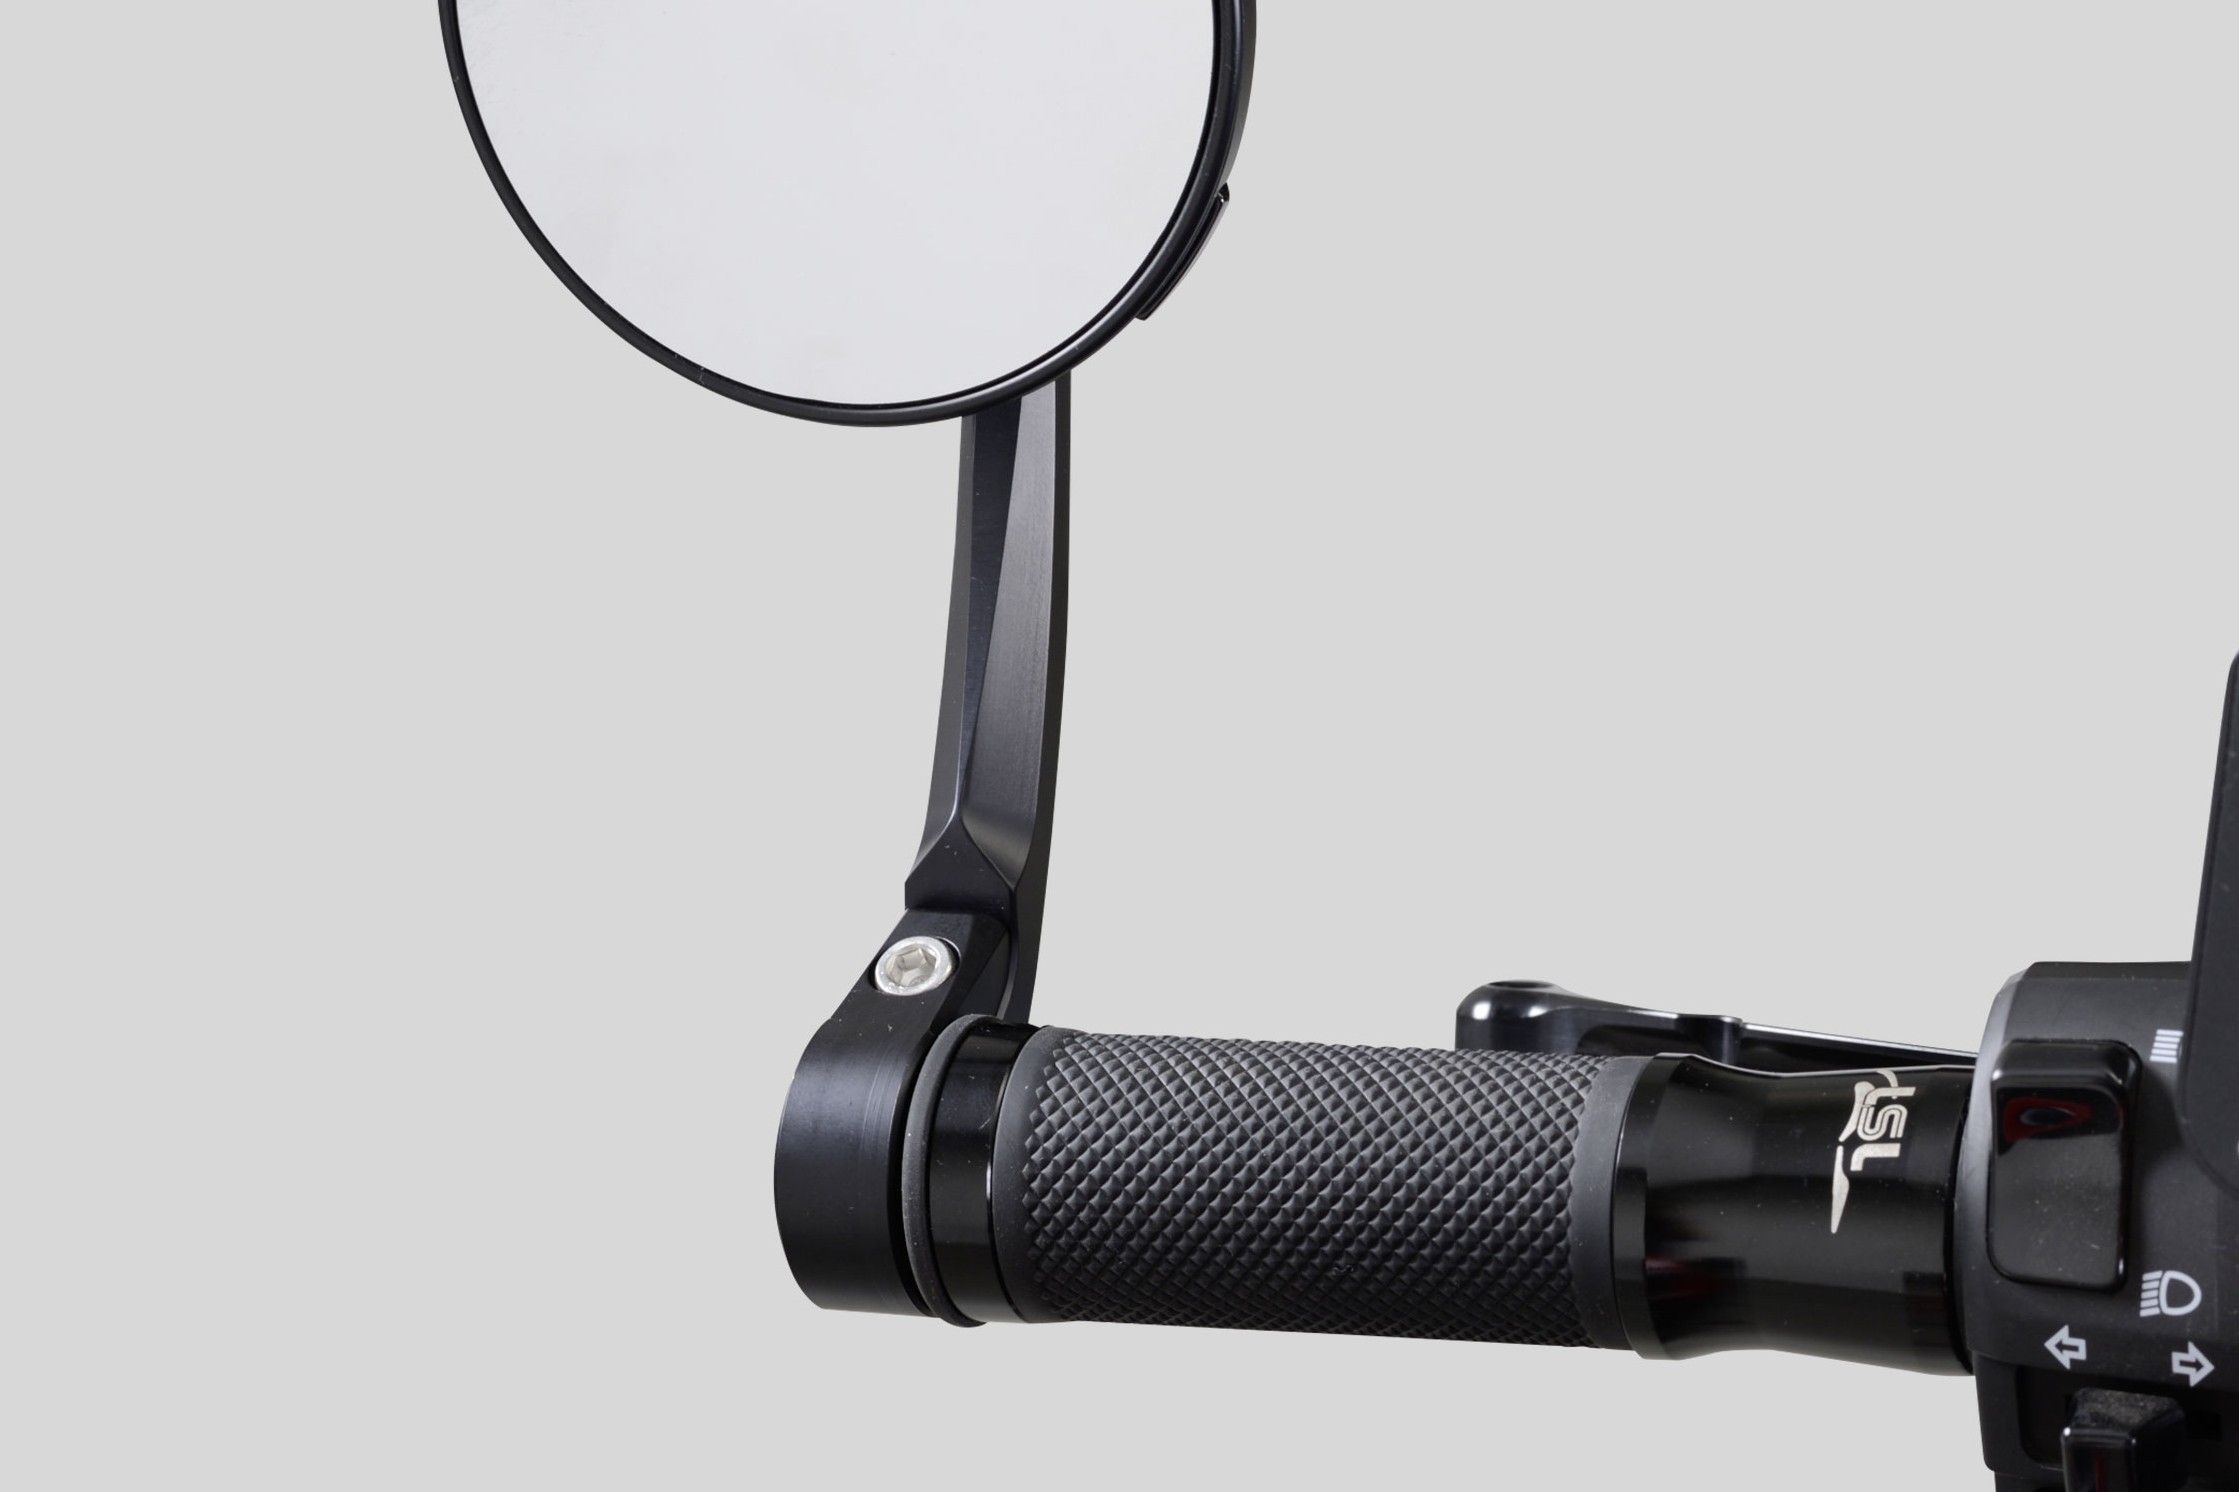
Fig. 13: Mirror clamped to the outside of the bar
Bar-end mirrors
Bikers who don't want anything to spoil the sleek lines of their streetfighter or cafe racer, for example, often like to fit bar-end mirrors. Whether over-bar or under-bar is a matter of personal preference. Both are allowed as long as the full steering lock and your rear vision are not impeded. Bar-end mirrors are either clamped to the outside of the handlebar or secured with a mounting bolt inserted into the end of the handlebar.
If they're clamped externally, you should check that there is still enough space for the handlebar grips and brake/clutch lever. If not, you will need to move the levers further in towards the middle of the handlebar.
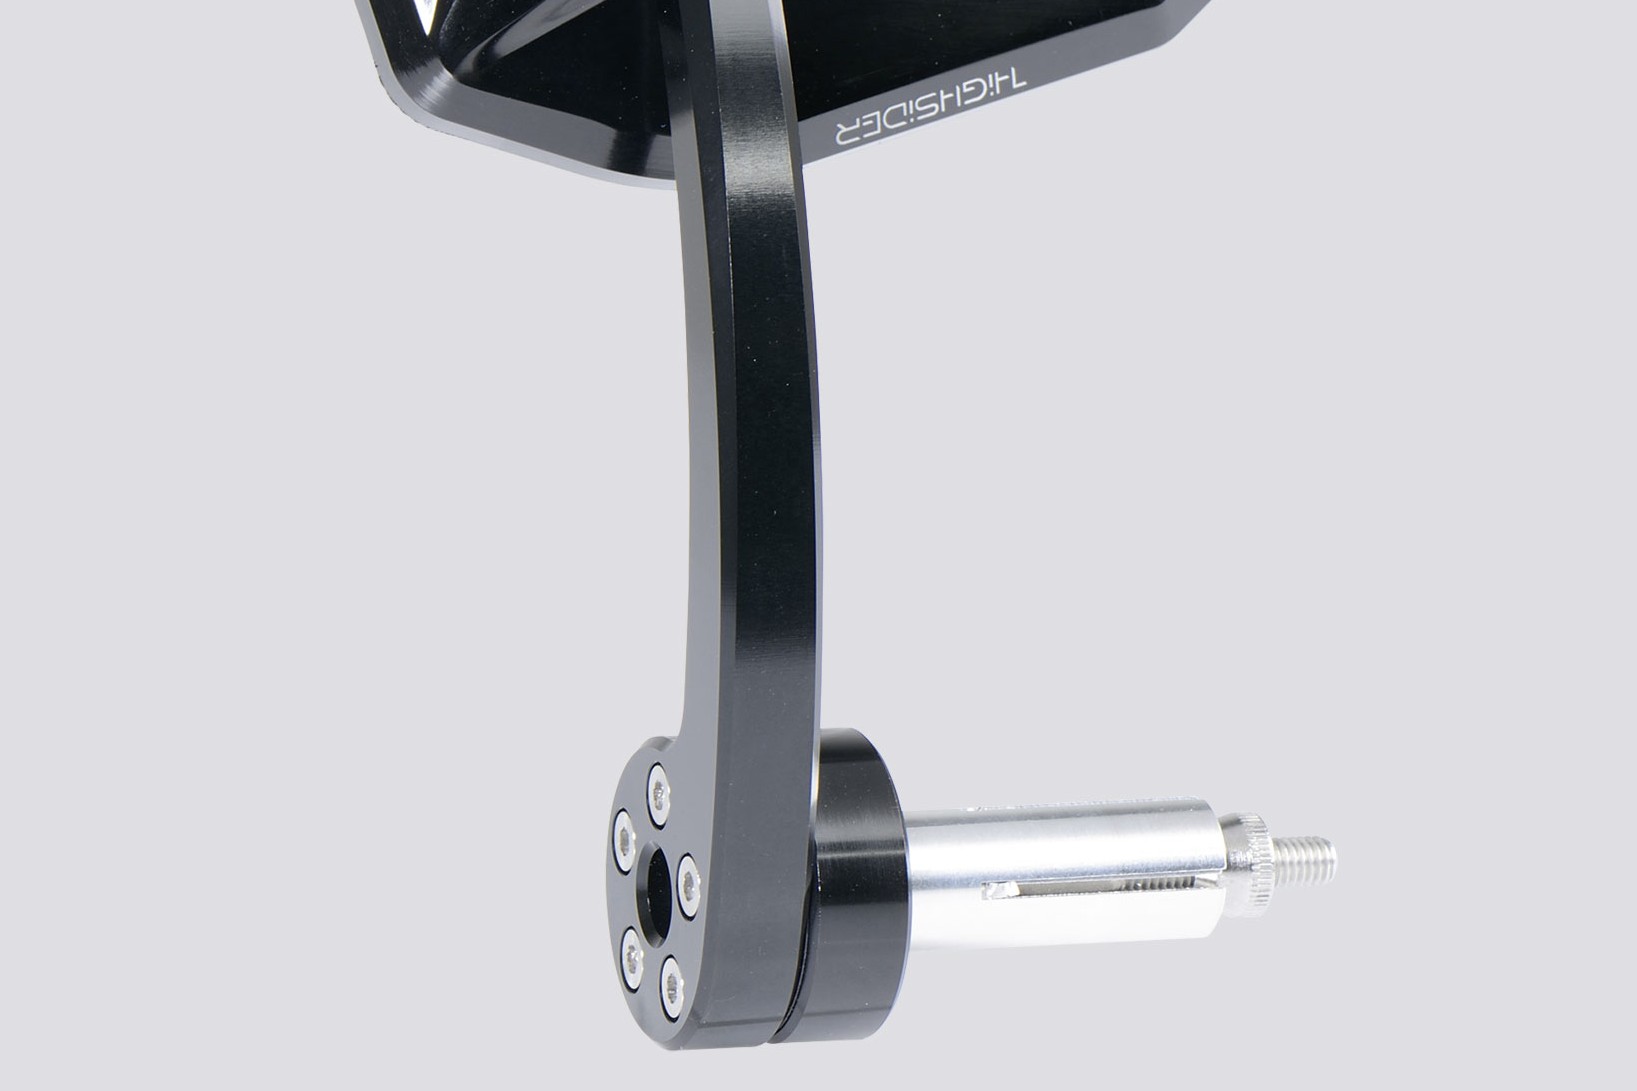
Fig. 14: Mirror with internal mounting bolt
For internal mounting, the end of the handlebar tube must be free inside. For example, there must not be a threaded sleeve from the original bar ends. If there is a sleeve, see if you can extract it – not every sleeve is designed to be removed.
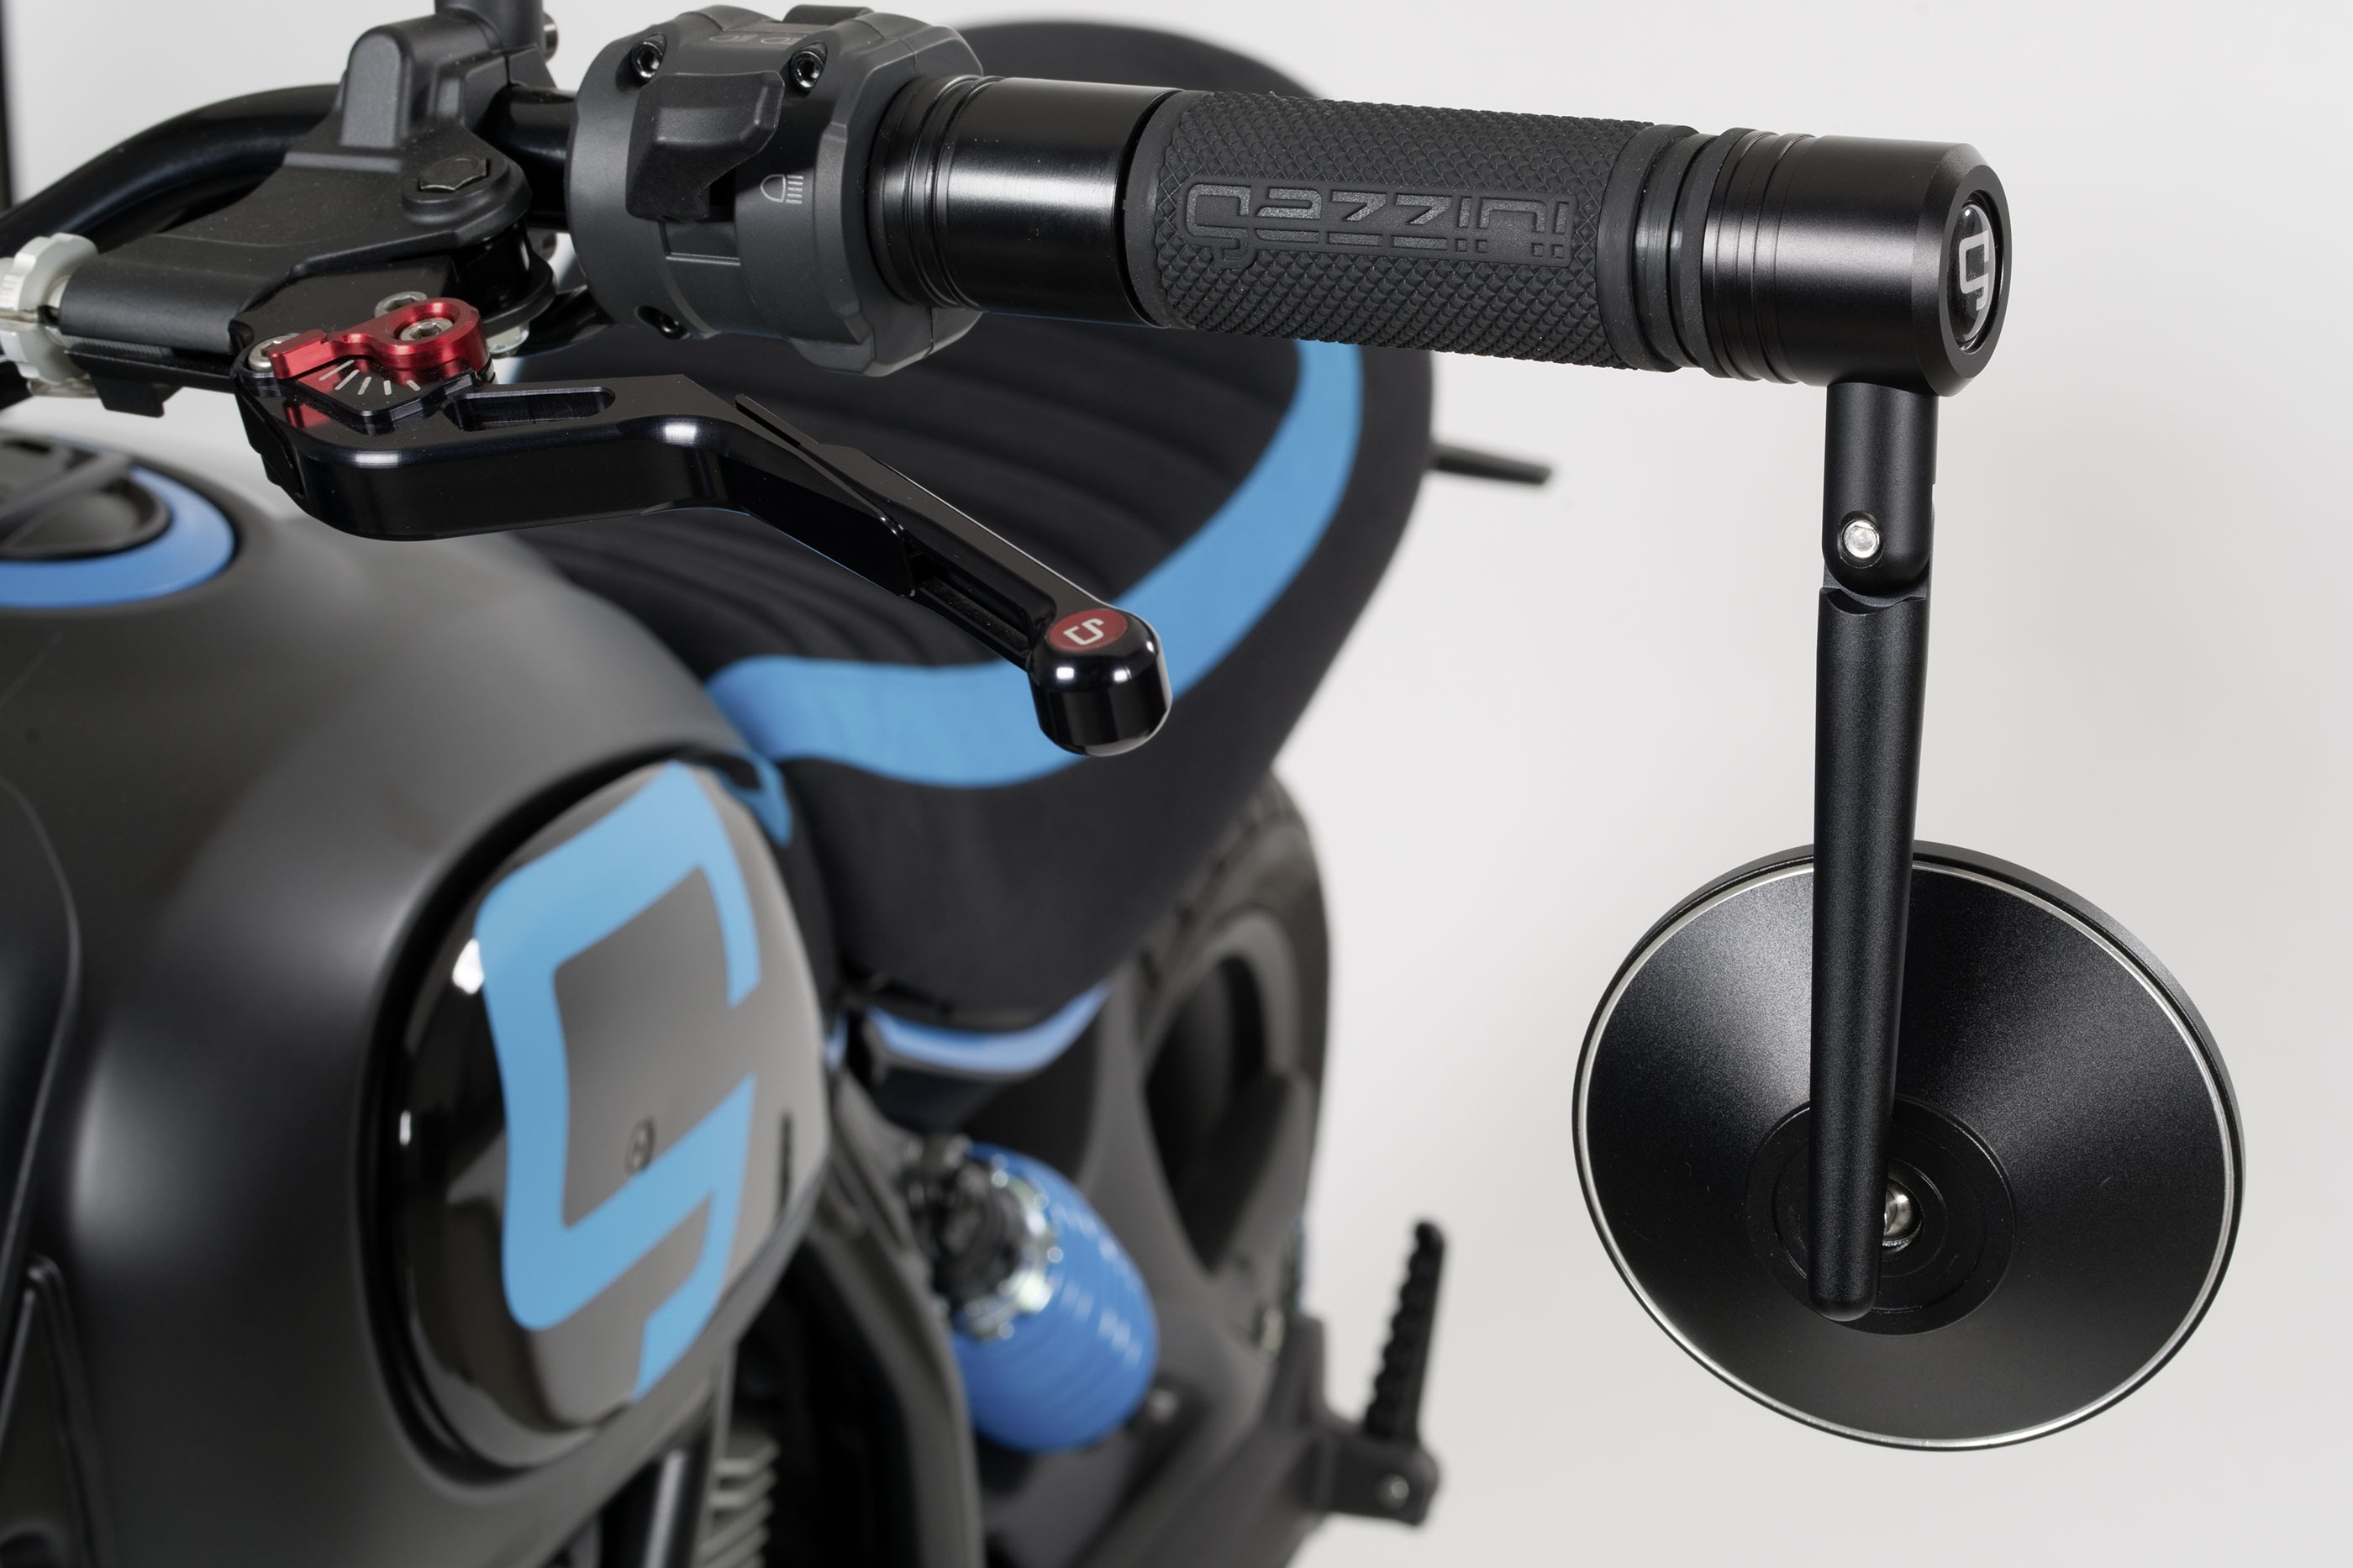
Fig. 15: Bar ends with mirror mount
A third option is to use special bar ends with an expansion anchor to lock them inside the handlebar. The mirrors are then mounted on these bar ends.
Bar ends with a rubber clamp are not suitable for mounting a mirror, as they would twist. So you should only use bar-end adapters with a metal clamp.
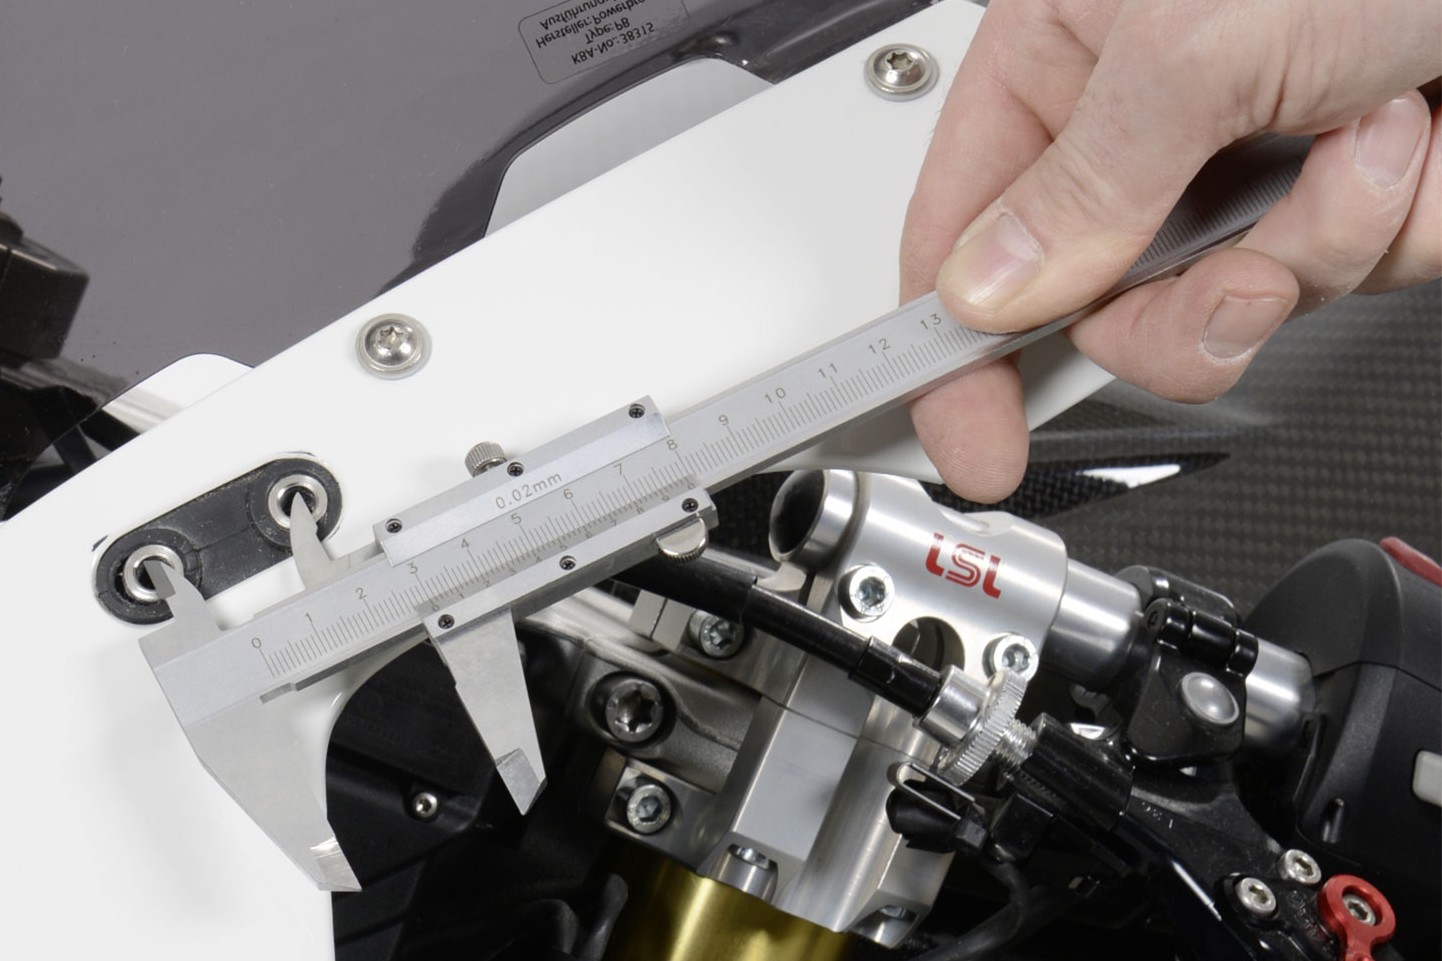
Fig. 16: Measure the bolt hole spacing with a caliper gauge
Fairing mirrors
If your original fairing mirror gets damaged, or if you want to replace it with an elegant, slimline aluminium mirror, you first need to check what securing options your fairing offers. The key factor is the spacing of the bolt holes and their position relative to the angle of the mirror stem.
Then you need to check that the adapter base of your chosen mirror matches up with the hole spacing (usually they will be slotted holes to allow variable spacing) and that the mirror with adapter can be positioned on the fairing at the angle you require.
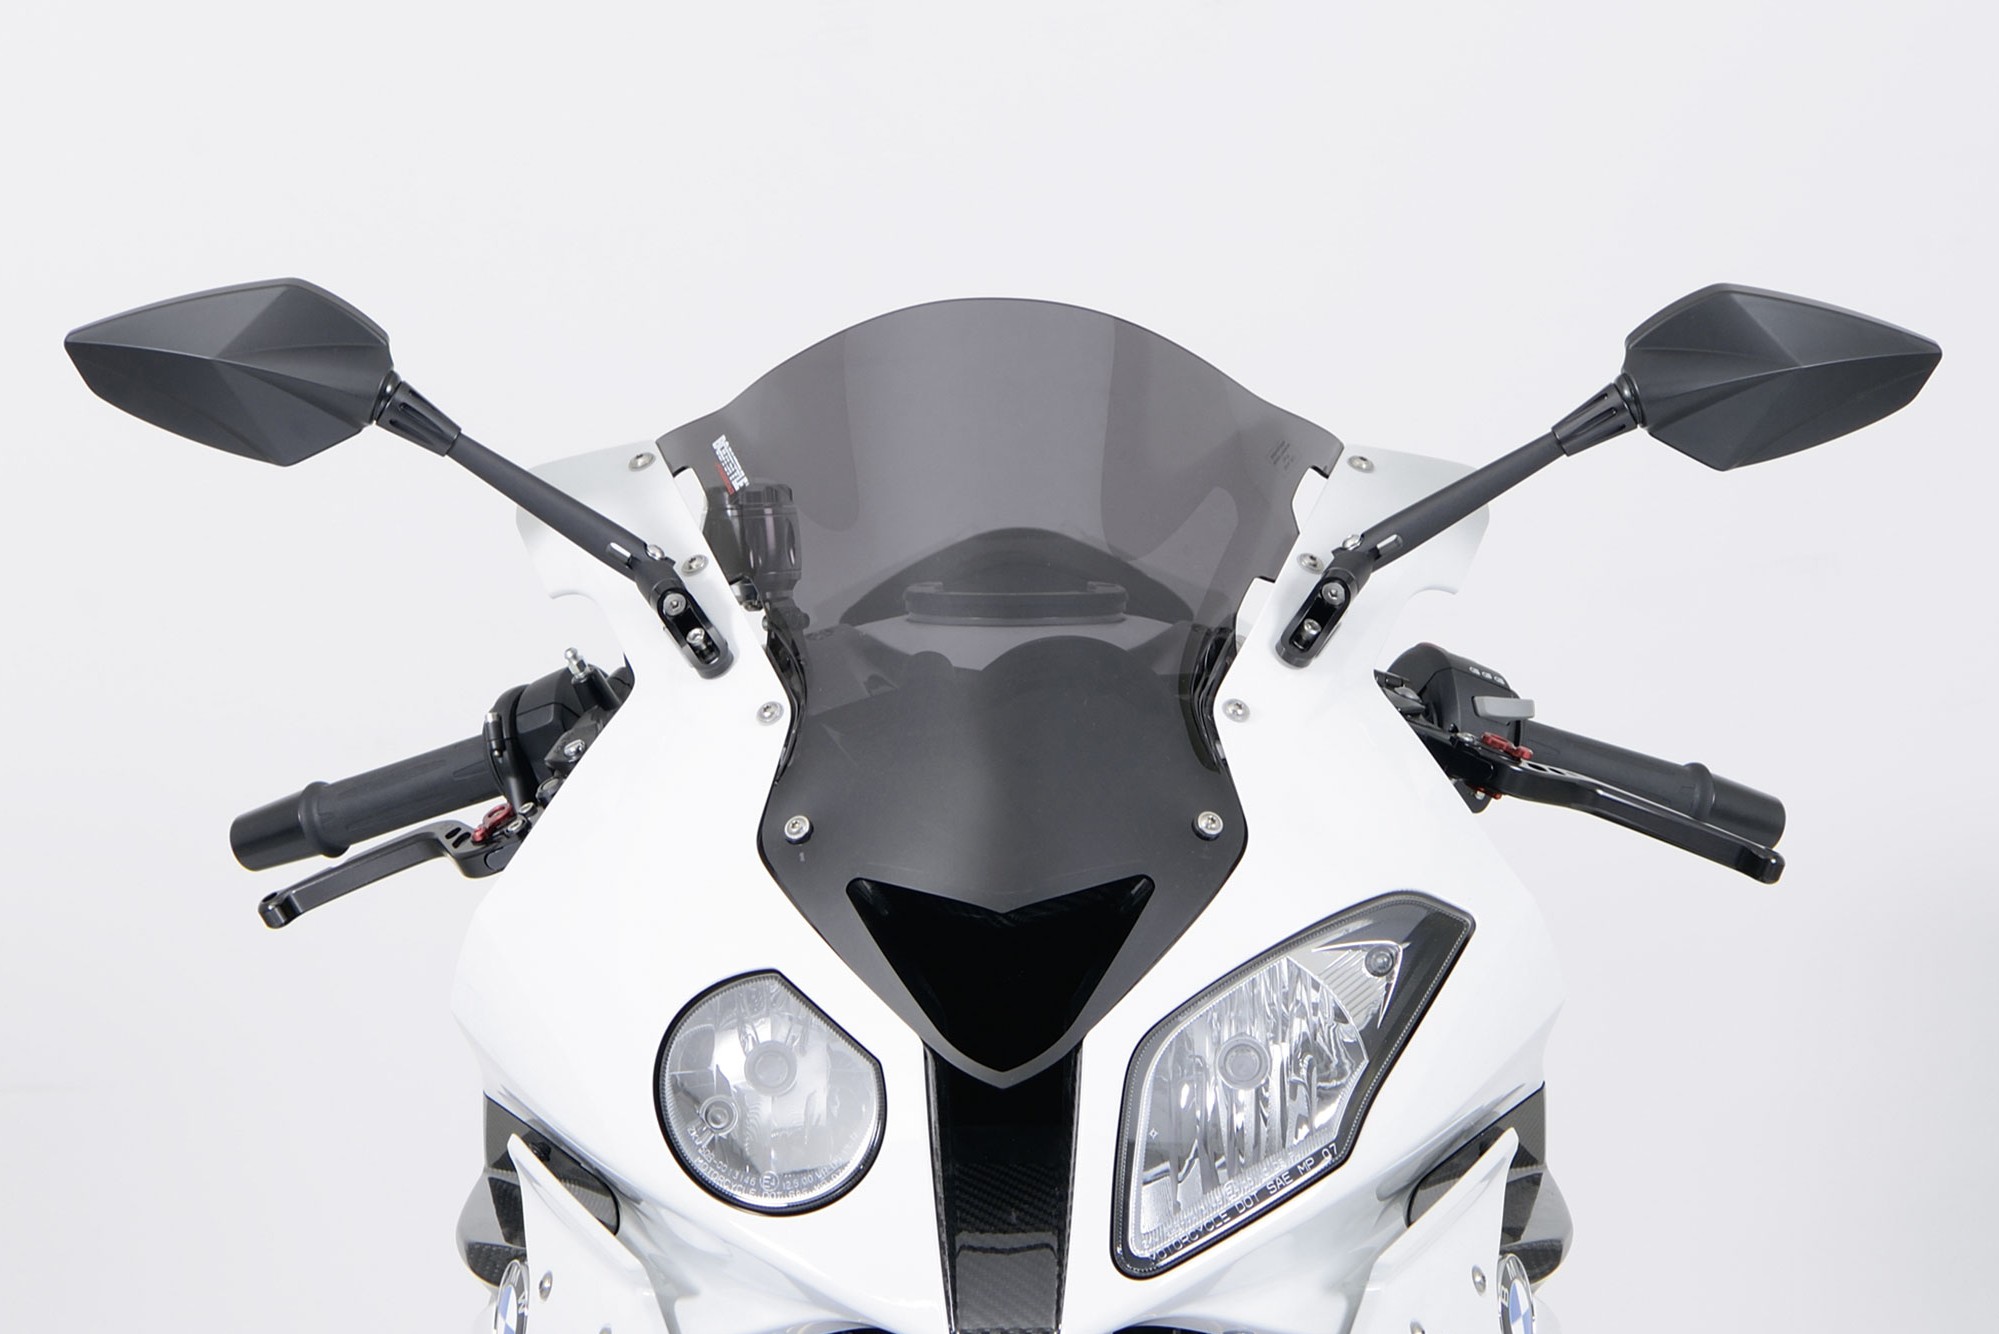
Fig. 17: Here's how it fits: aftermarket mirrors on a BMW S1000RR
Modular gazzini Mirror System
If you prefer to put together the optimal mirror for your bike from individual components, gazzini offers an ingenious modular system. Different shapes of mirror housing, various stem lengths and a range of mounts for the brake/clutch lever, bar end or fairing can be combined in any way you like. So you can create your ideal mirror or adapt existing components if you get a new bike or if you're doing a conversion (Fig. 18).
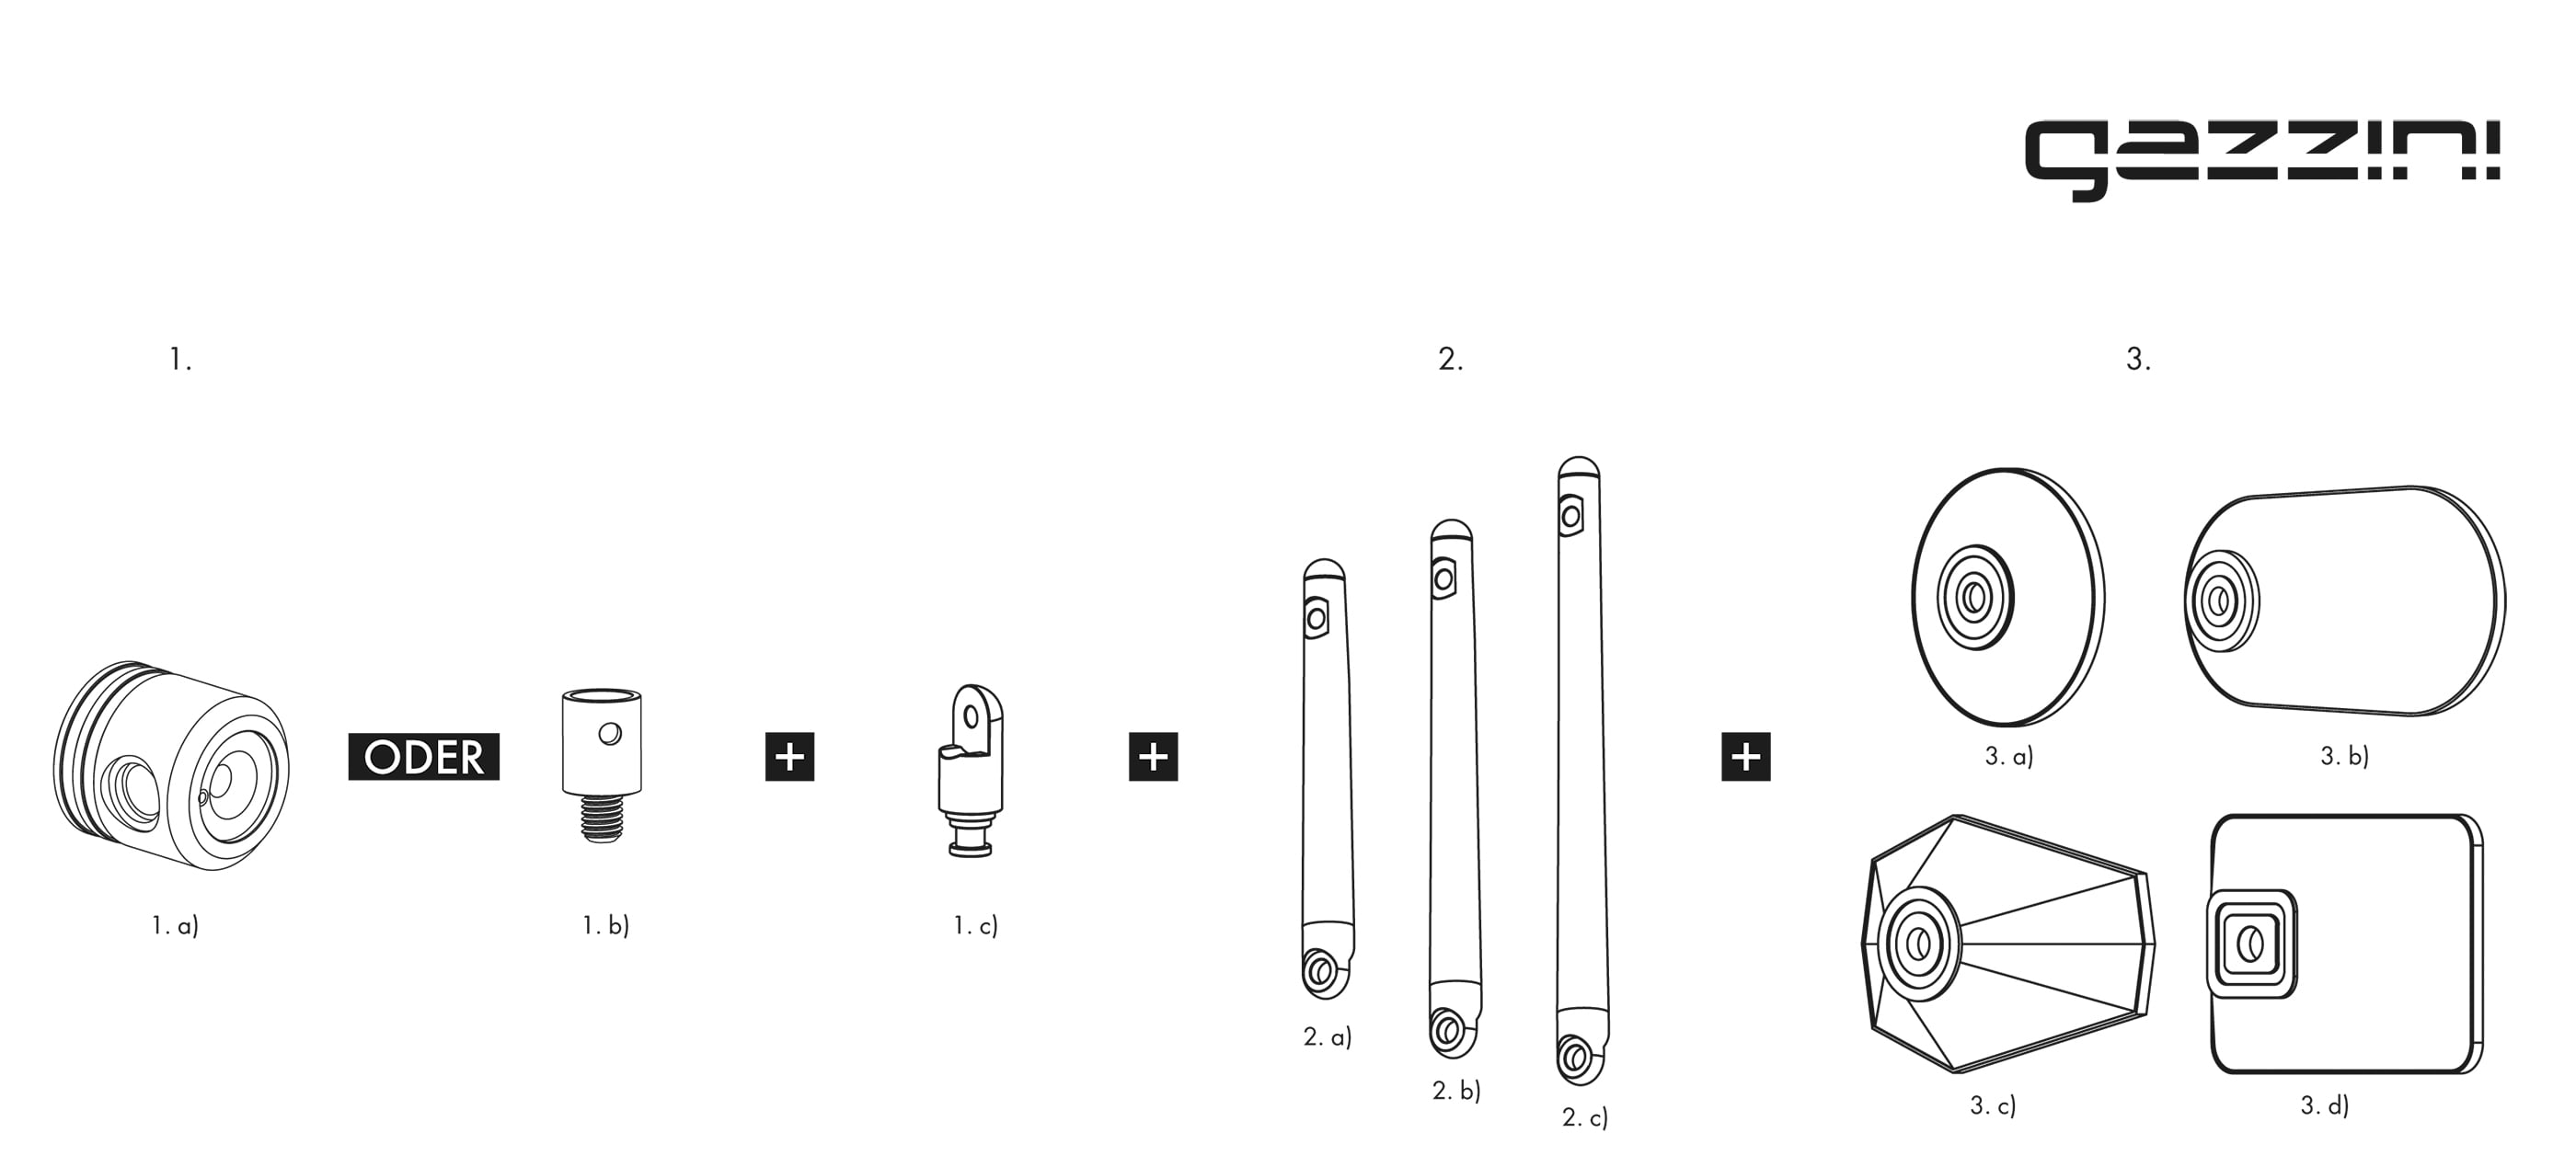
Fig. 18: Modular gazzini Mirror System
1. = Select type of mounting
2. = Select mirror stem
3. = Select mirror shape
1. a) = Bar end with joint mount
1. b) = Adapter for brake/clutch lever
1. c) = Mirror joint (Available in: M10x1.25 RH thread; M10x1.25 LH thread; M10x1.5 RH thread; M8x1.25 RH thread
2. a) = Short
2. b) = Medium
2. c) = Long
3. a) = Round
3. b) = Oval
3. c) = Octagonal
3. d) = Oblong
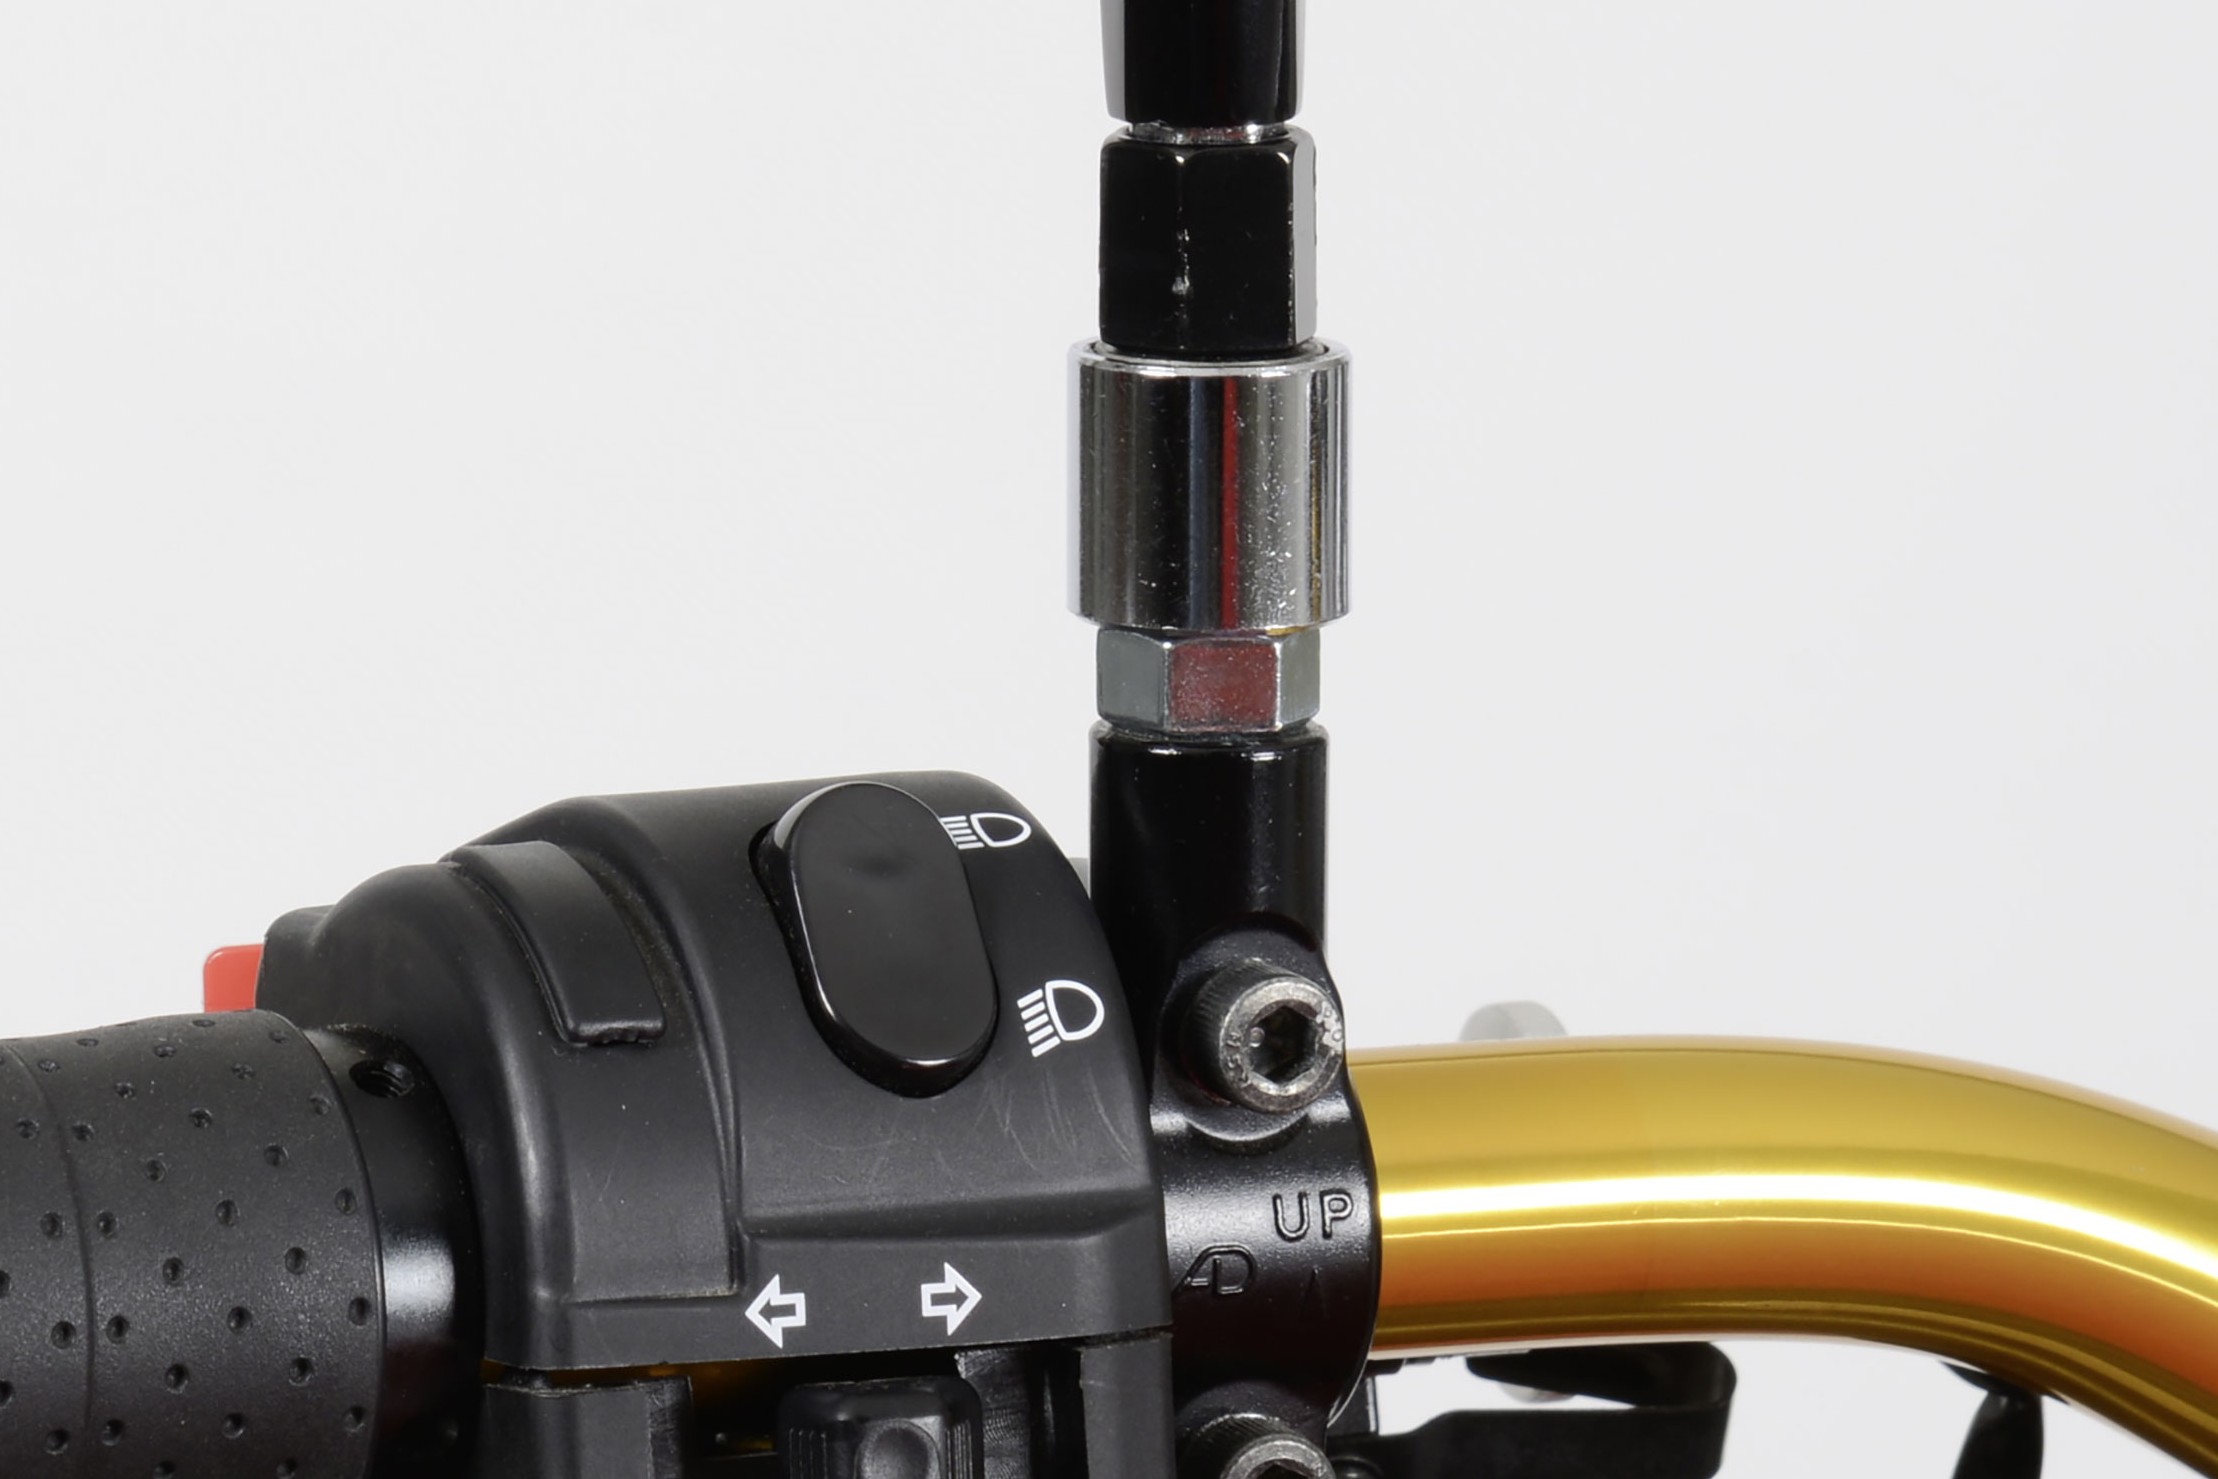
Fig. 19: Adapter with vibration damper
Vibration problems
If vibrations make it hard to see clearly in your mirror, there are various remedies to choose from. However, vibrations are difficult to calculate, so it's always a matter of trying out different things. First of all, you need to find out whether your bike's vibration is normal. Excessive vibration may mean that the engine mountings have worked loose or there is a problem with the engine itself. Vibrations tend to be worse with a short, straight handlebar, whereas they're able to "disperse" more easily along a wider, curved bar. So your choice of handlebar for your particular motorcycle may be a factor in whether you get annoying vibration at certain engine speeds, which makes your fingers go numb and also blurs everything in your mirrors. Some mirrors have a vibration damper in the base, comprising an adjustable spring and a thread.
You can also insert a rubber vibration damper between the mirror base and the brake/clutch lever mount.
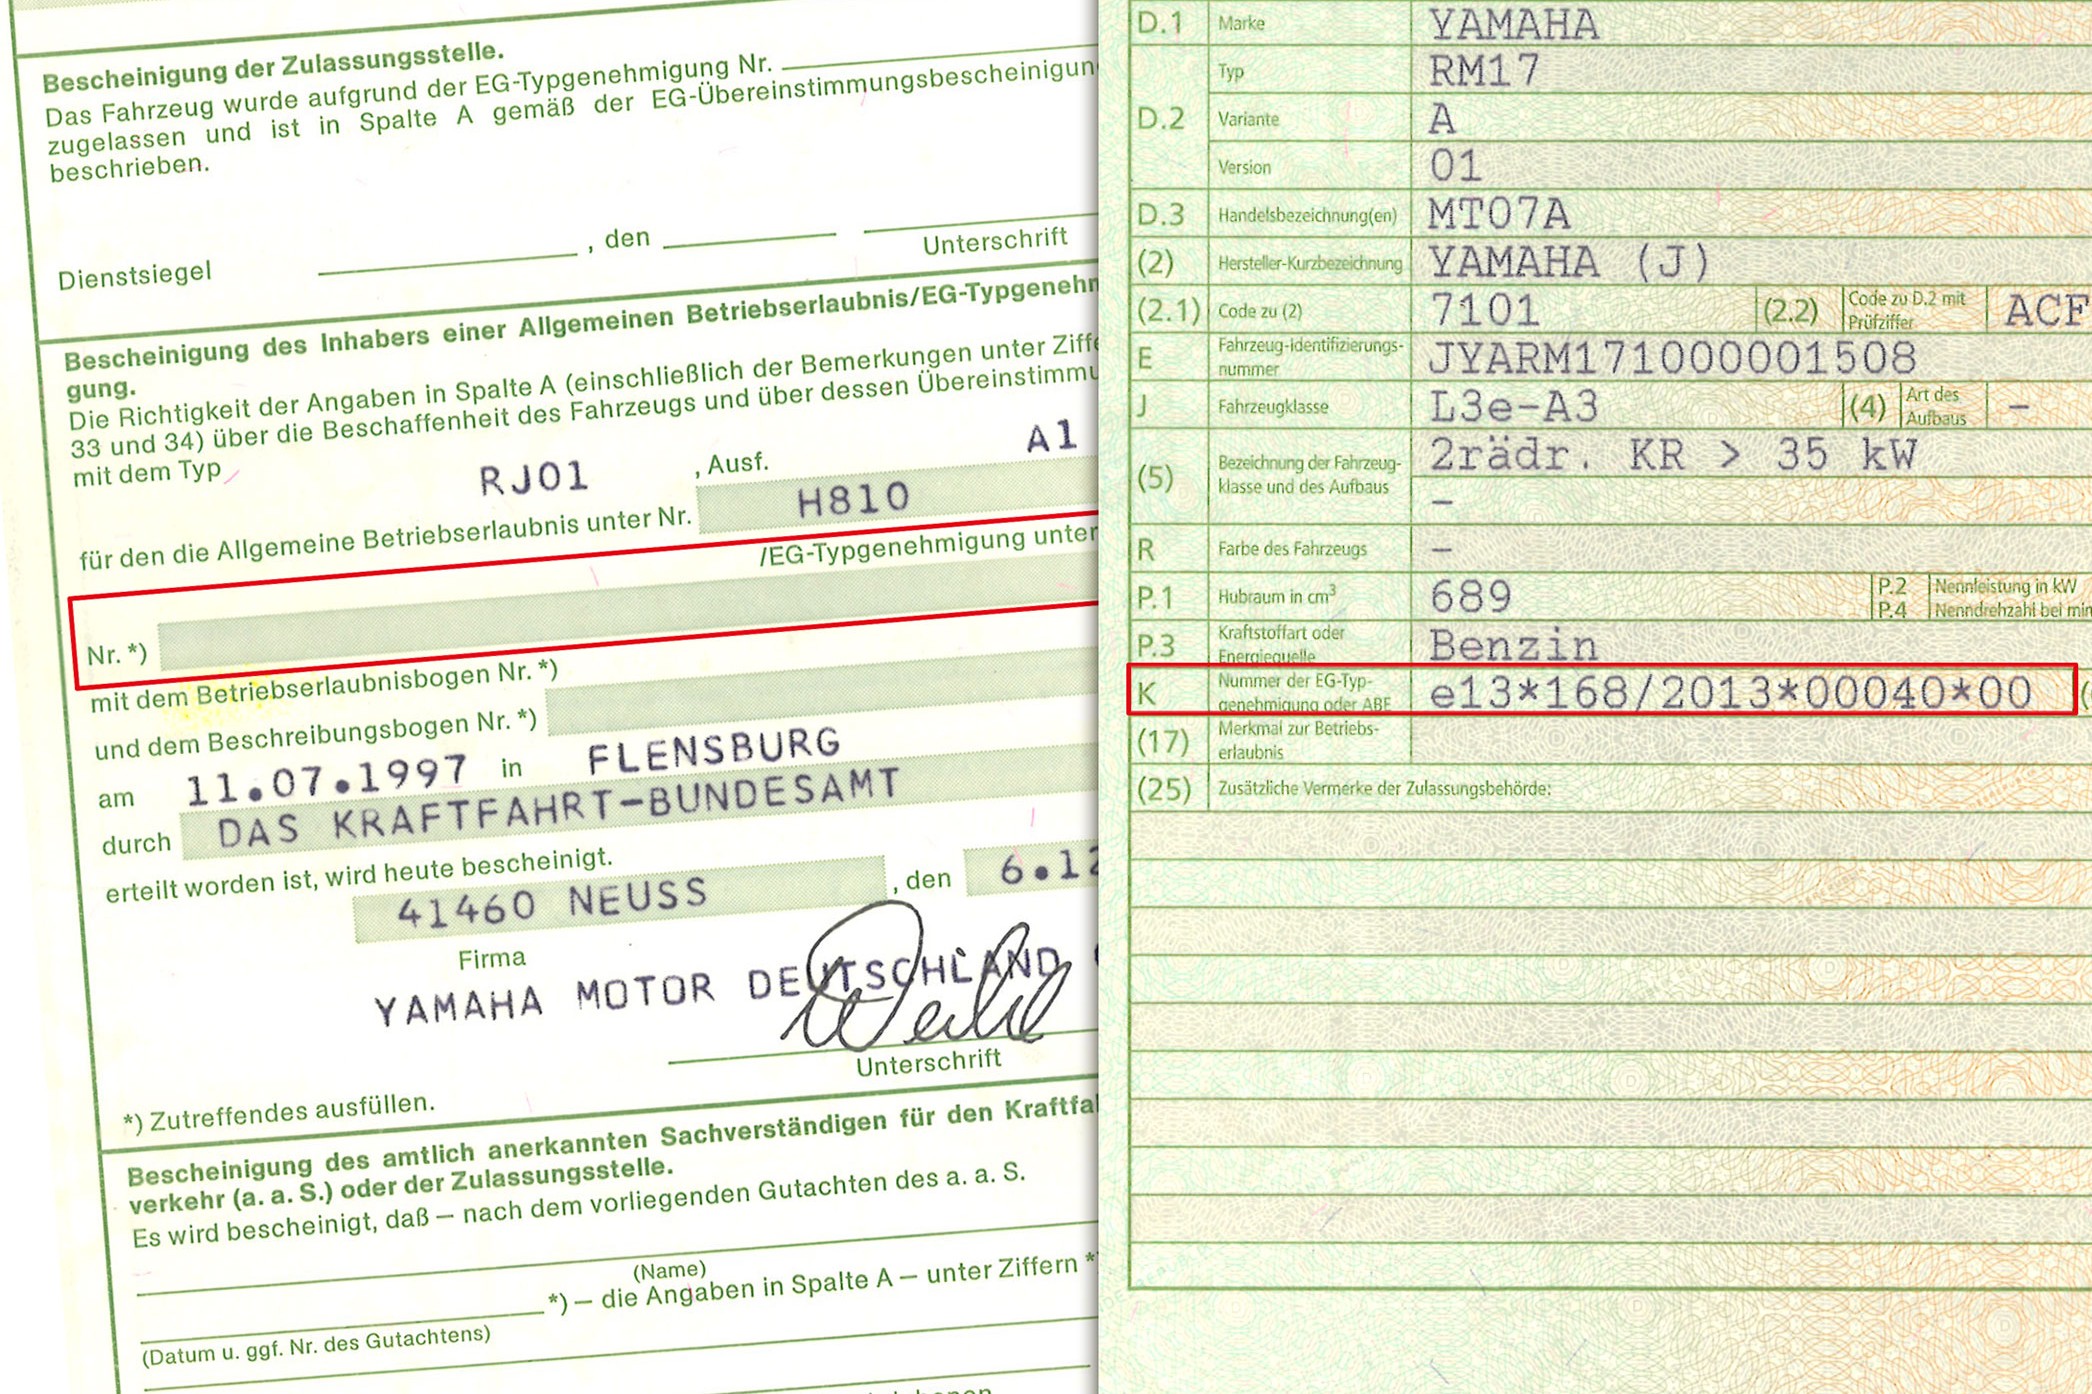
Fig. 20: The bike on the right is approved under EU law, but not the one on the left
So what is street-legal? (Only valid for Germany)
What you should always consider when buying new rear-view mirrors:
Modern motorcycles generally have EC type approval (check this in the vehicle registration certificate, column "K". The number begins with the letter "e"). On these motorcycles, only E-marked mirrors are permitted. If the mirror carries an E mark, it complies with the required minimum size of 69 cm² and is therefore street-legal. Motorcycles first registered before 17/6/2003 will not usually have EC type approval (check column "K" in the new-style vehicle registration certificate, or P. 4 in older certificates). For these motorcycles, a mirror size of 60 cm² is adequate.
The Louis Technical Centre
If you have a technical question about your motorbike, please contact our Technical Centre, where they have endless experience, reference books and contacts.
Please note!
These tips for DIY mechanics contain general recommendations that may not apply to all vehicles or all individual components. As local conditions may vary considerably, we are unable to guarantee the correctness of information in these tips for DIY mechanics.
Thank you for your understanding.


