Motorcycle wheel stripes
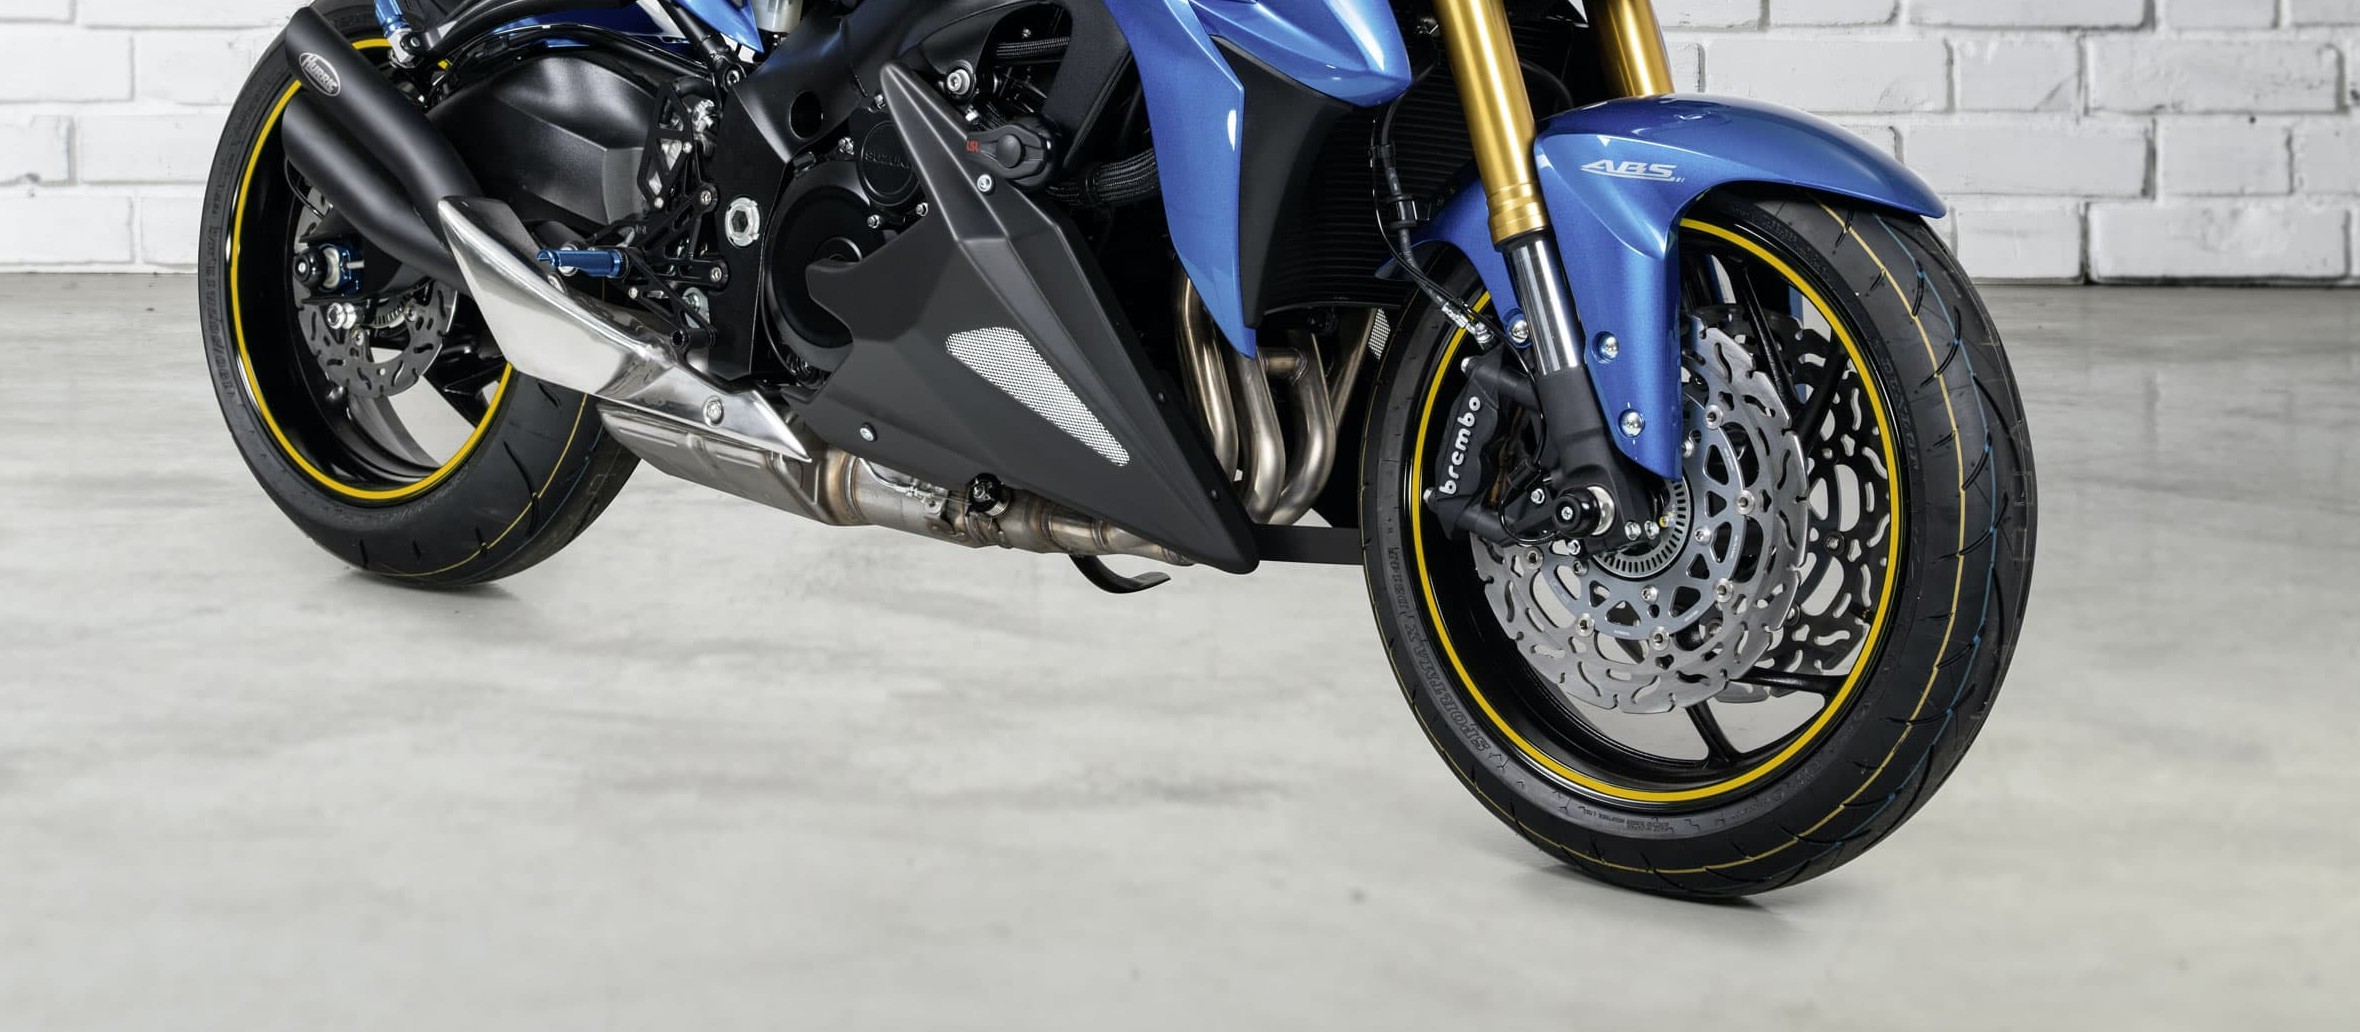
Self-adhesive wheel stripes give your bike a fresh new look with a splash of colour. They accentuate contours and shapes, and personalise your motorbike with minimal effort.
Note: The videos are in German.
- Motorcycle wheel stripes
- Option 1: Applying the stripe from the roll – now let's get started
- 01 – Clean the rim
- 02 – Bend the applicator guide to fit the rim
- 03 – Thread the adhesive stripe into the narrow slot
- 04 – Pull off liner and thread it through the wide slot
- 05 – Turn wheel to affix the stripe
- 06 – Cut off leaving an overlap
- 07 – Apply to the other side of the rim in the same way
- 08 – Also brightens up other parts of your bike
- Our recommendation
- Option 2: Applying preshaped stripes – now let's get started
- 01 – Cut apart segments of wheel stripe
- 02 – Position first segment, pull off liner and stick to rim
- 03 – Pull off the clear cover strip
- 04 – Segment ausmessen und markieren
- 05 – Check spacings
- Bonus tips for real DIY mechanics
Motorcycle wheel stripes
Self-adhesive decorative (wheel) stripes give your bike a fresh new look with a splash of colour, highlighting contours, brightening up plain surfaces and accentuating shapes. So you can personalise your motorbike at very little cost. At the same time, the luminous effect makes your bike more visible in traffic, and the easier you are to see, the safer you'll be (passive safety). Wheel stripes are available either as a roll (the most economical option), which is applied to the rim edge using a special applicator, or as preshaped stripes. Applying stripes from the roll requires a little more skill, but they look better on classically styled motorbikes. And they're also a great way to liven up and personalise other parts of your bike. The styling of the preshaped stripes makes them ideal for sporty bikes.
To get the best results, do not apply these adhesive stripes in low temperatures, as they tend to go stiff if they're too cold. Ideally the temperature should not be below 15°C. To make the stripes more supple, you can also warm them up a bit near a radiator prior to use.
If you jack up your bike so that the wheel turns, you'll be able to apply the stripes without removing the wheel. Use suitable front and rear paddock stands to make sure your motorbike is good and stable see DIY tip Motorcycle Stand Basics. Of course, the ideal solution is a motorcycle hoist, so that you can lift the bike to a comfortable working height. You should stand your bike on a clean surface for this job. If necessary, put down a sheet of cardboard or a piece of carpet or workmat.
Option 1: Applying the stripe from the roll – now let's get started
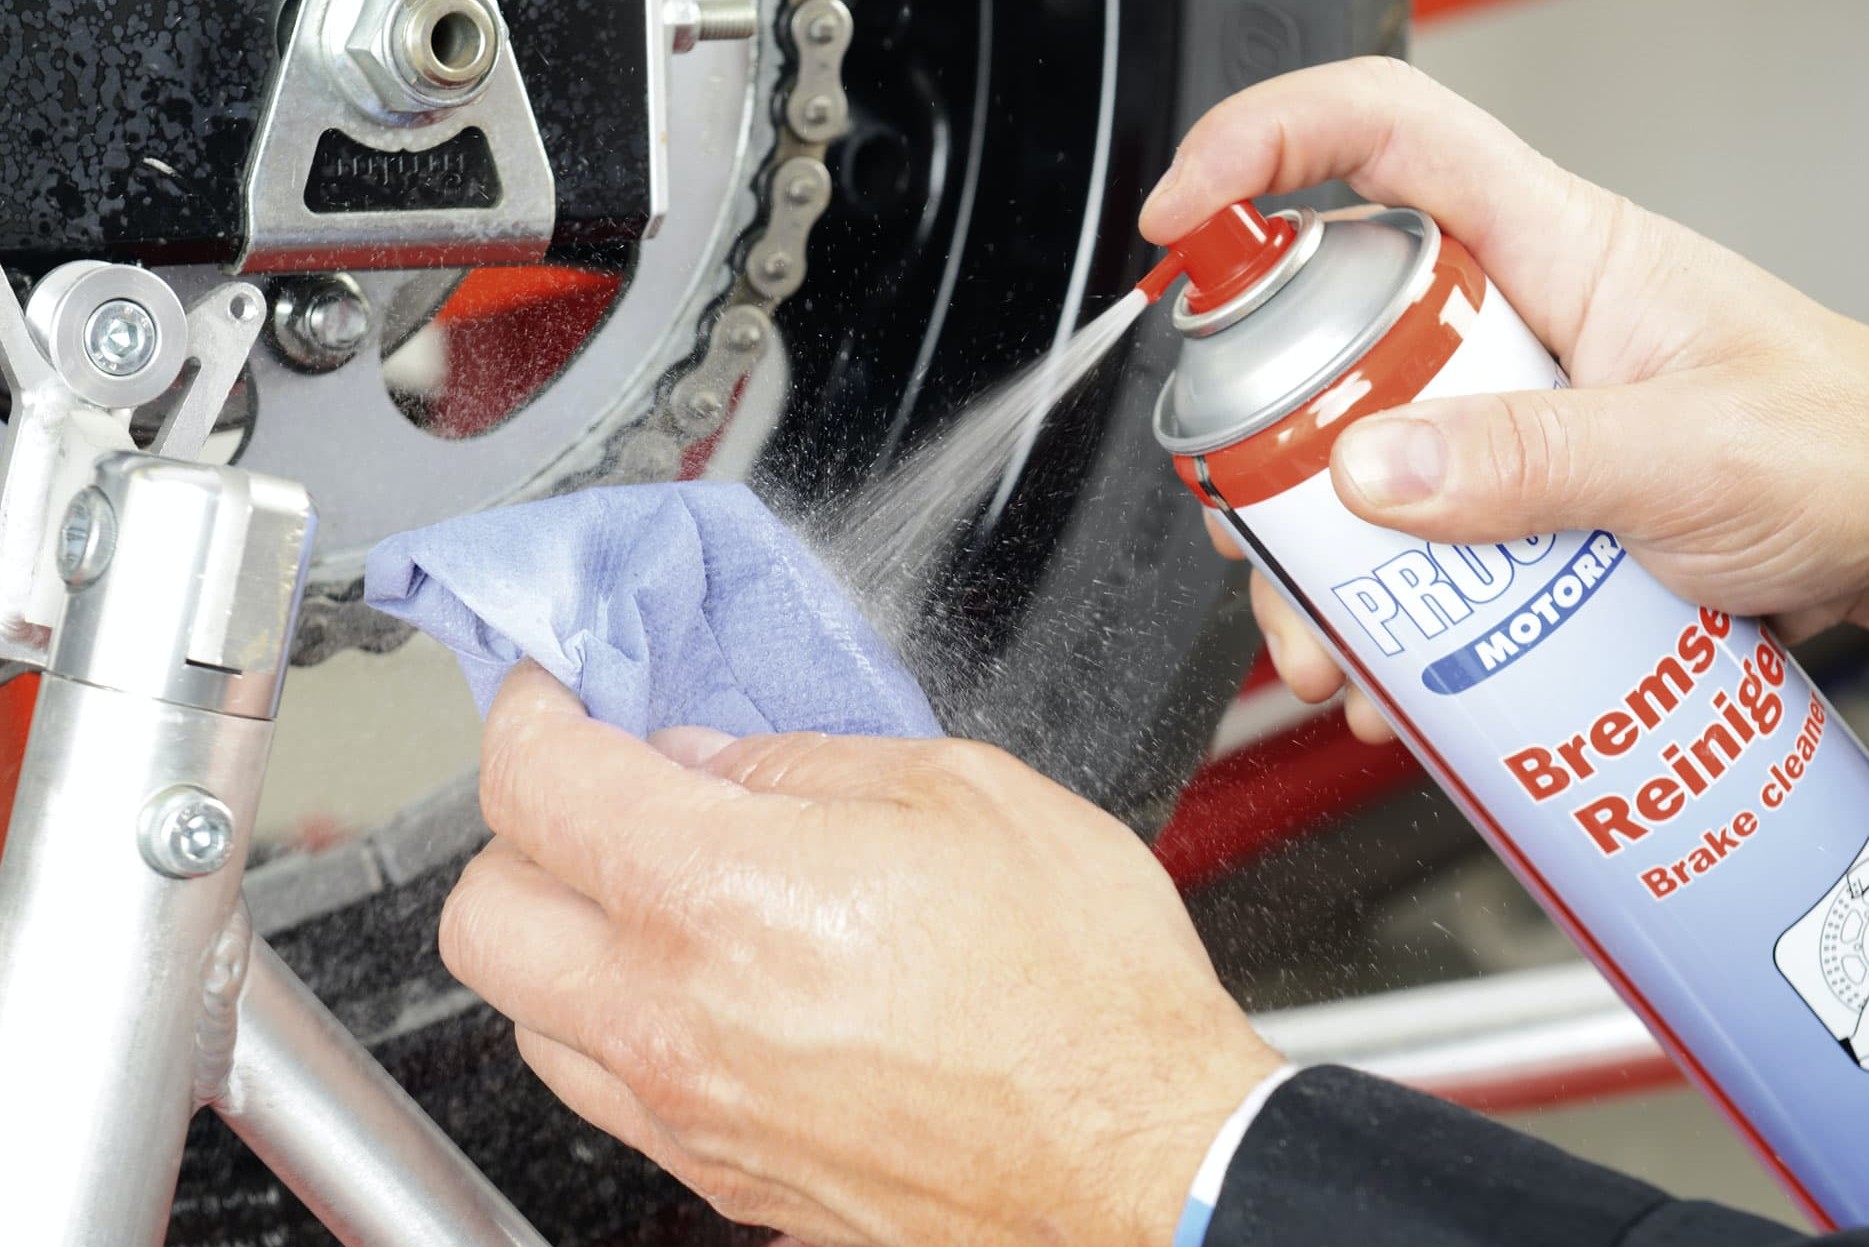
Option 1 – Step 1: Clean the rim and degrease thoroughly
01 – Clean the rim
To ensure the stripes adhere well, the wheel rim must be completely free of dirt and grease. So you need to clean it thoroughly before you start, ideally with brake cleaner, the FOLIATEC Cleaning Wipe Set or silicone remover. If you have repainted the wheel yourself (e.g. with spray paint), choose a small unobtrusive spot to test whether it can be safely wiped clean with brake cleaner or silicone remover without dissolving the paintwork. If necessary, use motorcycle cleaner or soapy water instead. Take special care to remove all traces of chain grease, especially on the rear wheel.
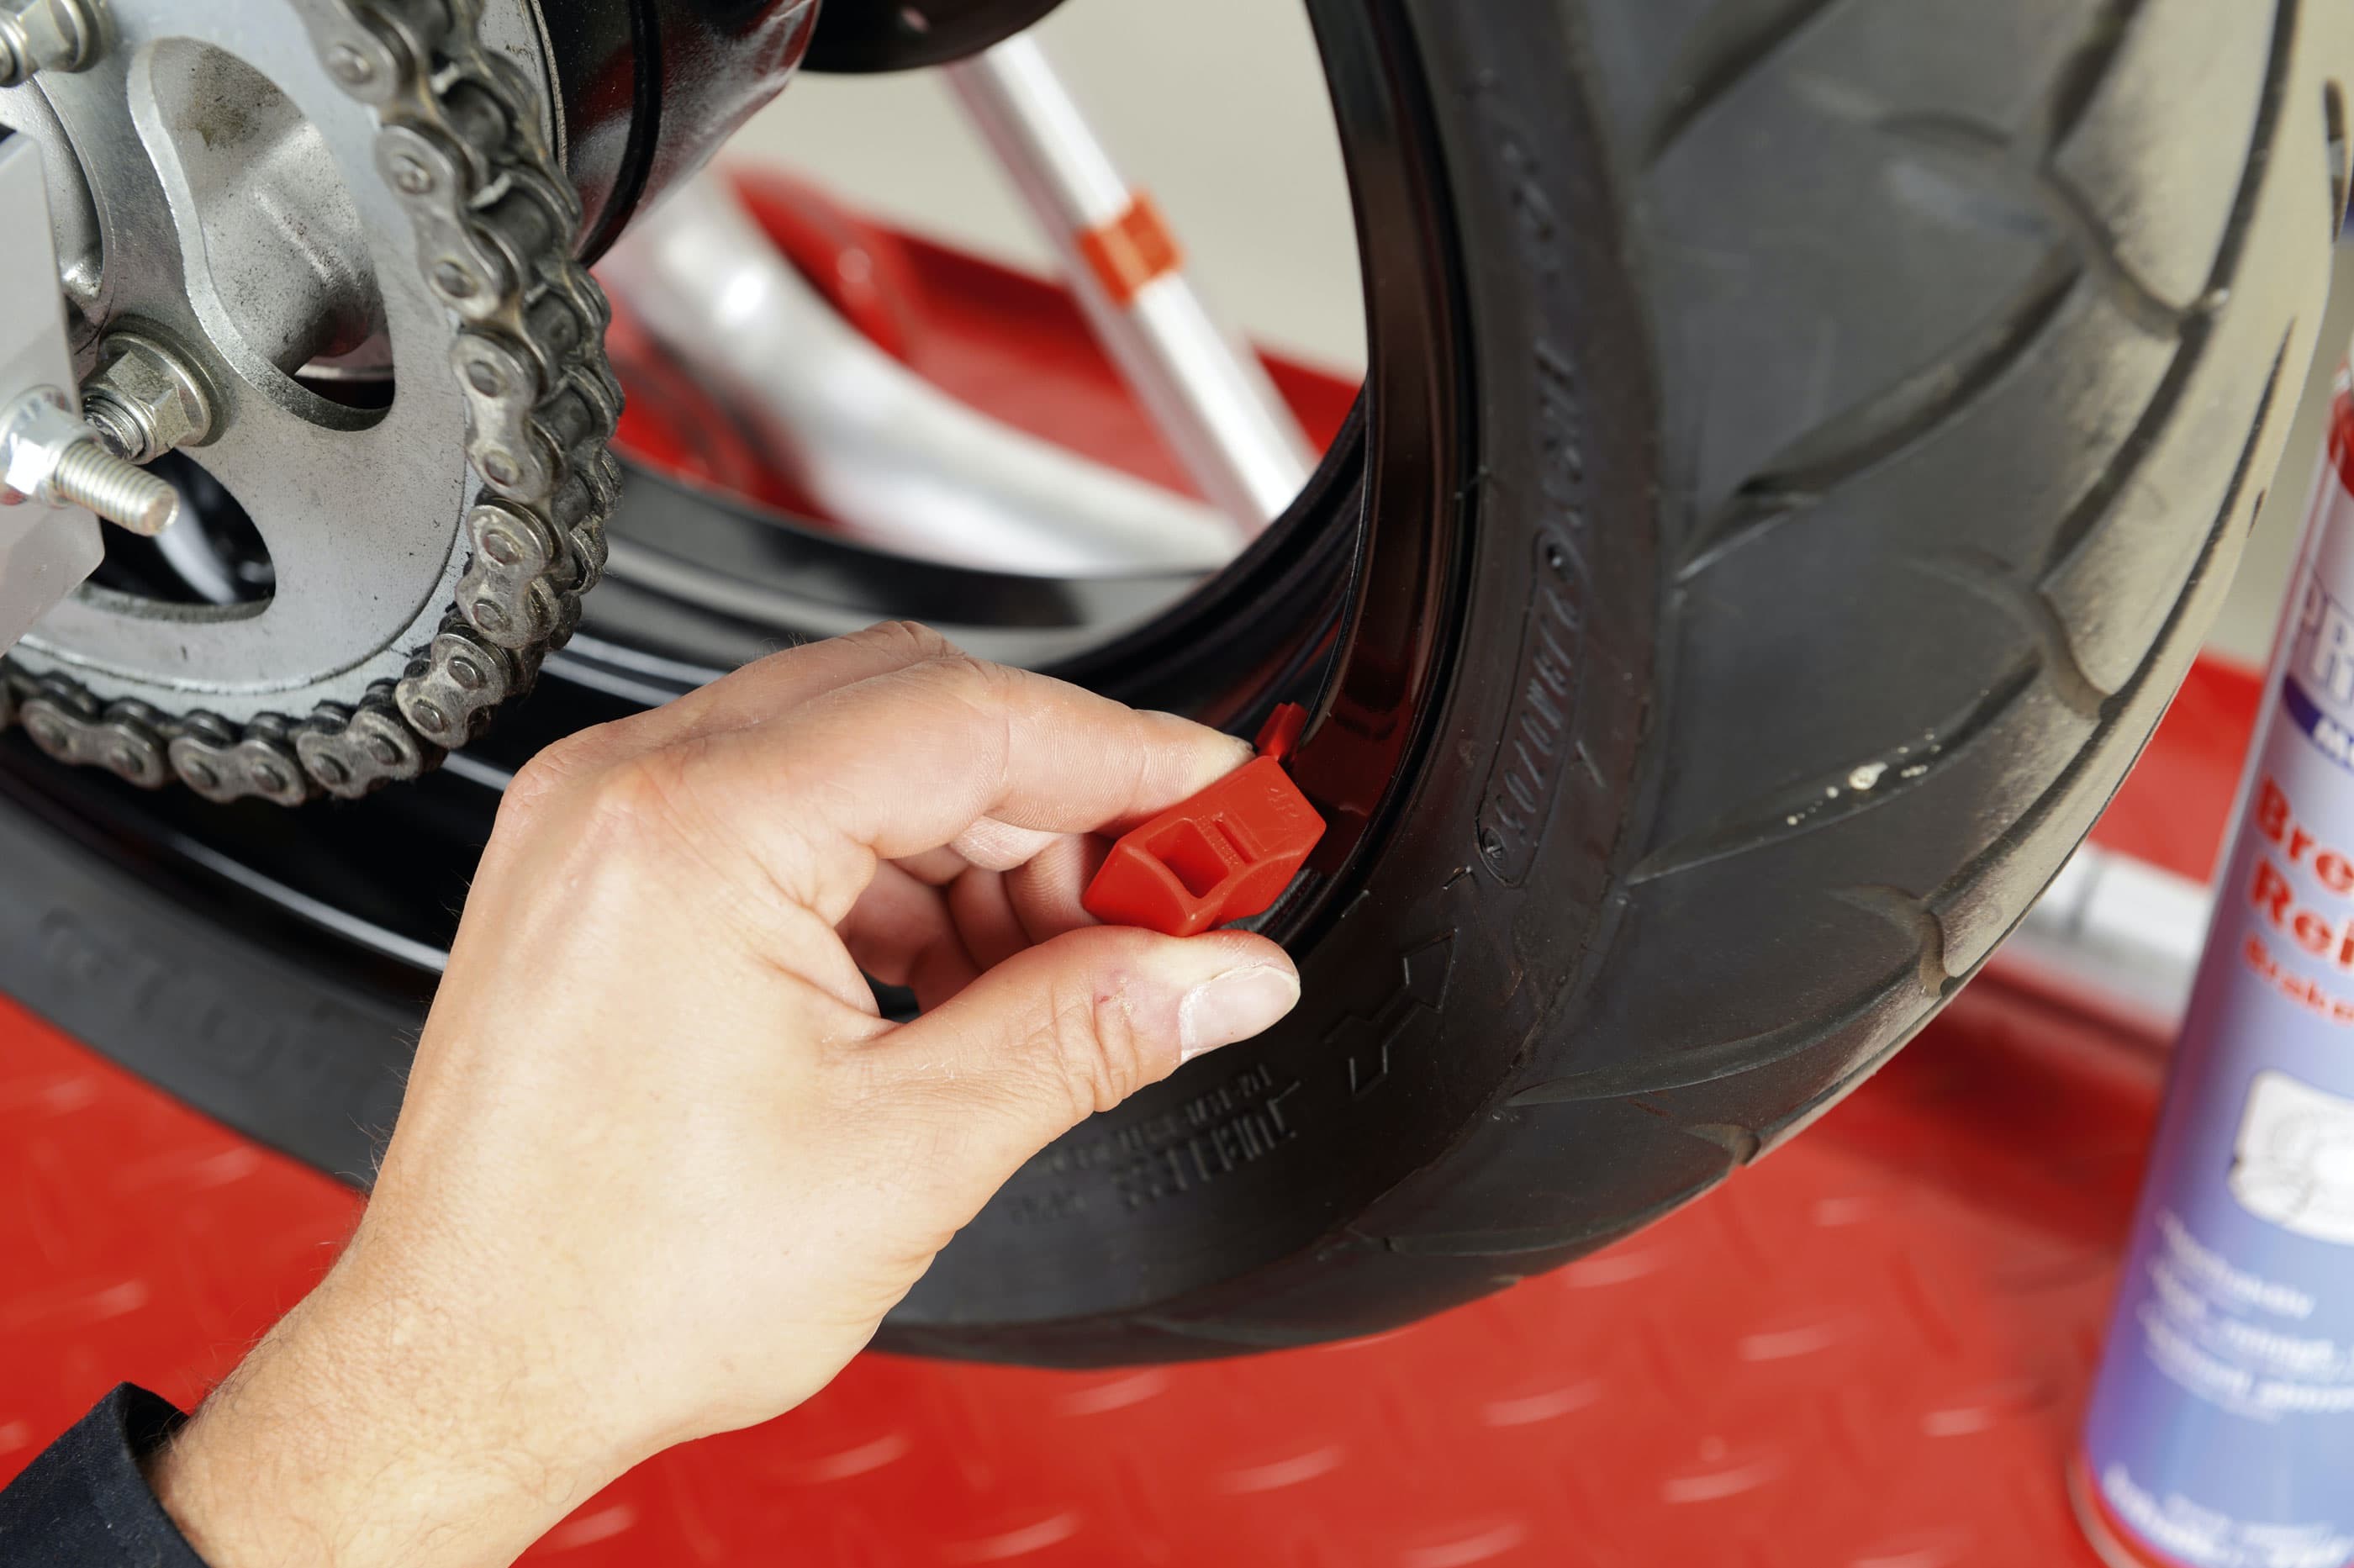
Option 1 – Step 2: Bend the applicator guide to fit the rim
02 – Bend the applicator guide to fit the rim
Try out the applicator by holding it against the edge of the wheel rim. Bend the applicator guide as shown in the picture so that it rests fully on the rim base while the applicator itself is flush with the rim edge.
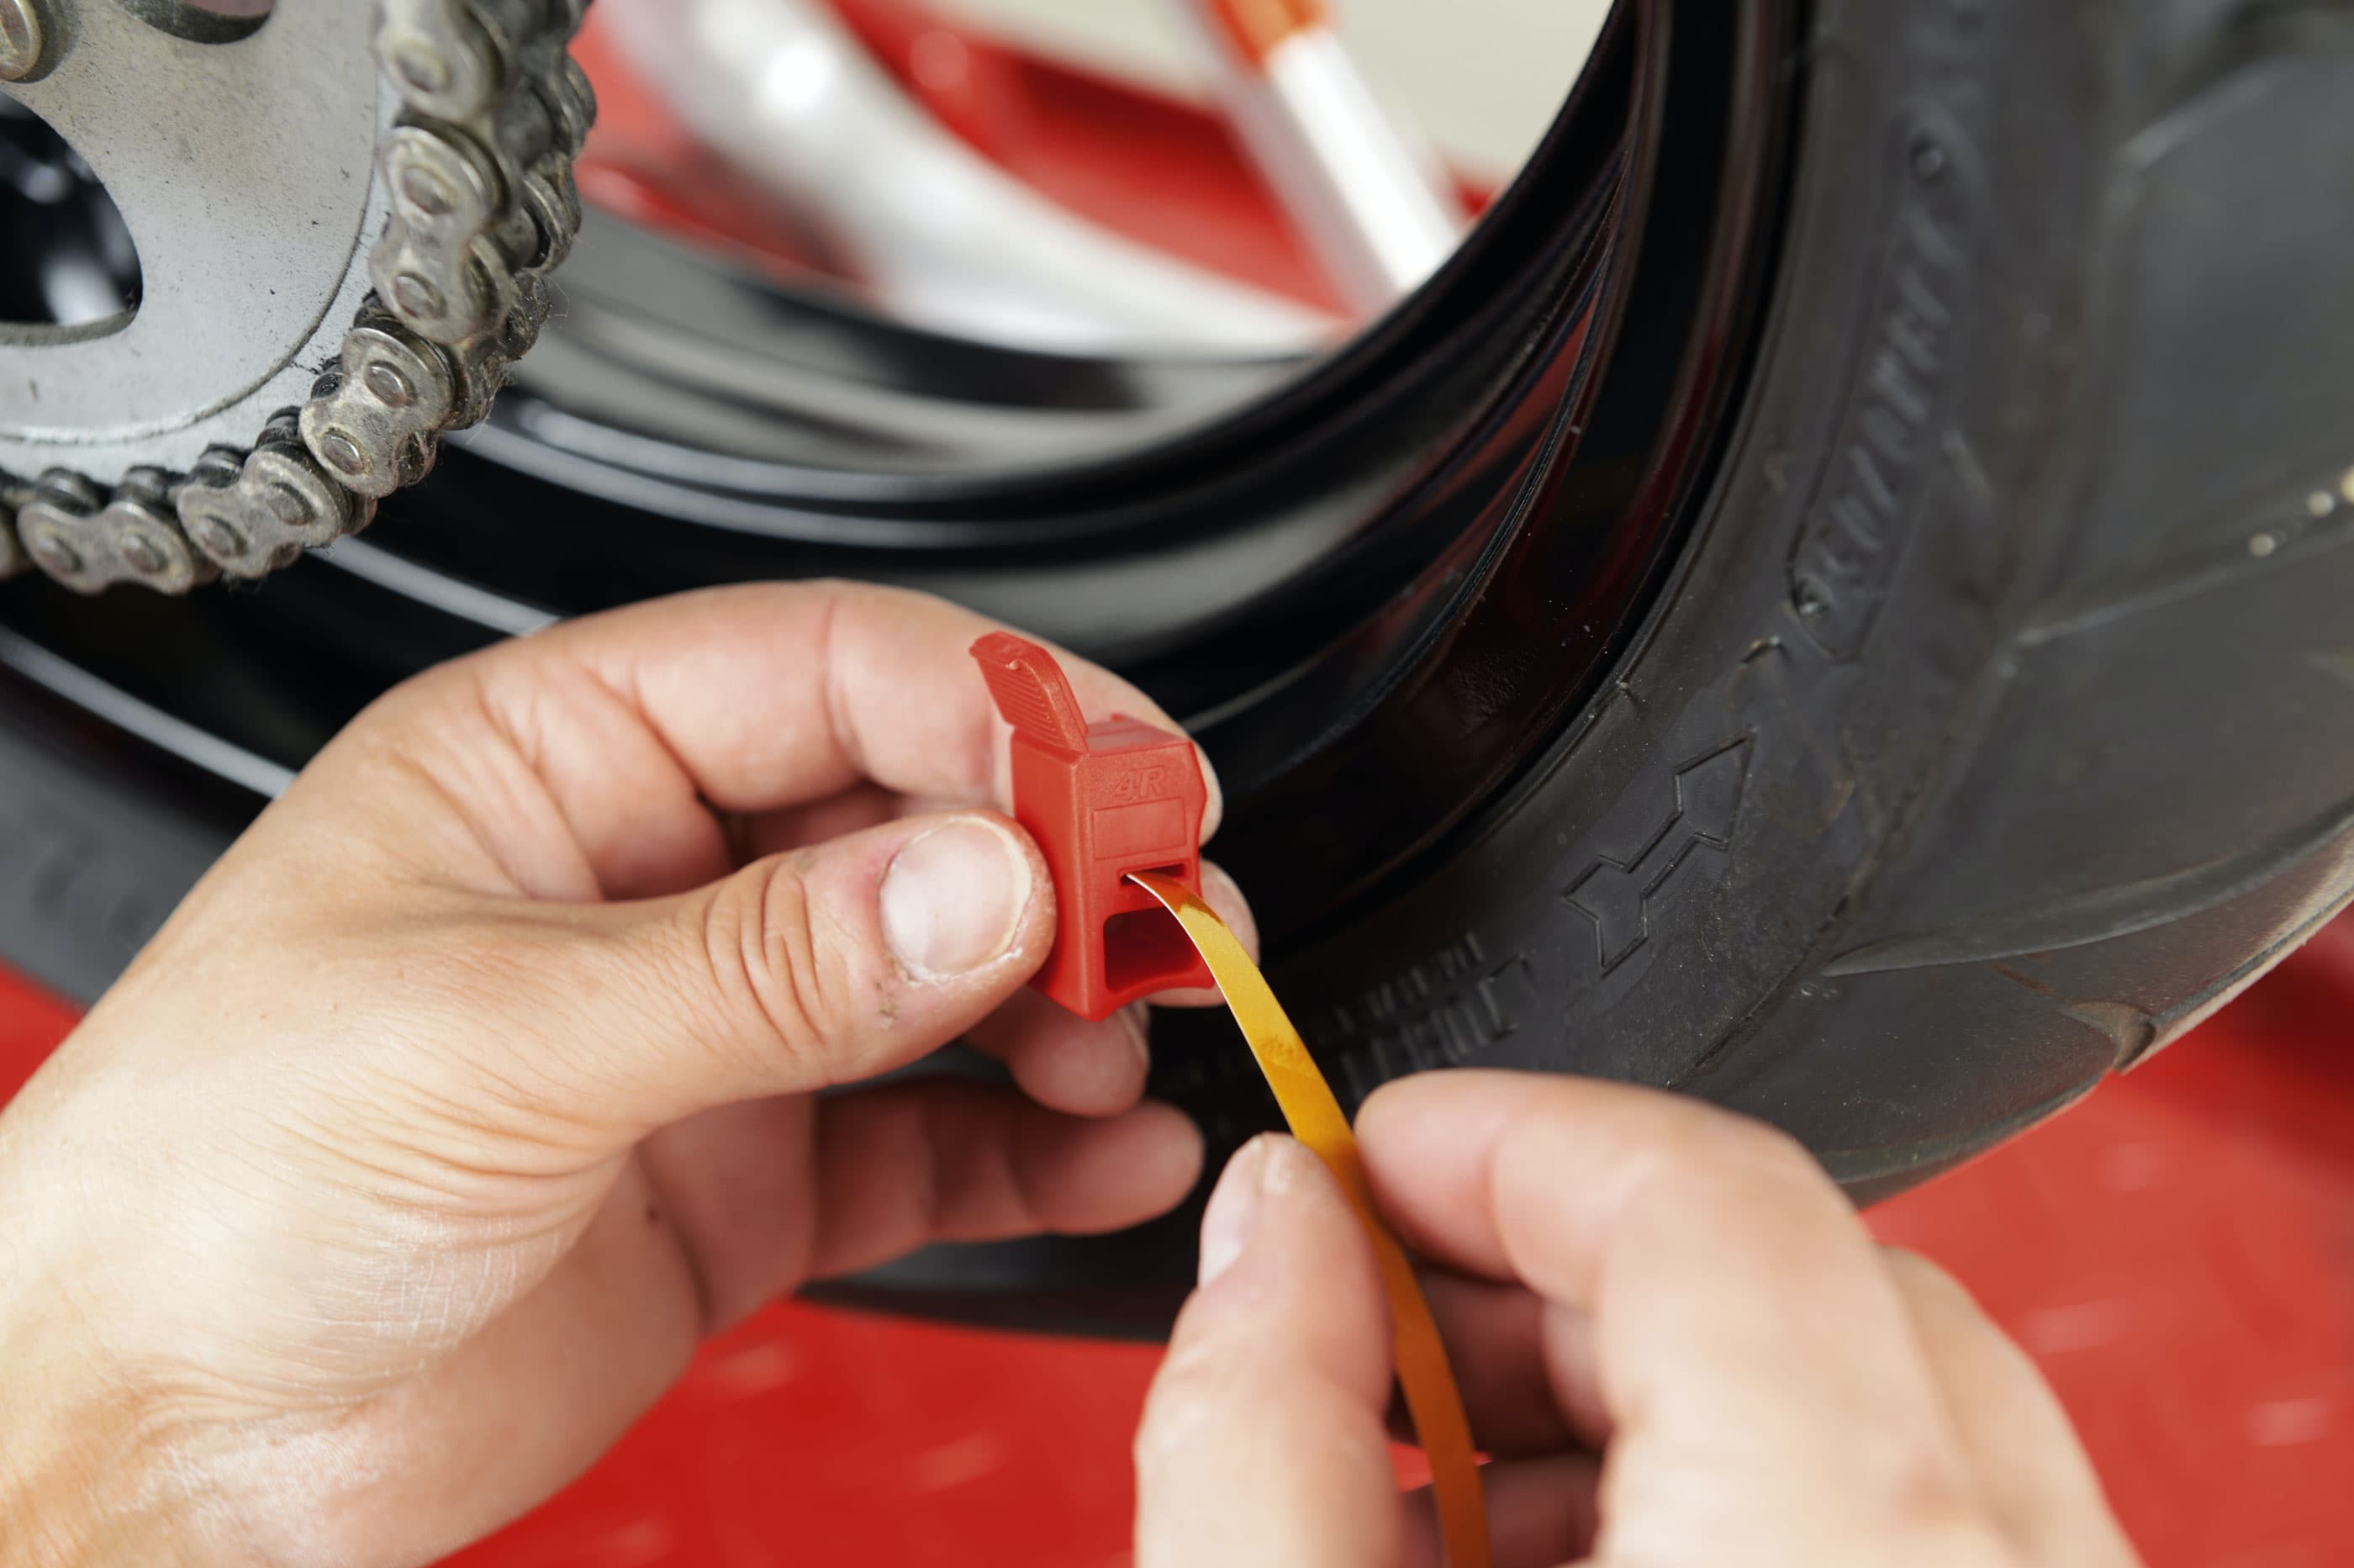
Option 1 – Step 3: Thread the adhesive stripe into the narrow slot
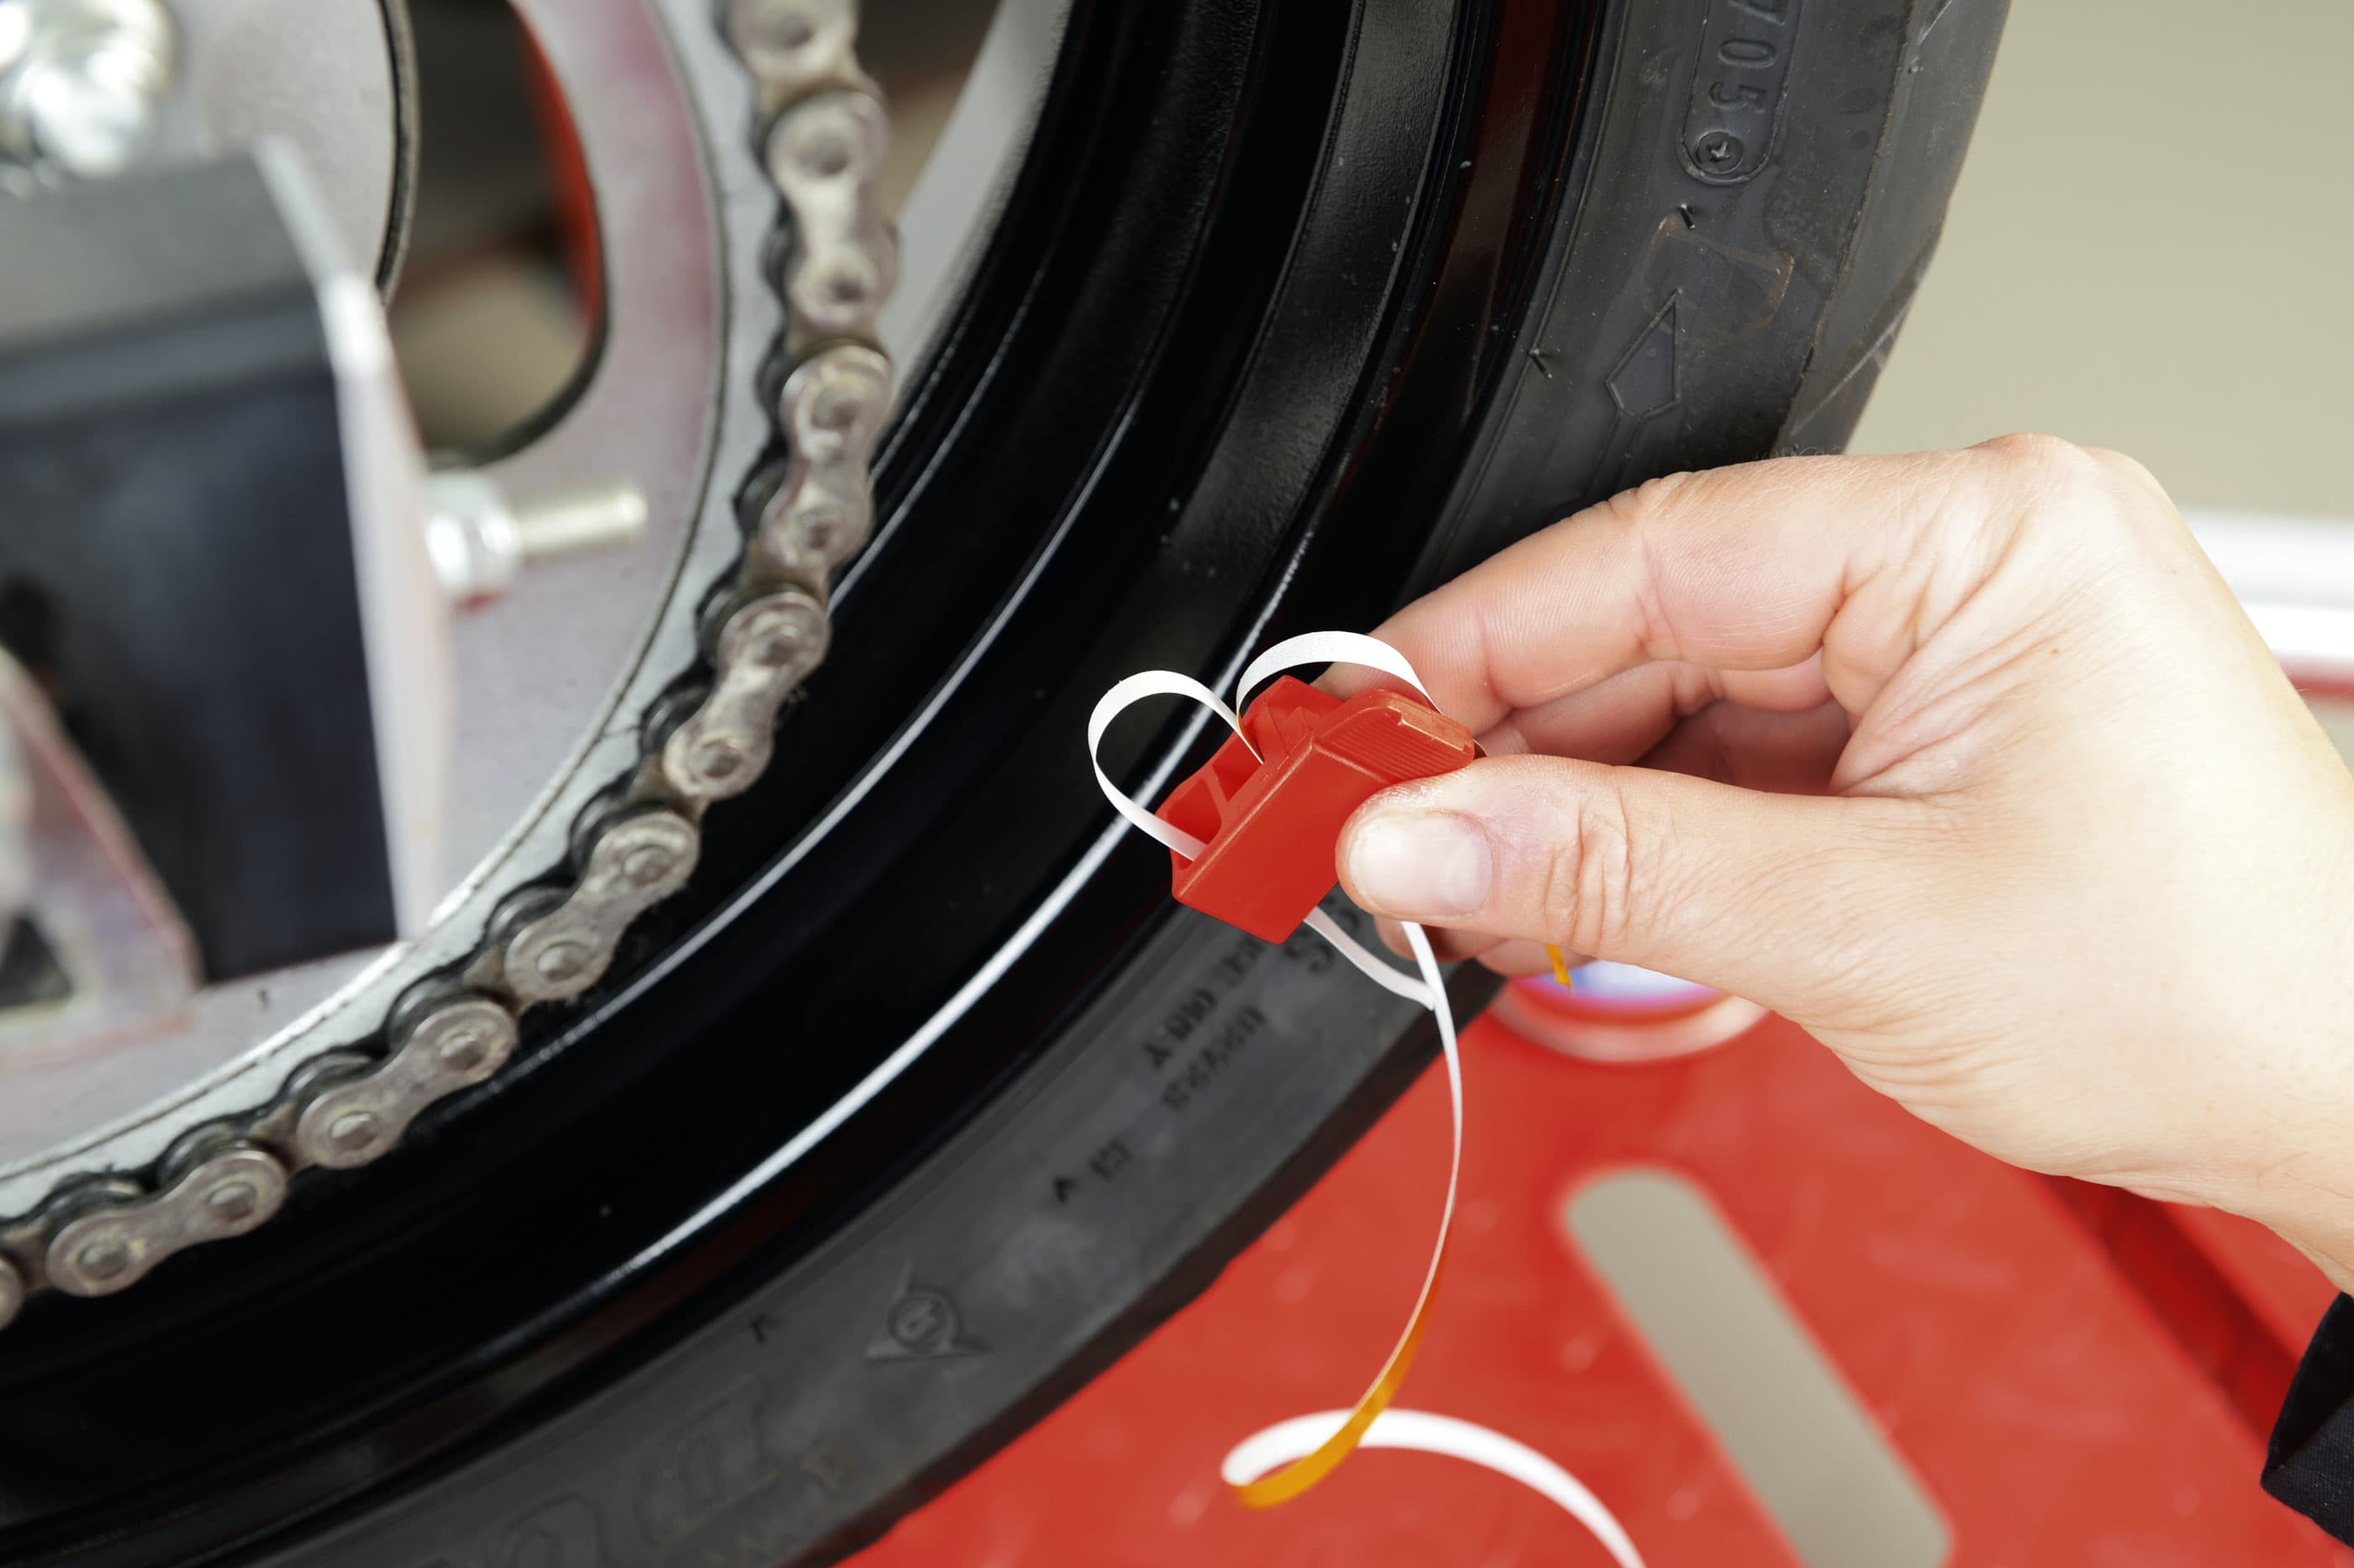
03 – Thread the adhesive stripe into the narrow slot
Unwind approx. 1.5 m of the adhesive stripe from the roll. Hold the applicator so that the guide is facing upwards towards yourself, then thread the adhesive stripe into the narrow slot from the right so that the coloured side is uppermost and the sticky side (with liner) is facing downwards.
Option 1 – Step 4: Pull off liner and thread it through the wide slot
04 – Pull off liner and thread it through the wide slot
Pull a short length of the liner away from the adhesive side and thread it through the wide slot of the applicator. Feed the adhesive stripe itself around the edge.

Option 1 – Step 5: Turn wheel to affix the stripe
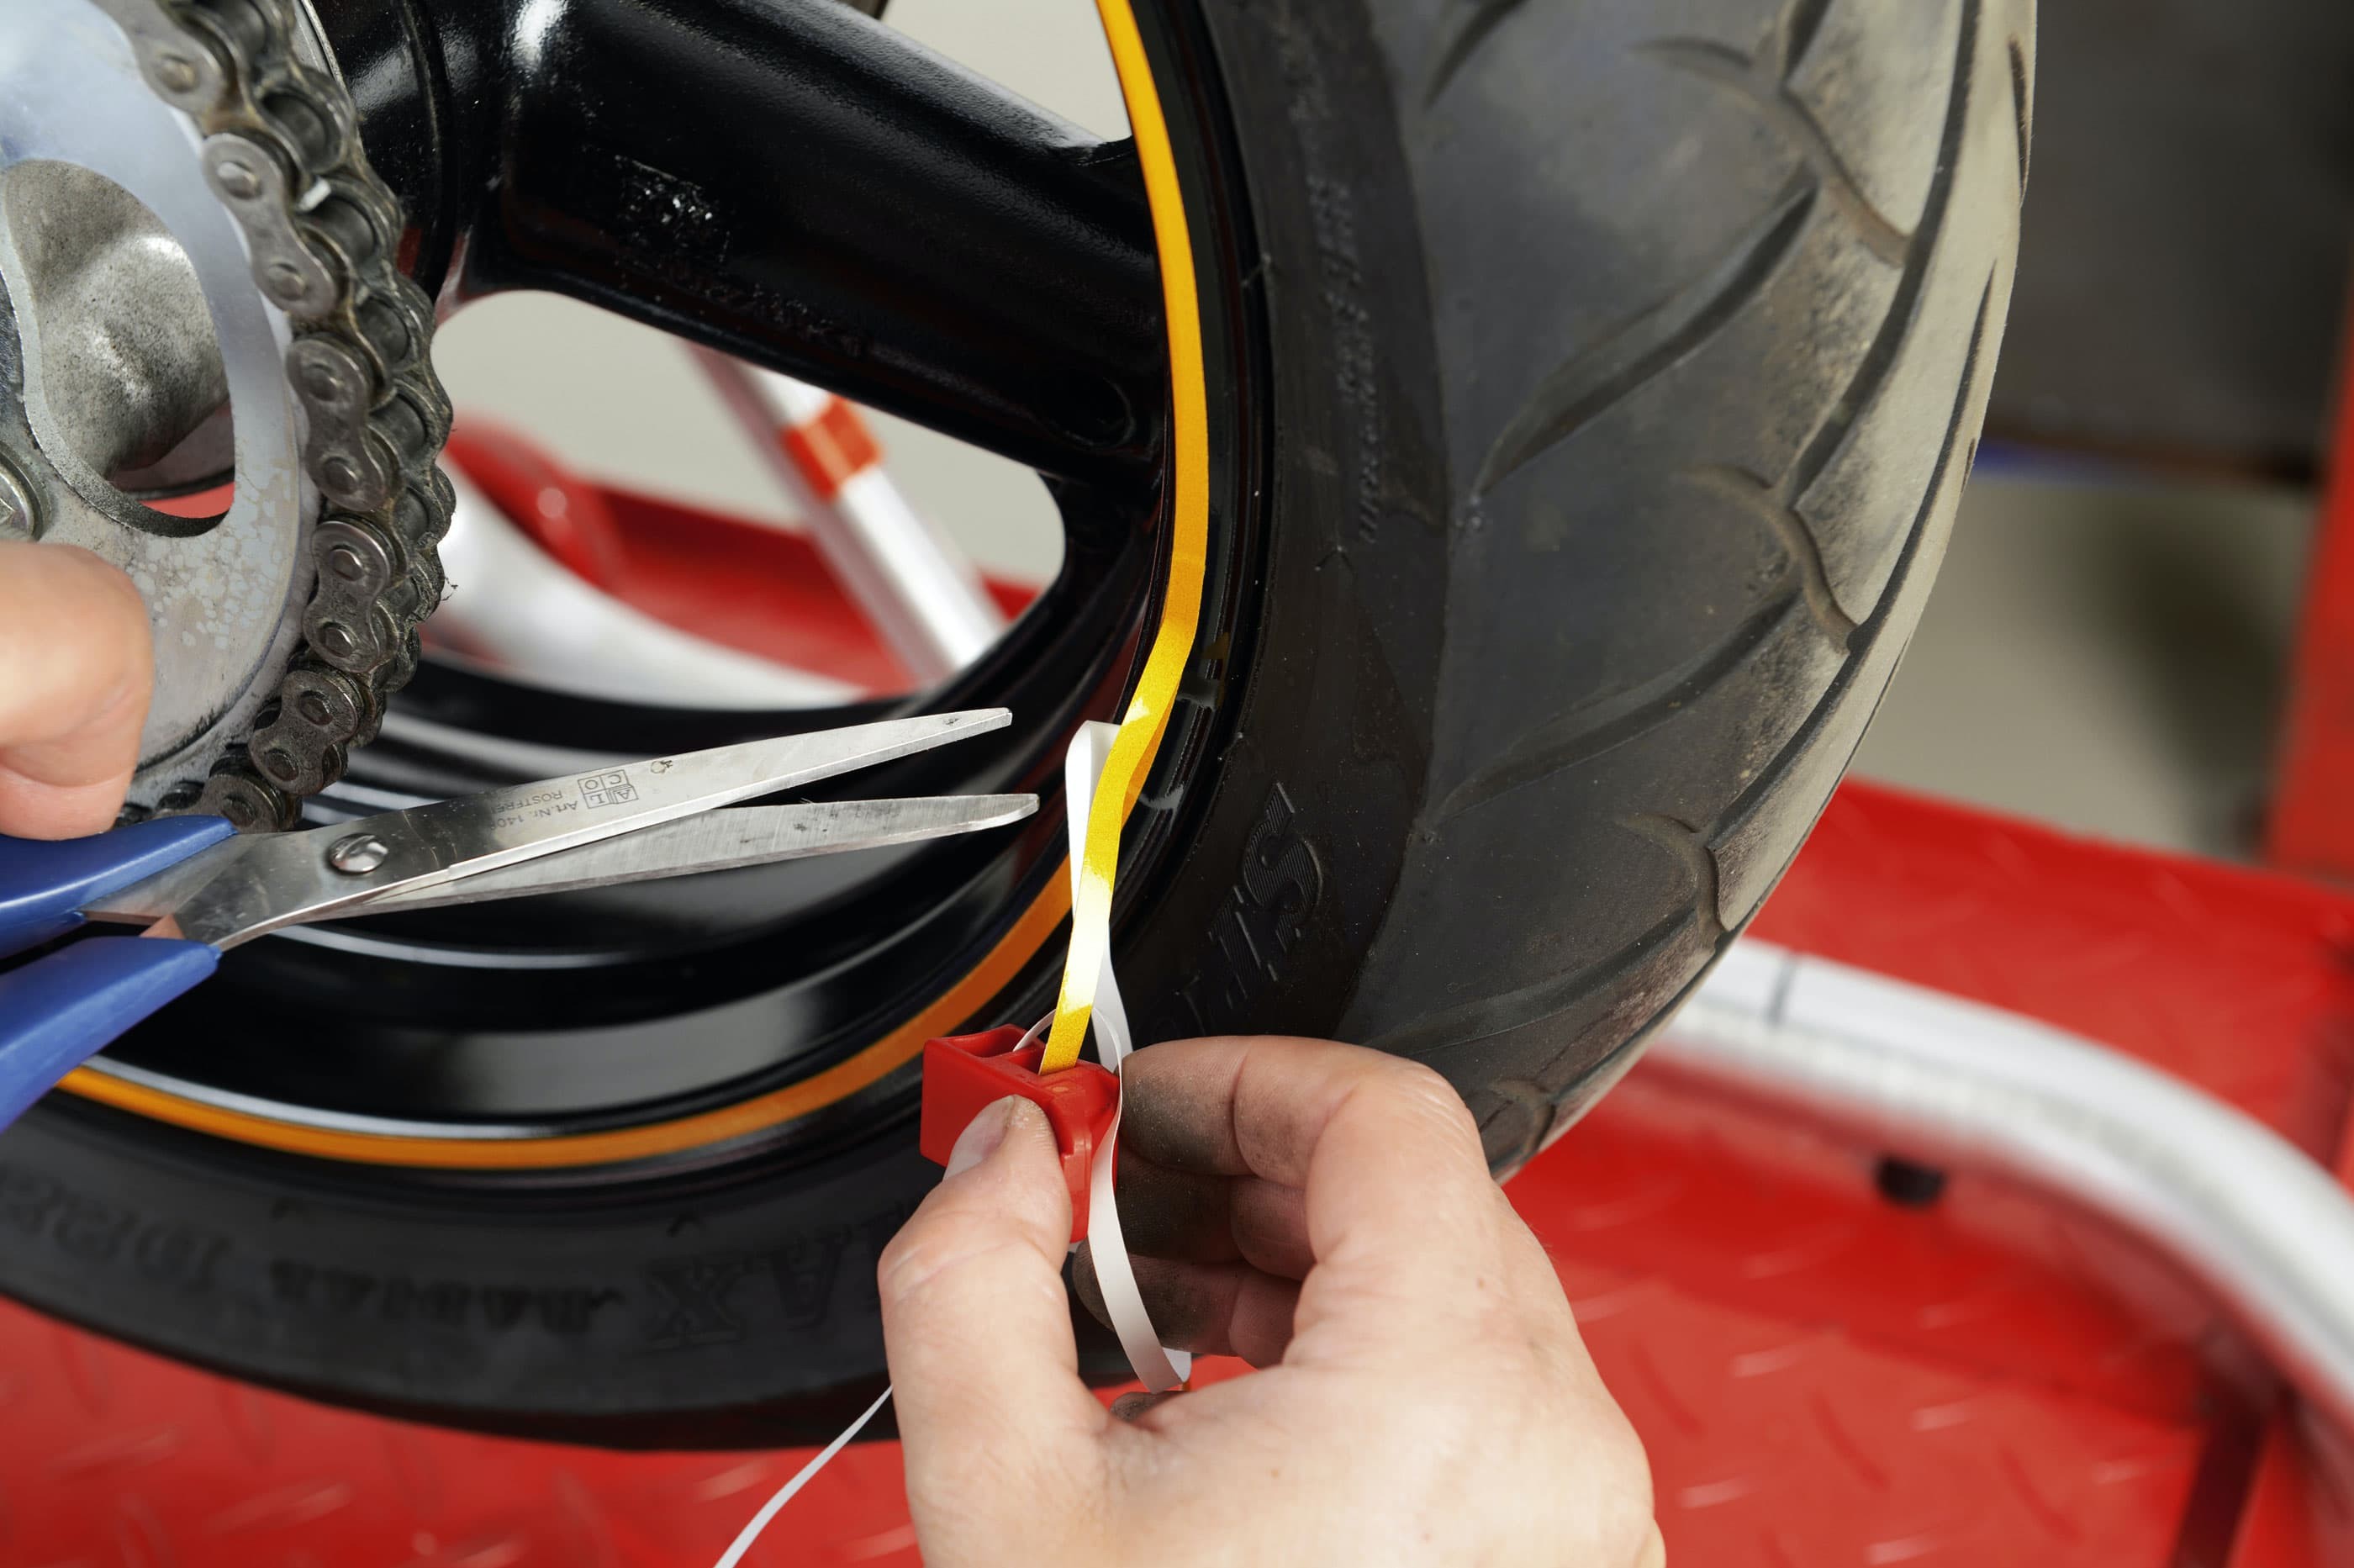
05 – Turn wheel to affix the stripe
The tool is now ready to use and you can start applying the adhesive stripe to the rim edge. Use the applicator guide to apply the stripe accurately to the rim base and press firmly against the rim edge. Slowly turn the wheel while holding the applicator in position to ensure that the stripe is evenly applied around the rim edge. At the same time, use your thumb to firmly press down the last section of stripe applied.
Option 1 – Step 6: Cut off leaving an overlap
06 – Cut off leaving an overlap
Once you have applied the stripe right round the wheel, cut it off cleanly at right angles with scissors, allowing a small overlap.
Option 1 – Step 7: Apply to the other side of the rim in the same way
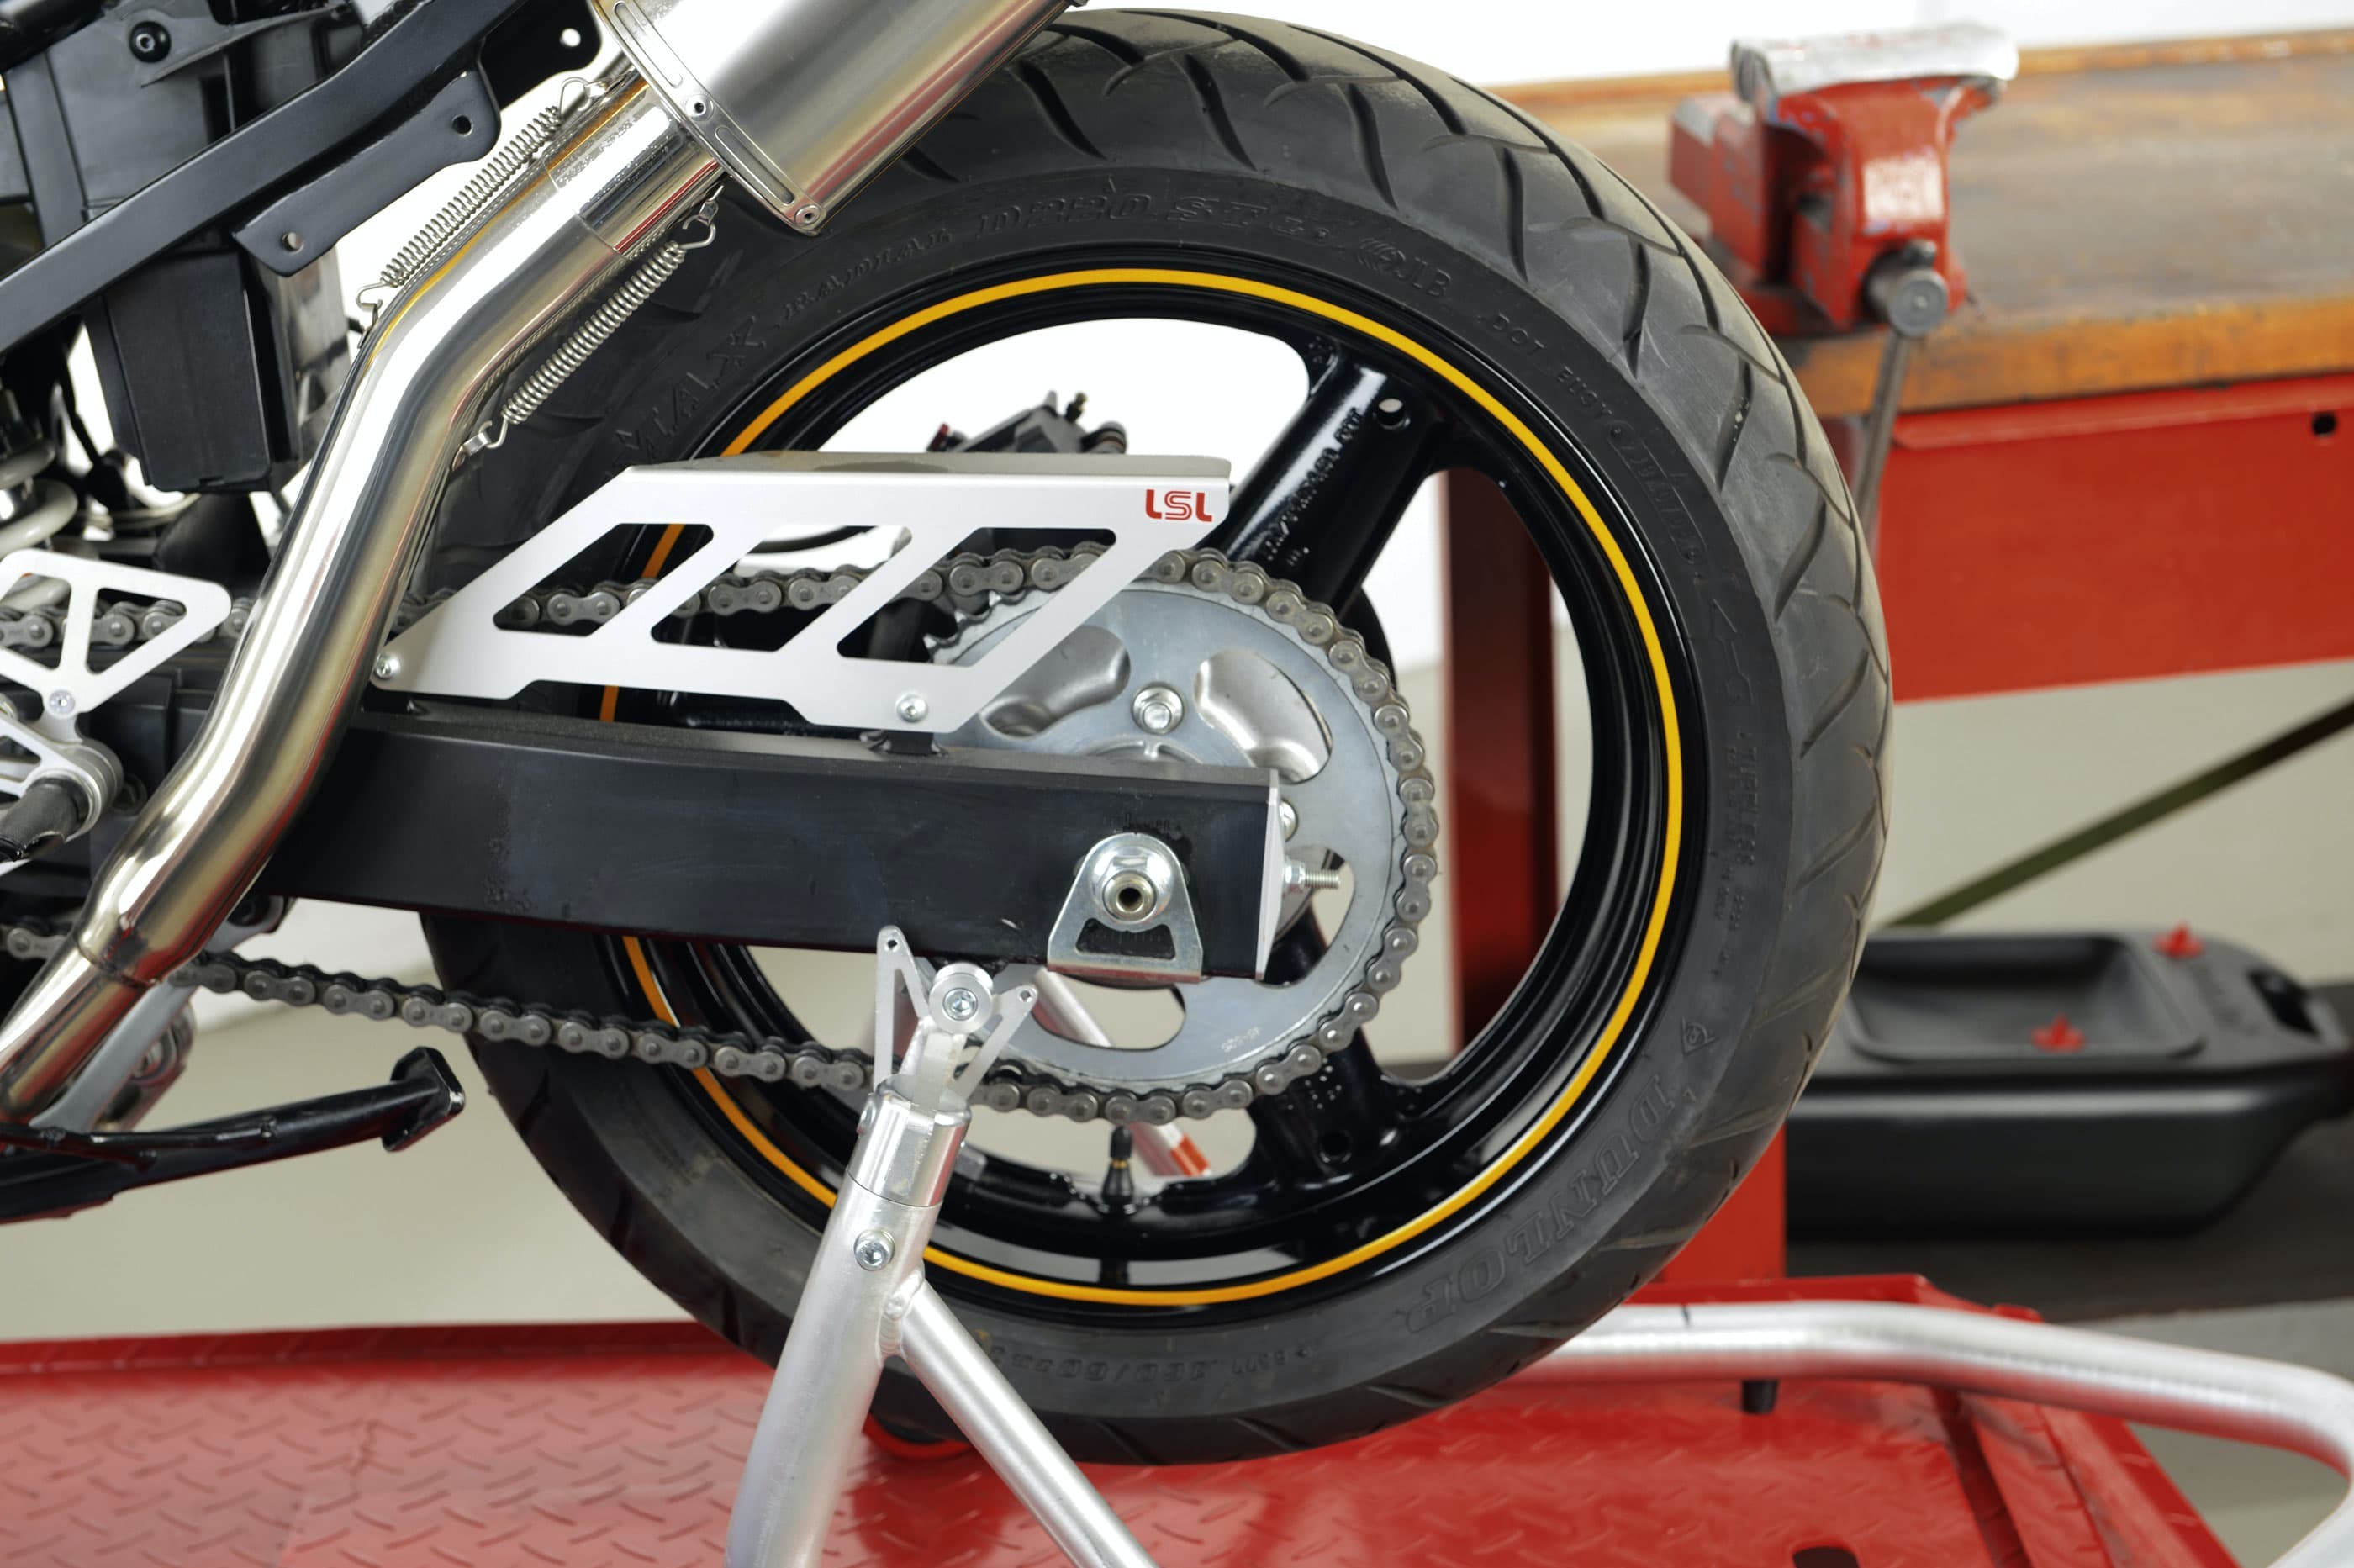
07 – Apply to the other side of the rim in the same way
Wrap a microfibre cloth round your index finger, and run your finger around the rim edge, pressing the stripe down firmly once again. Job done! Now repeat the procedure for the other side of the rim.
Option 1 – Step 8: Also brightens up other parts of your bike
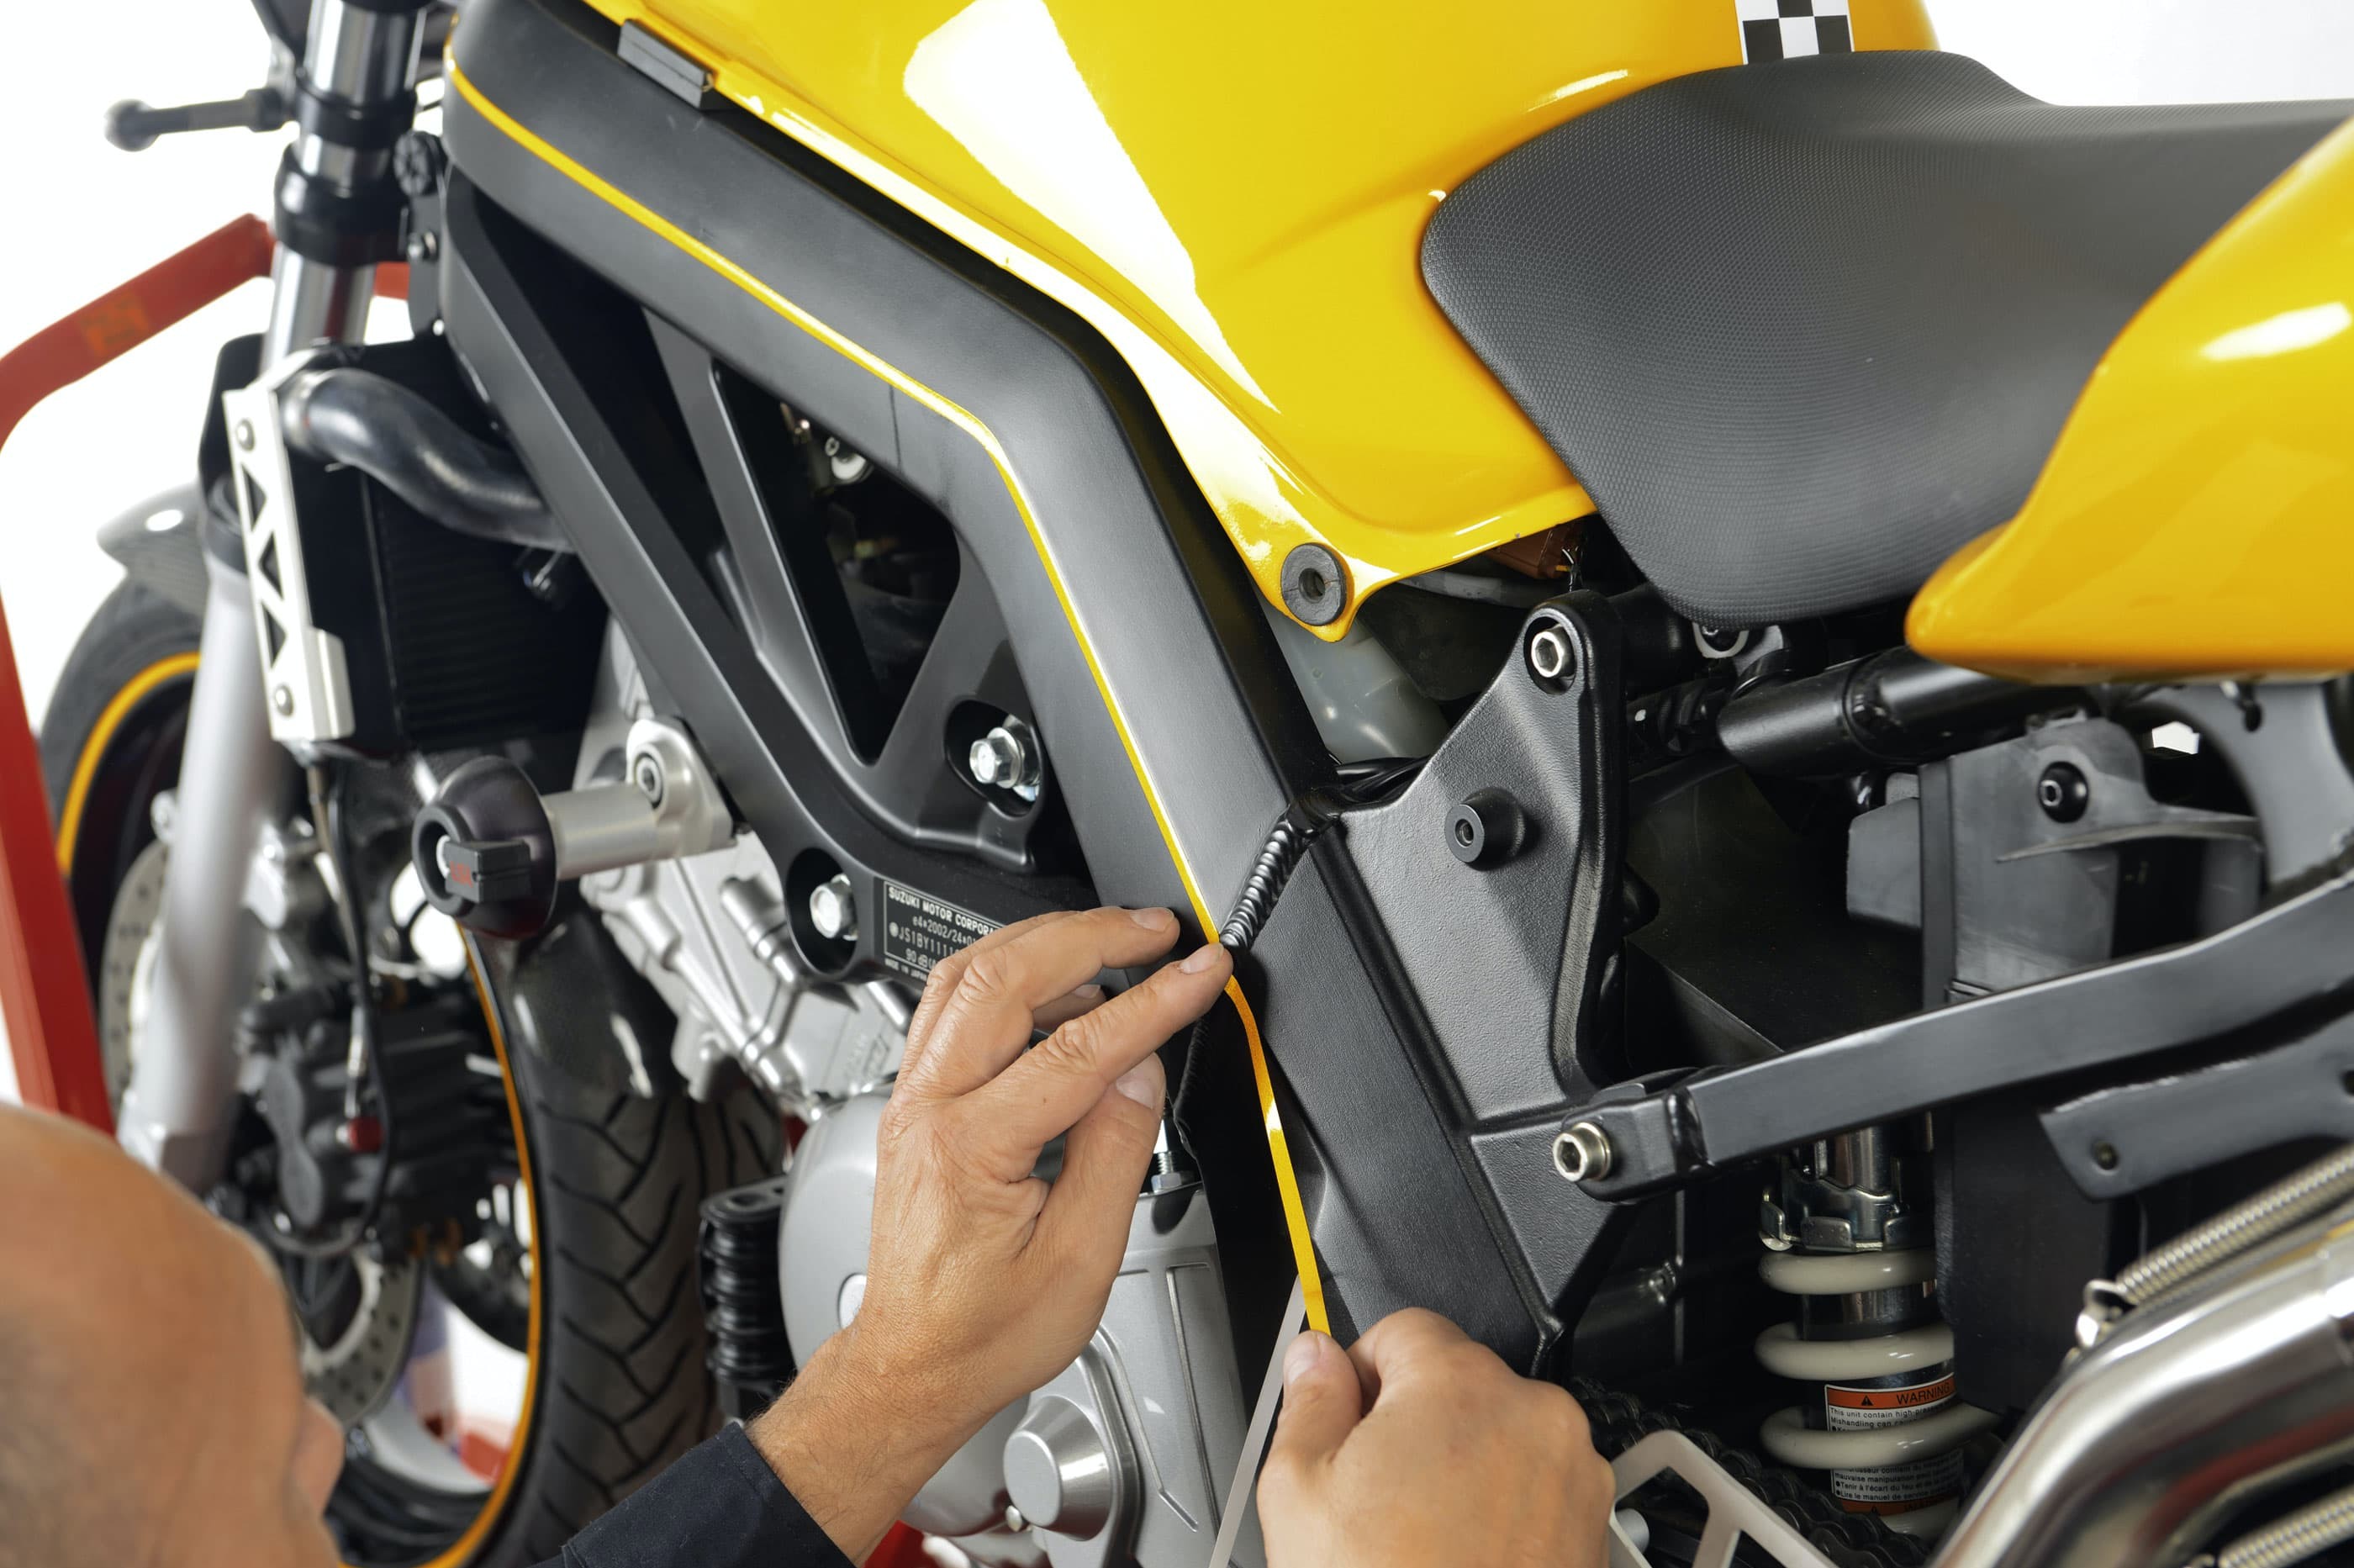
08 – Also brightens up other parts of your bike
It goes without saying that these coloured stripes are also great for jazzing up other parts of your bike.
Our recommendation
Option 2: Applying preshaped stripes – now let's get started
As described for Option 1 above, your bike needs to be jacked up so that you can turn the wheel, and the rims must be 100% clean and grease-free. Again, you need a minimum working temperature of 15°C and a clean surface to stand your motorbike on. The wheel stripe must be the right diameter for the rim (check product description).
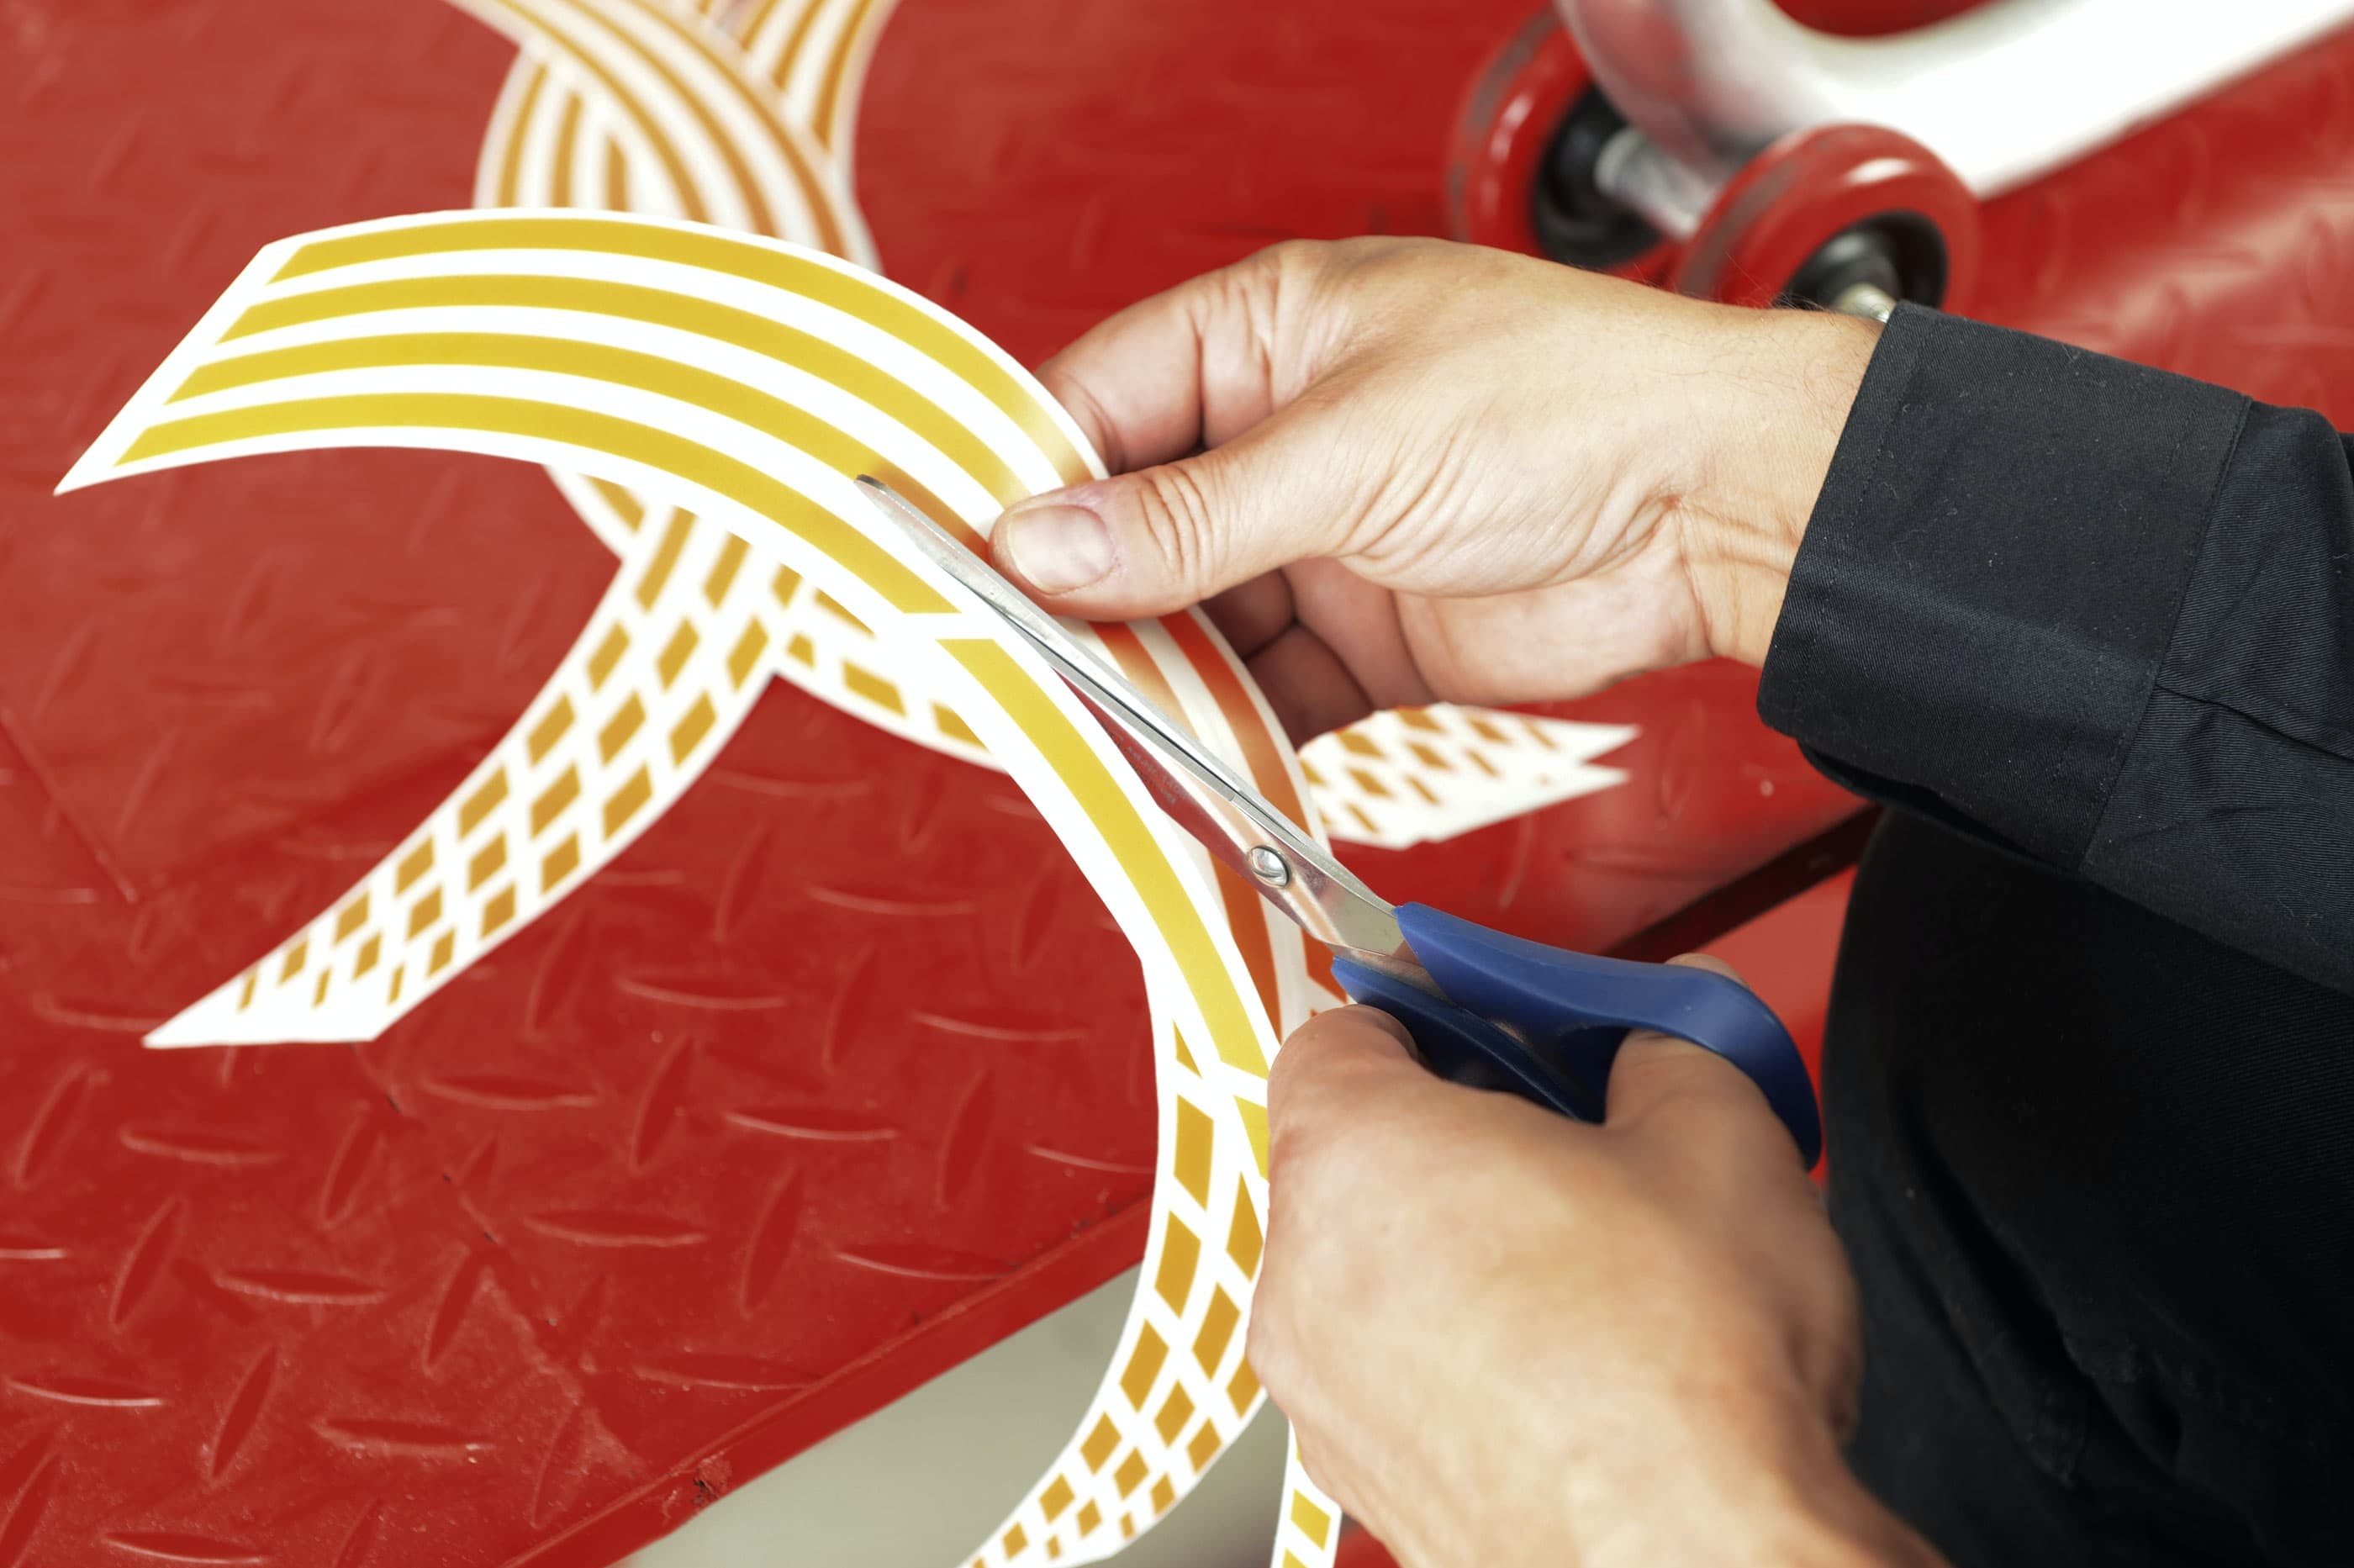
Option 2 – Step 1: Cut apart segments of wheel stripe
01 – Cut apart segments of wheel stripe
Carefully cut the stripe segments apart using a pair of scissors. The stripe has a transparent cover strip on the coloured side and a protective liner on the adhesive side. You will need 3 segments for each rim.
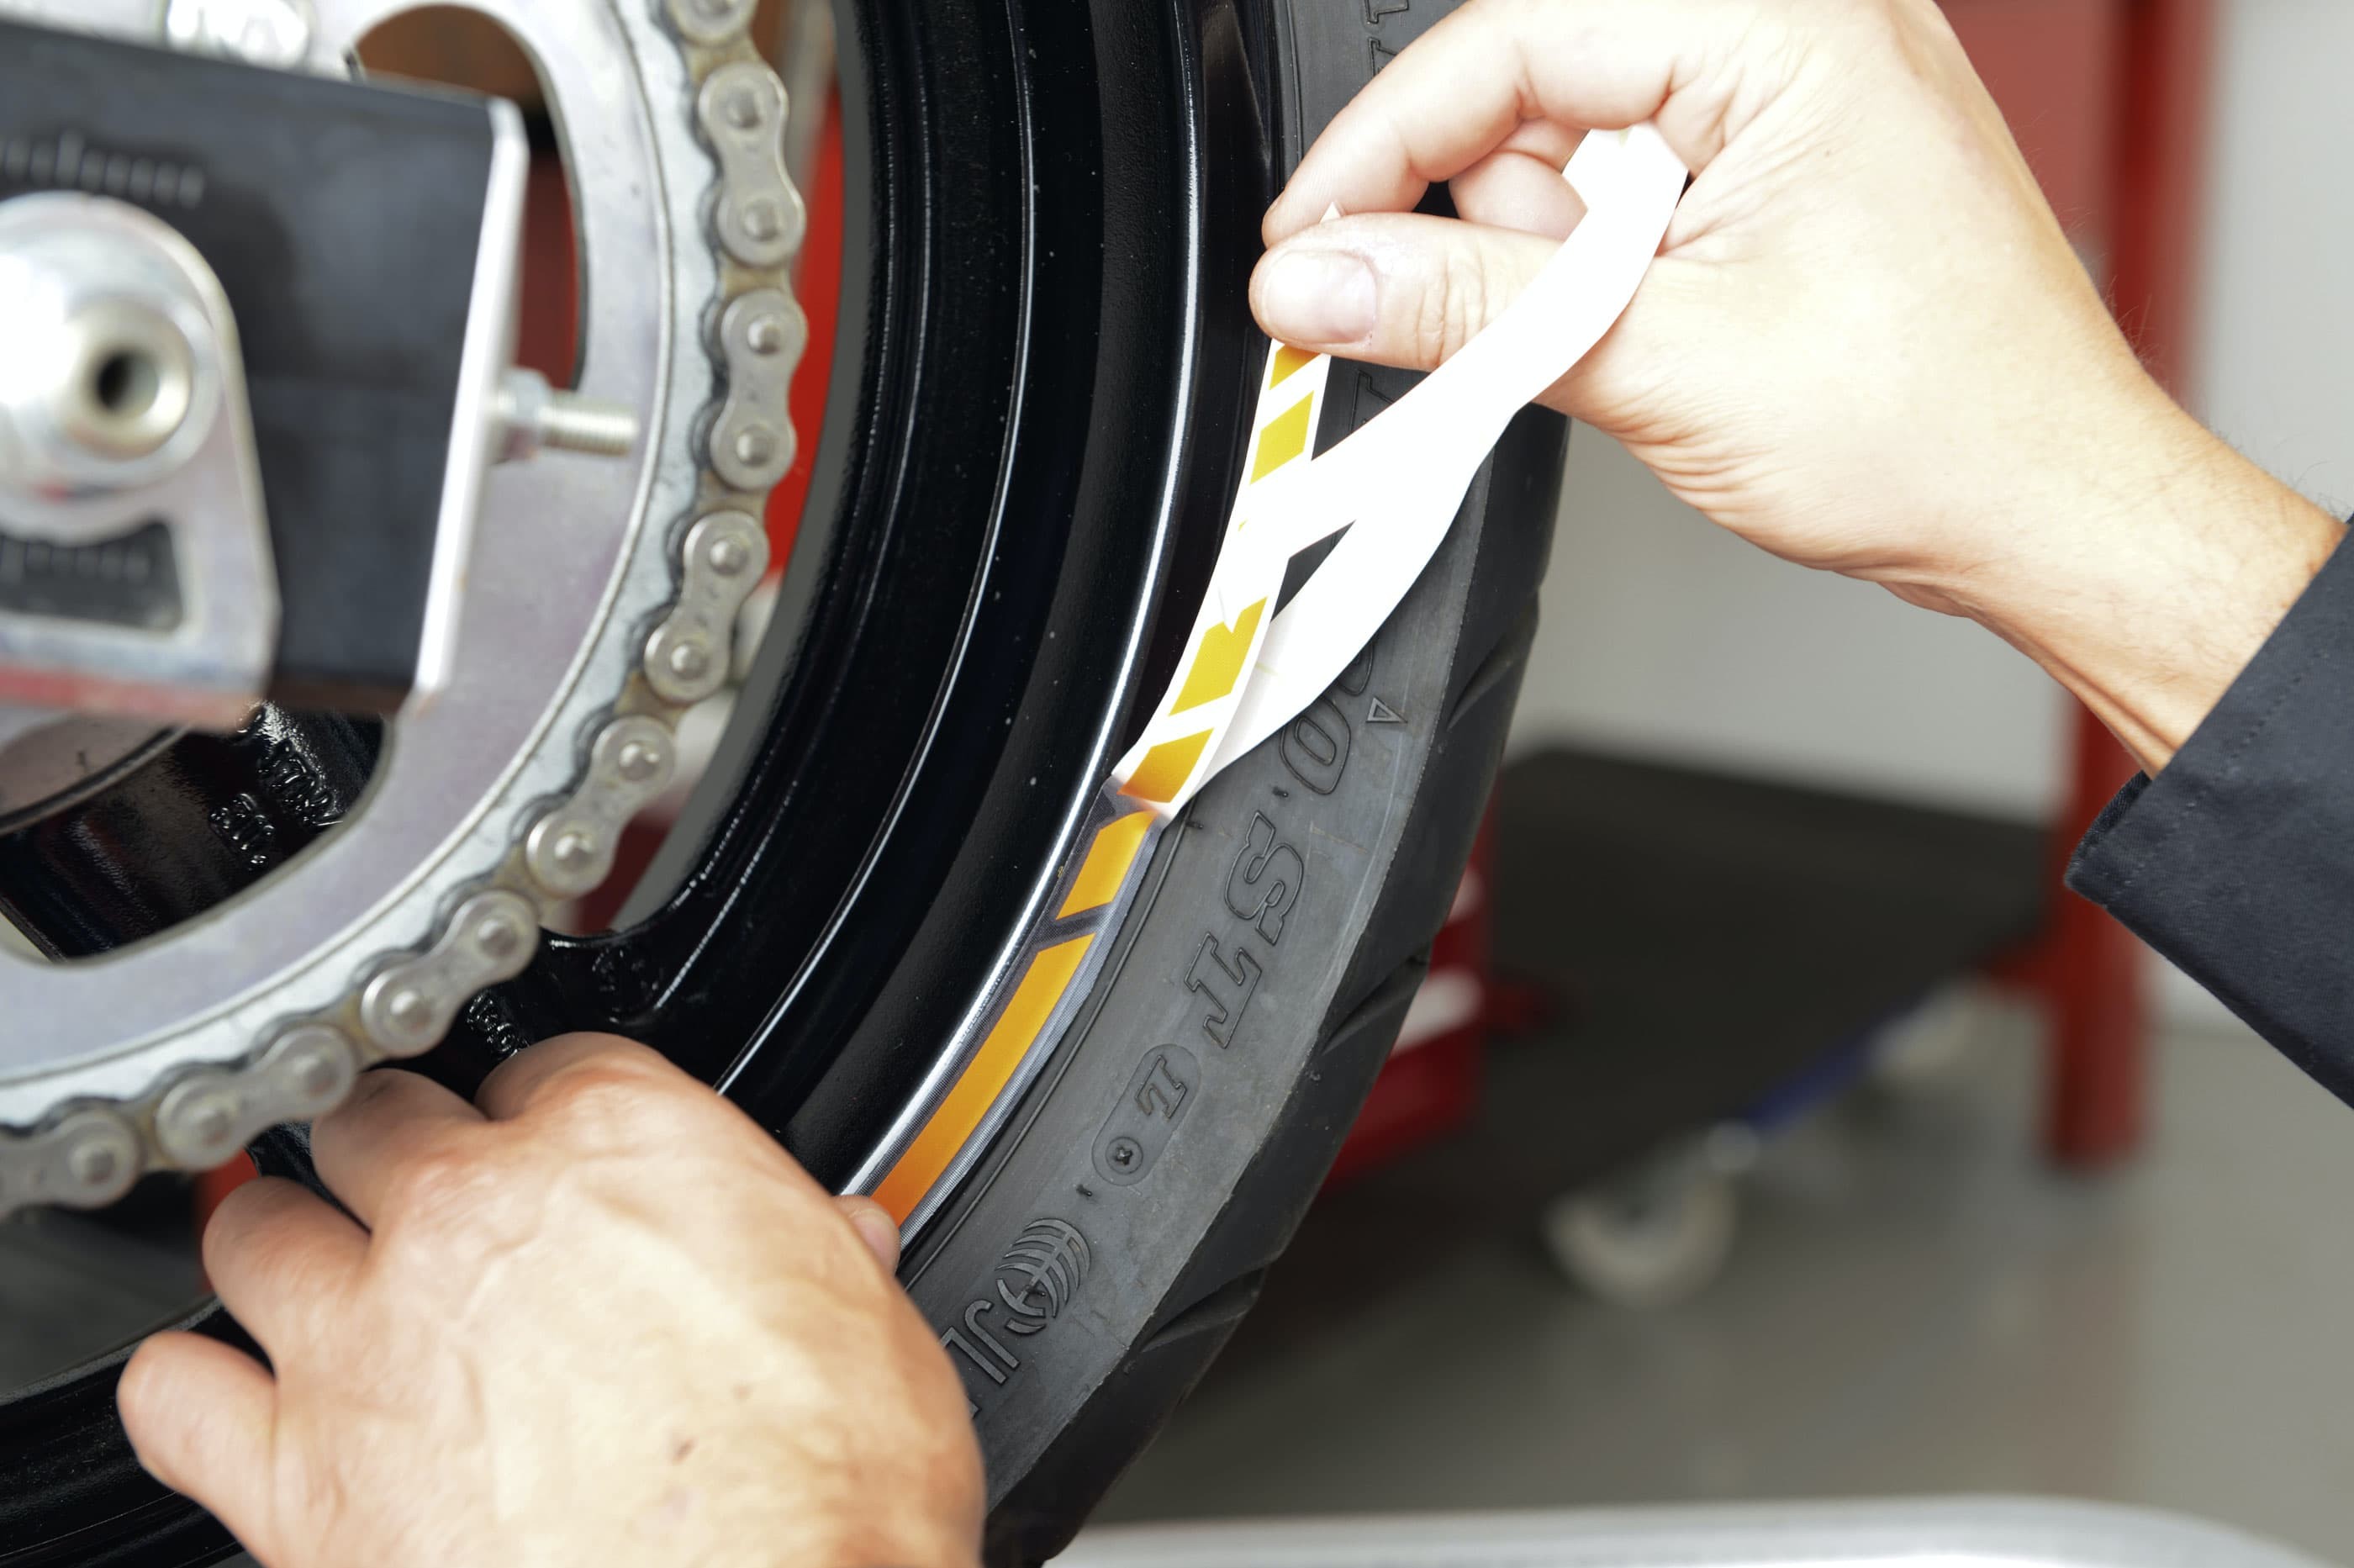
Option 2 – Step 2, Fig. 1: Position first segment, pull off liner and stick to rim
02 – Position first segment, pull off liner and stick to rim
2 Take the first segment and lift the end of the protective liner from the adhesive side. Apply the adhesive side of the first segment to the centre of the rim edge.
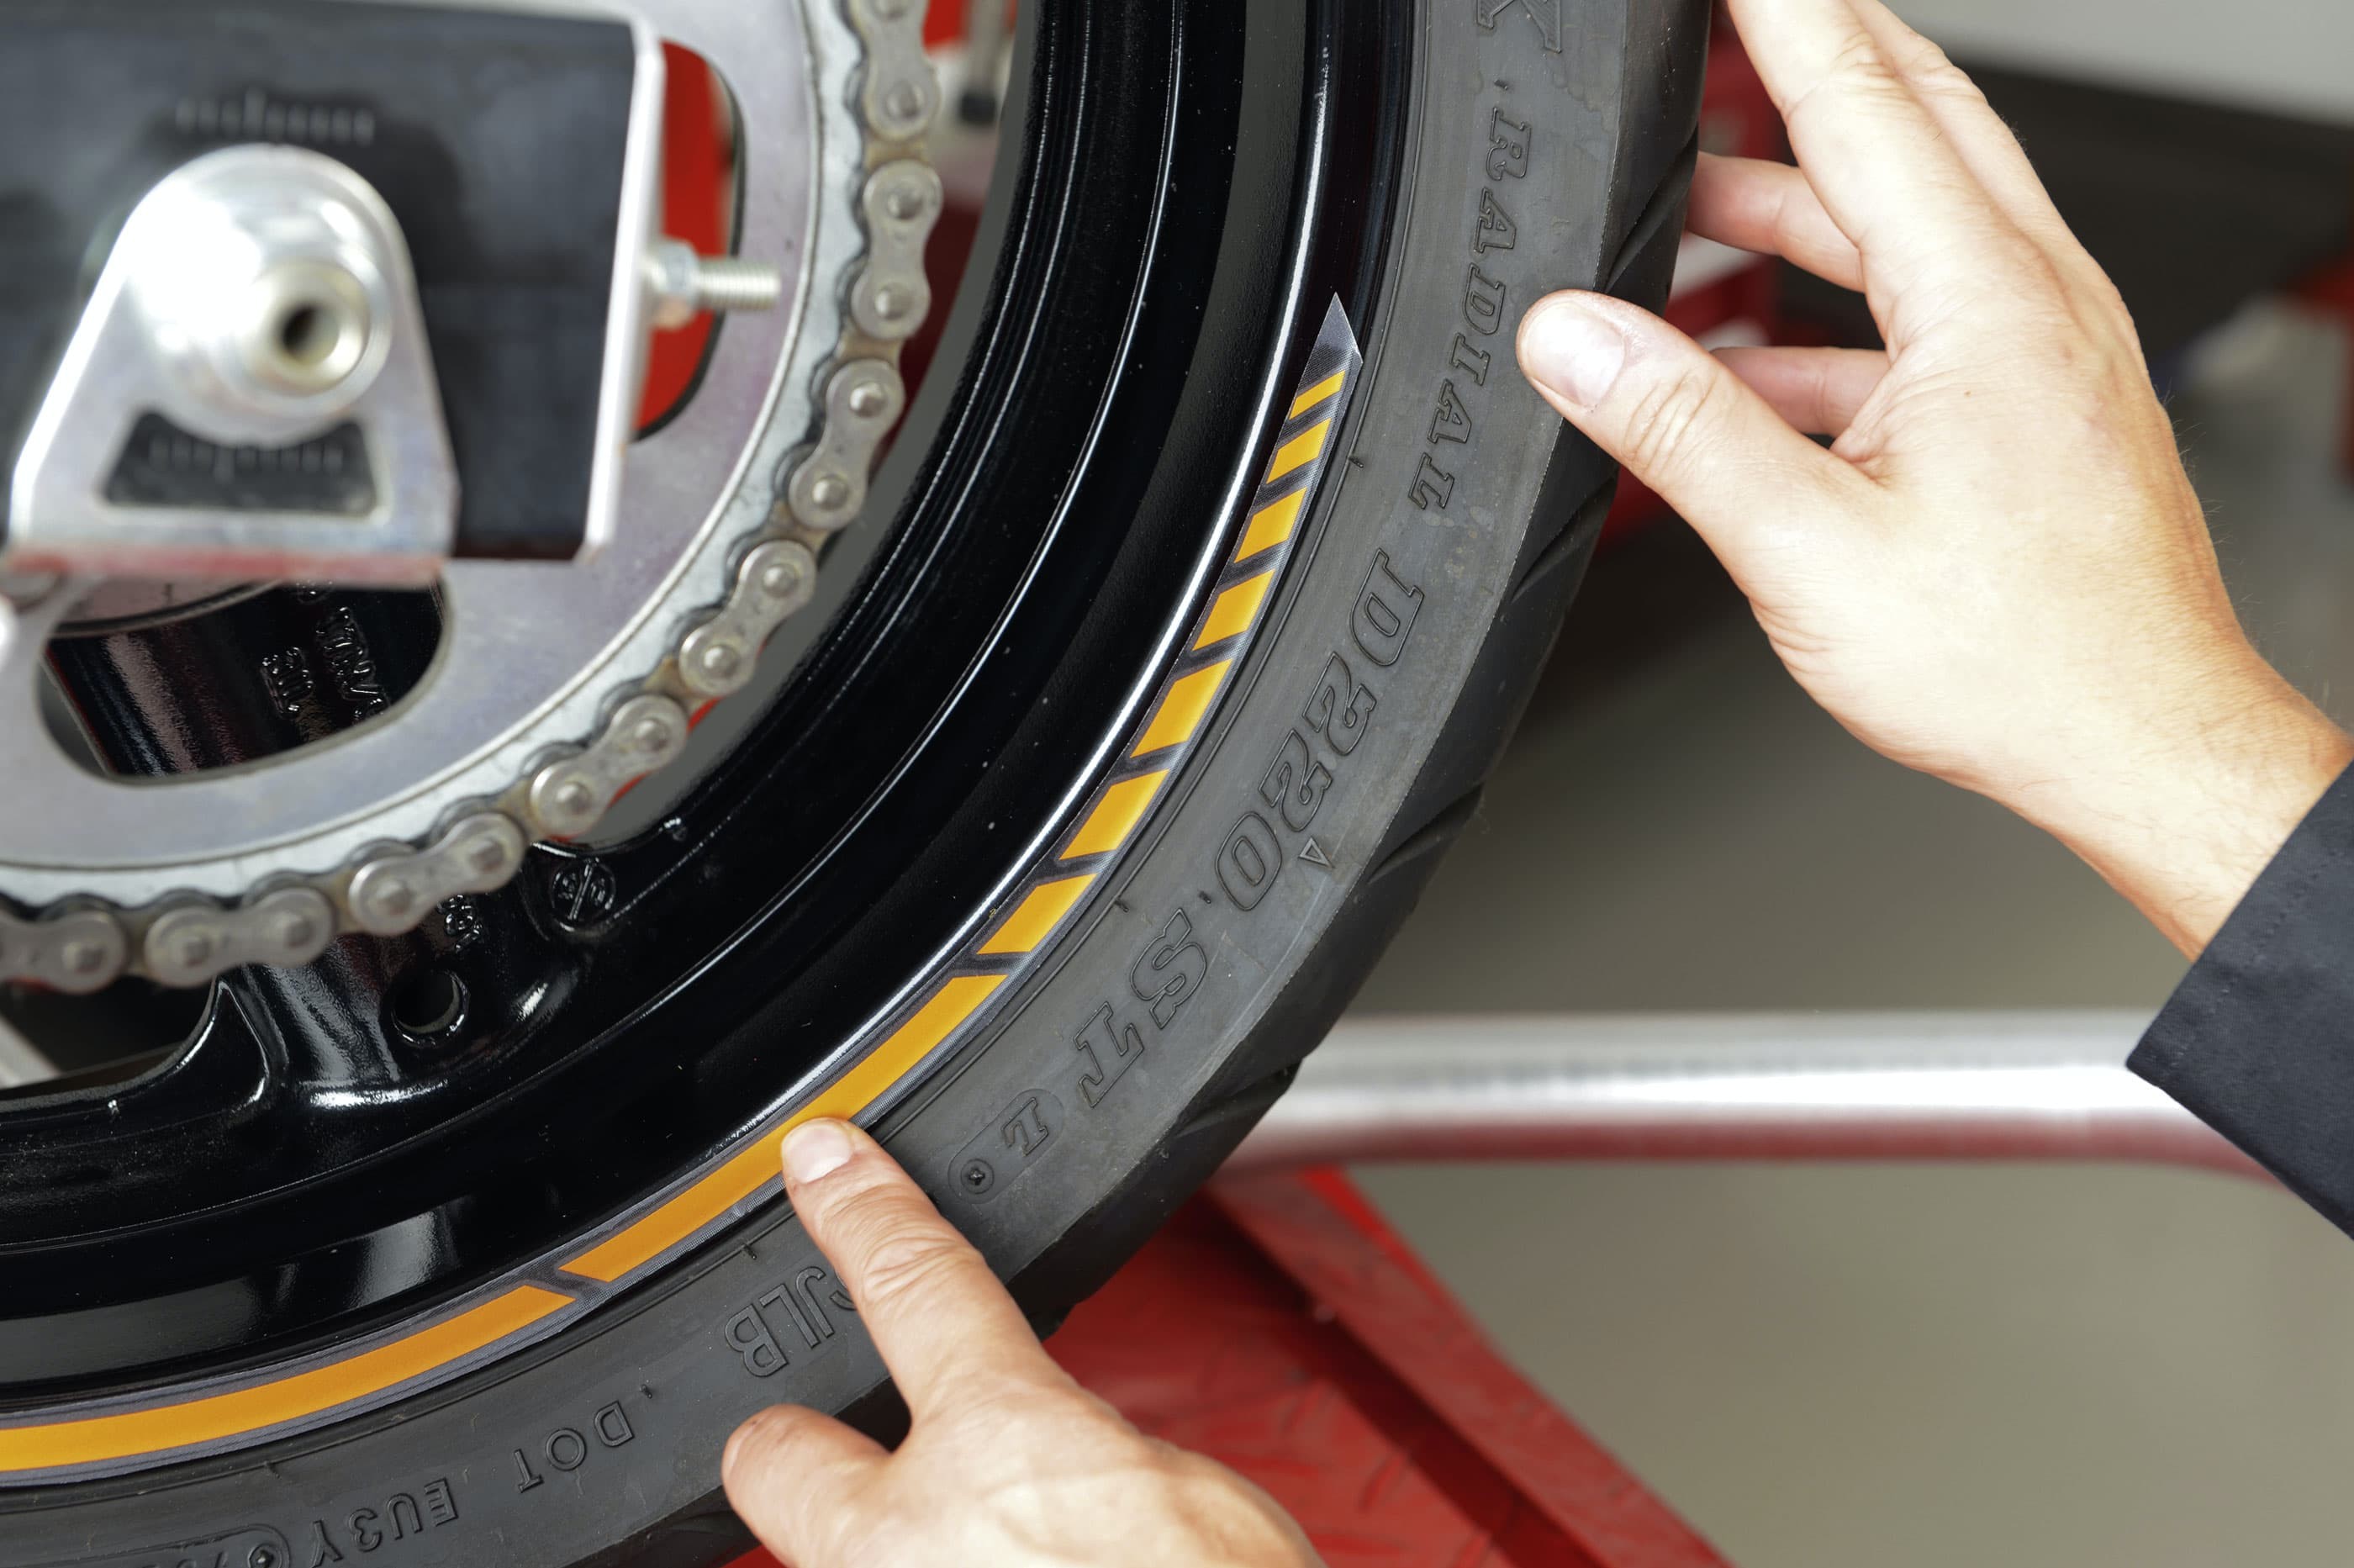
Option 2 – Step 2, Fig. 2: Press stripe down well ...
Run the stripe around the rim edge bit by bit, pulling off the protective liner as you go and pressing the wheel stripe into place centrally with your fingers.
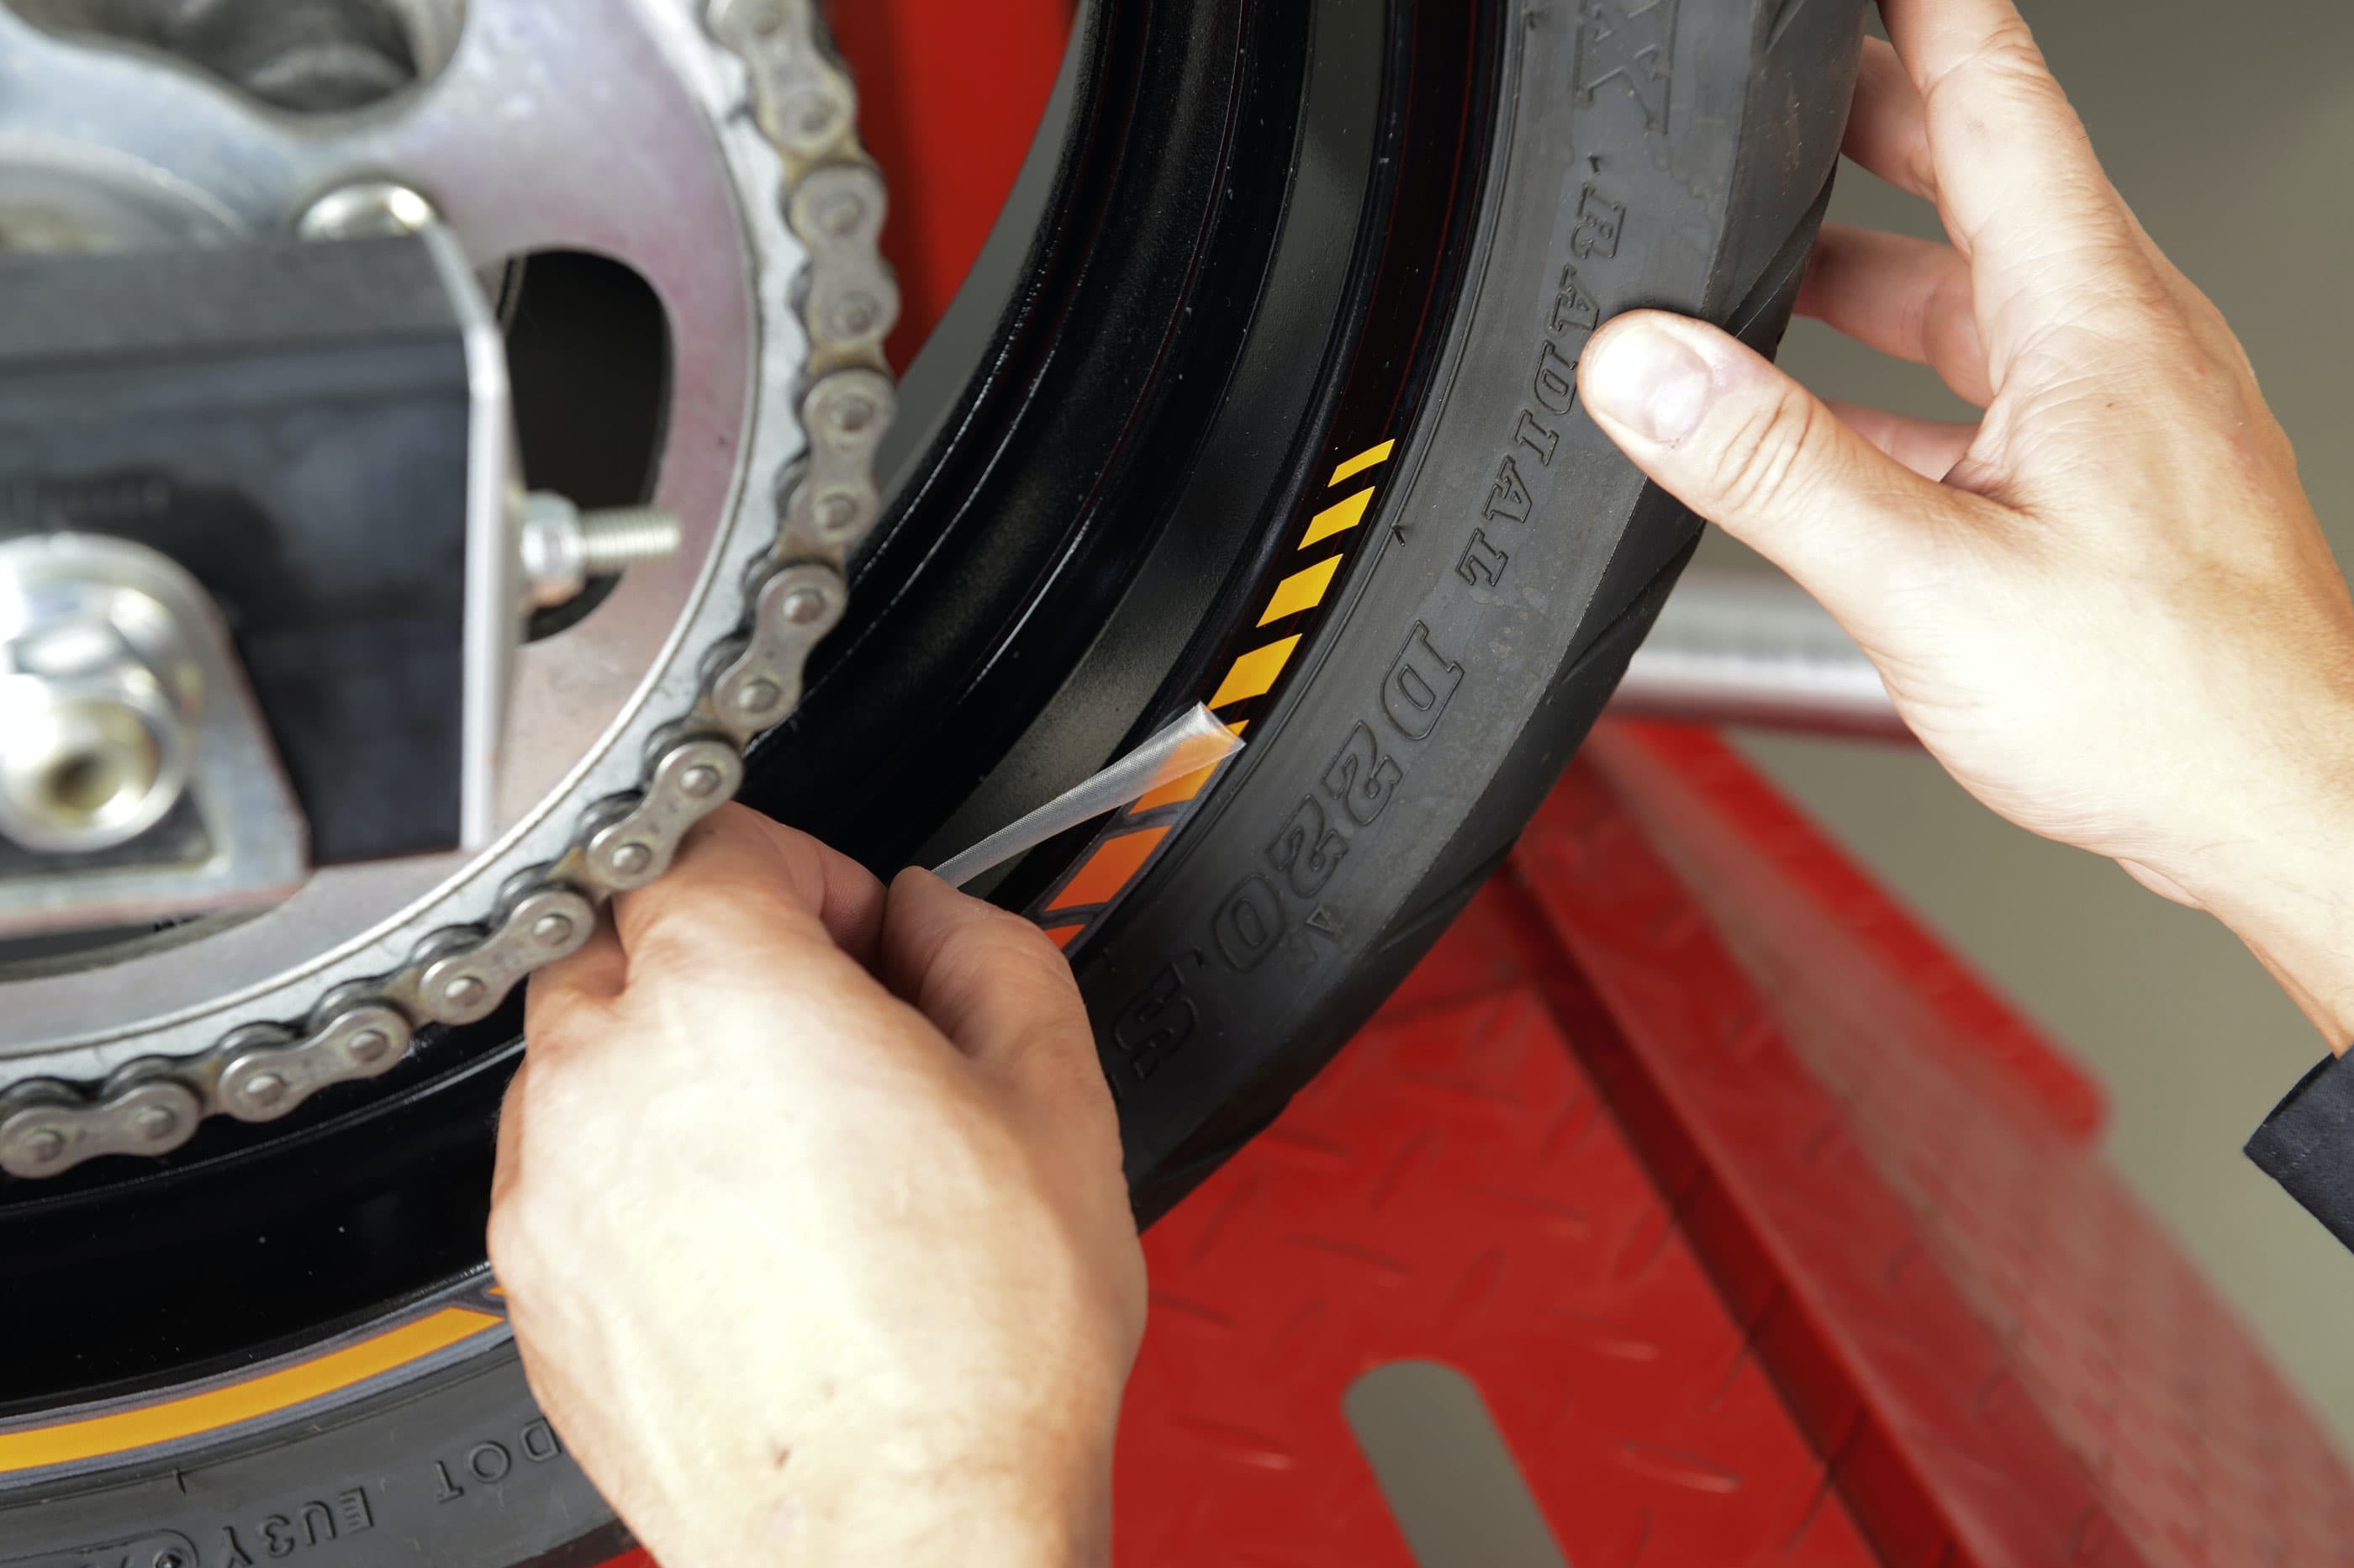
Option 2 – Step 3: ... and pull off the clear cover strip
03 – Pull off the clear cover strip
Once you have applied the whole of the segment, press it down firmly again using a microfibre cloth wrapped over your index finger. Then slowly pull off the transparent cover strip.
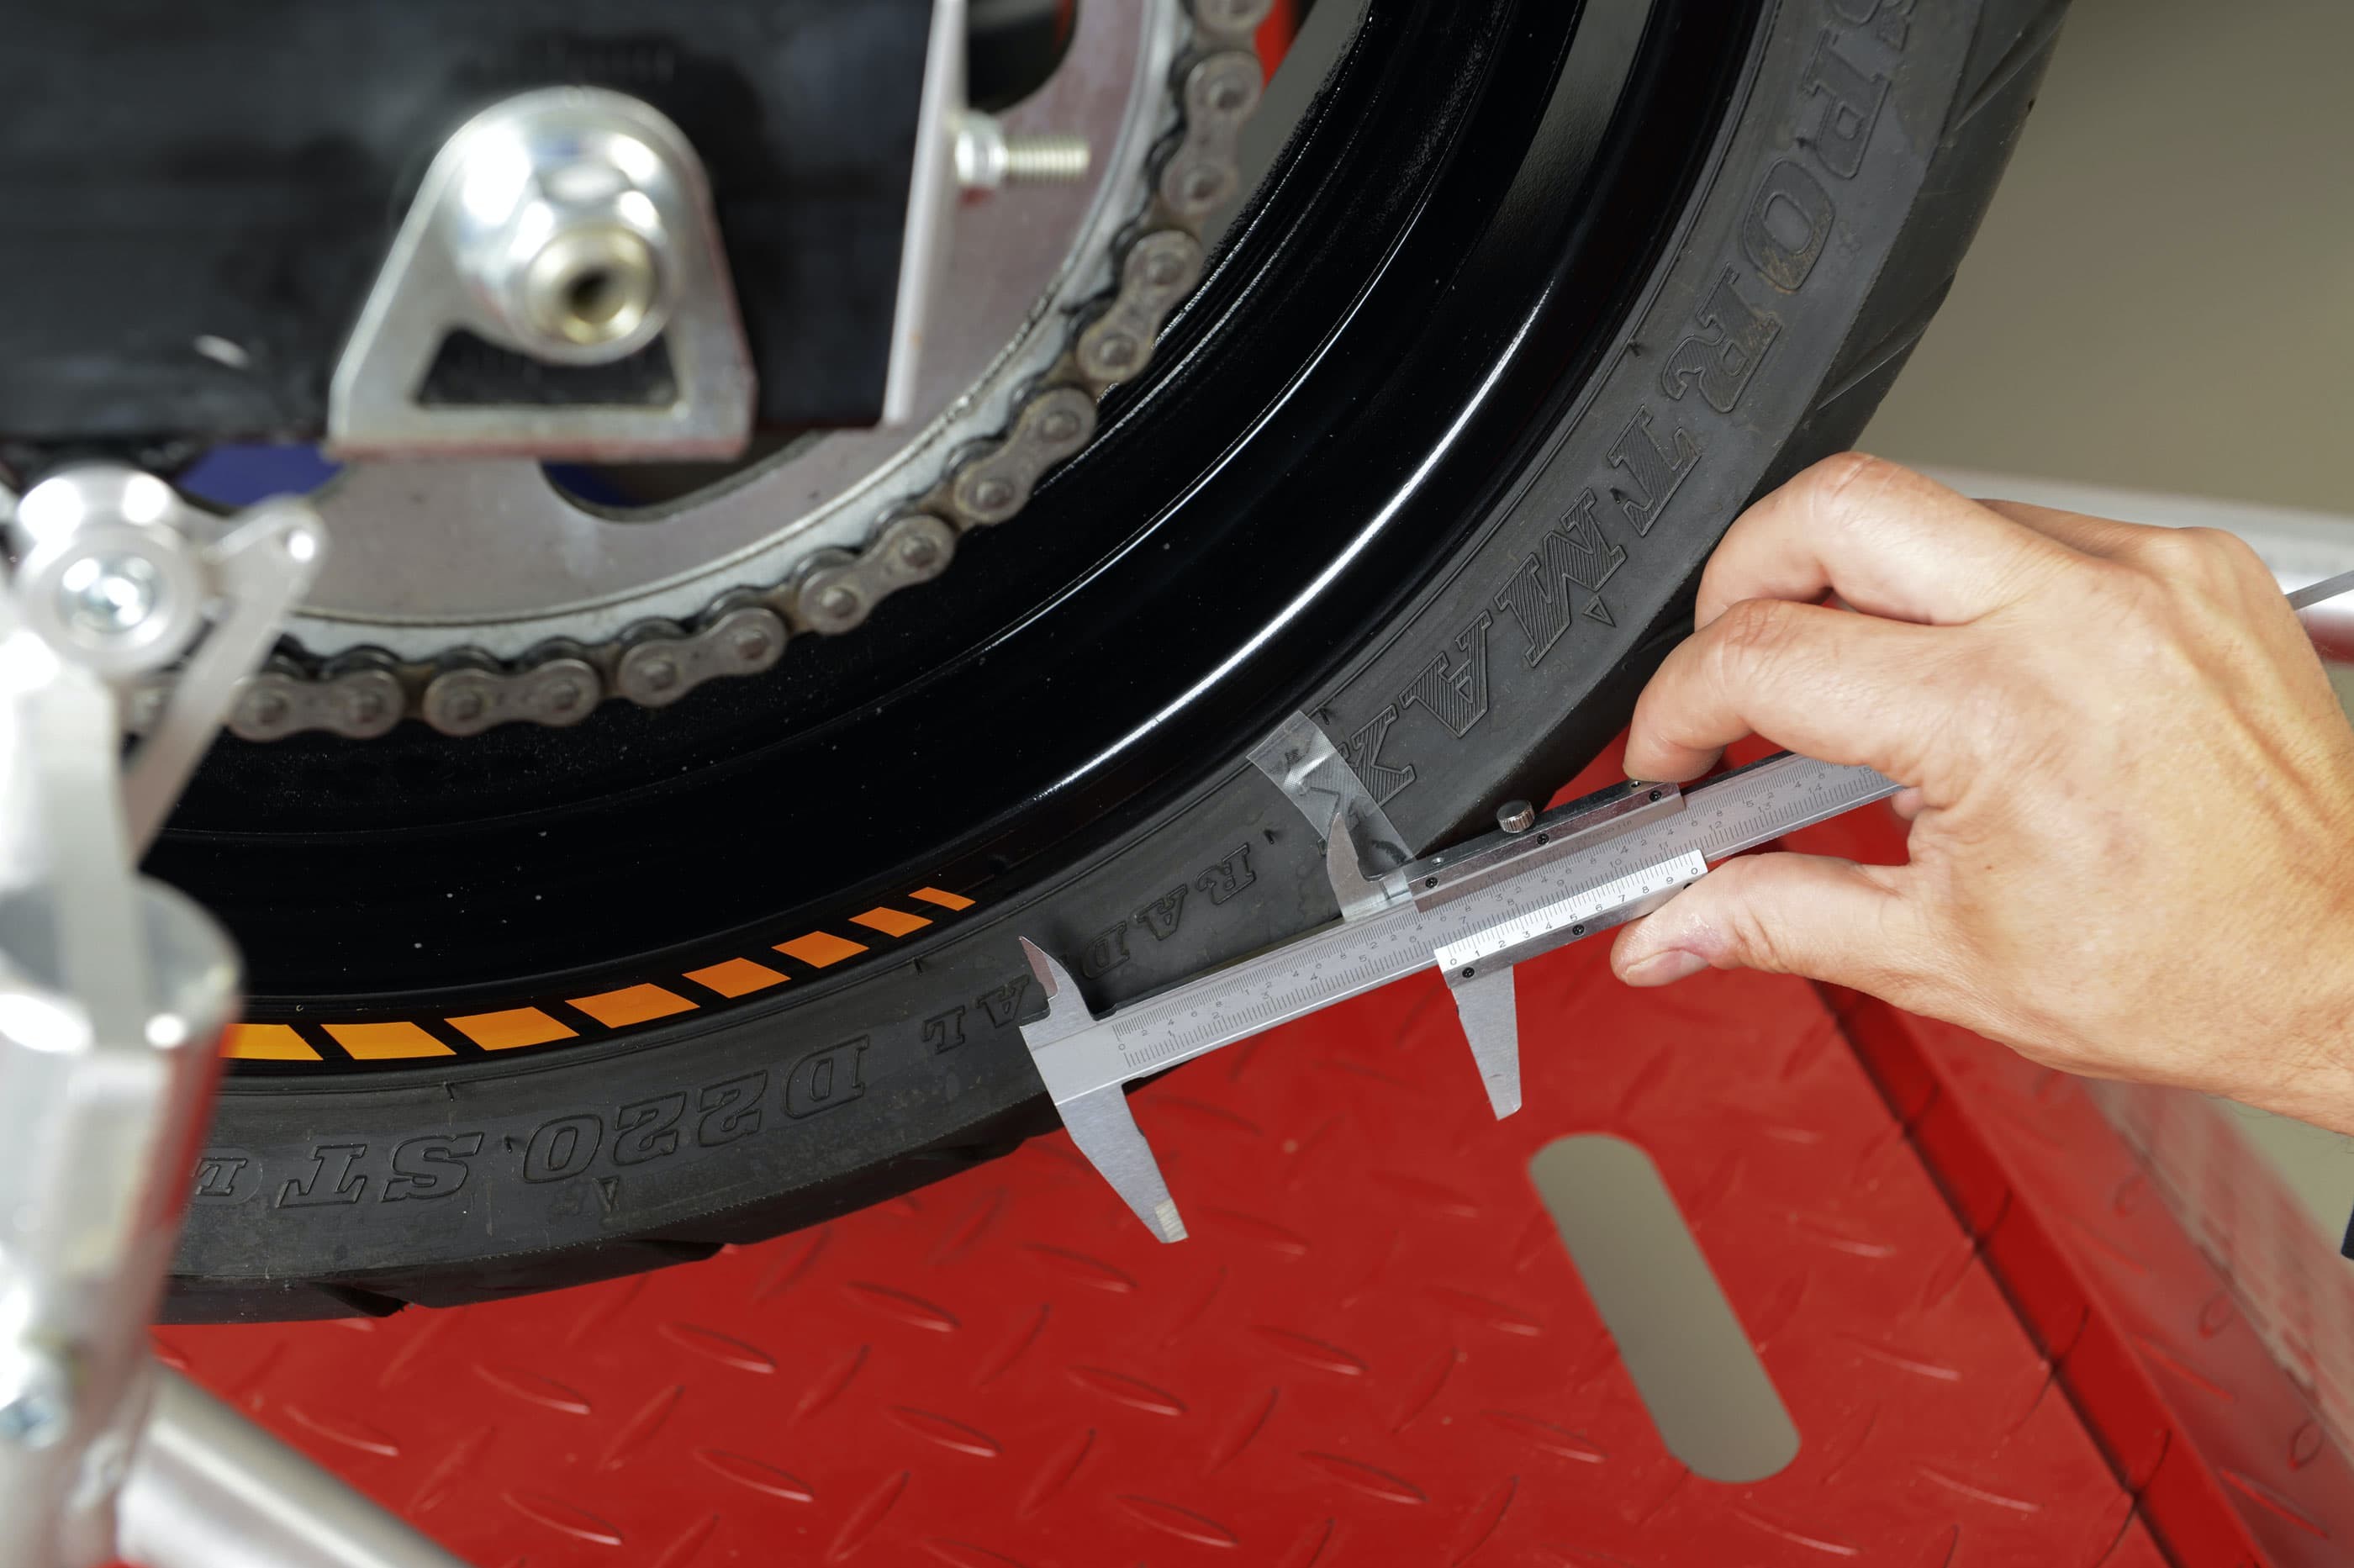
Option 2 – Step 4: Measure the spacing and mark
04 – Segment ausmessen und markieren
Now mark the spacing for the next segment to the right and the left of the segment you have just applied, as specified for your rim size in the instructions on the pack. You may find a piece of cover strip or a chalk line helpful for this task.
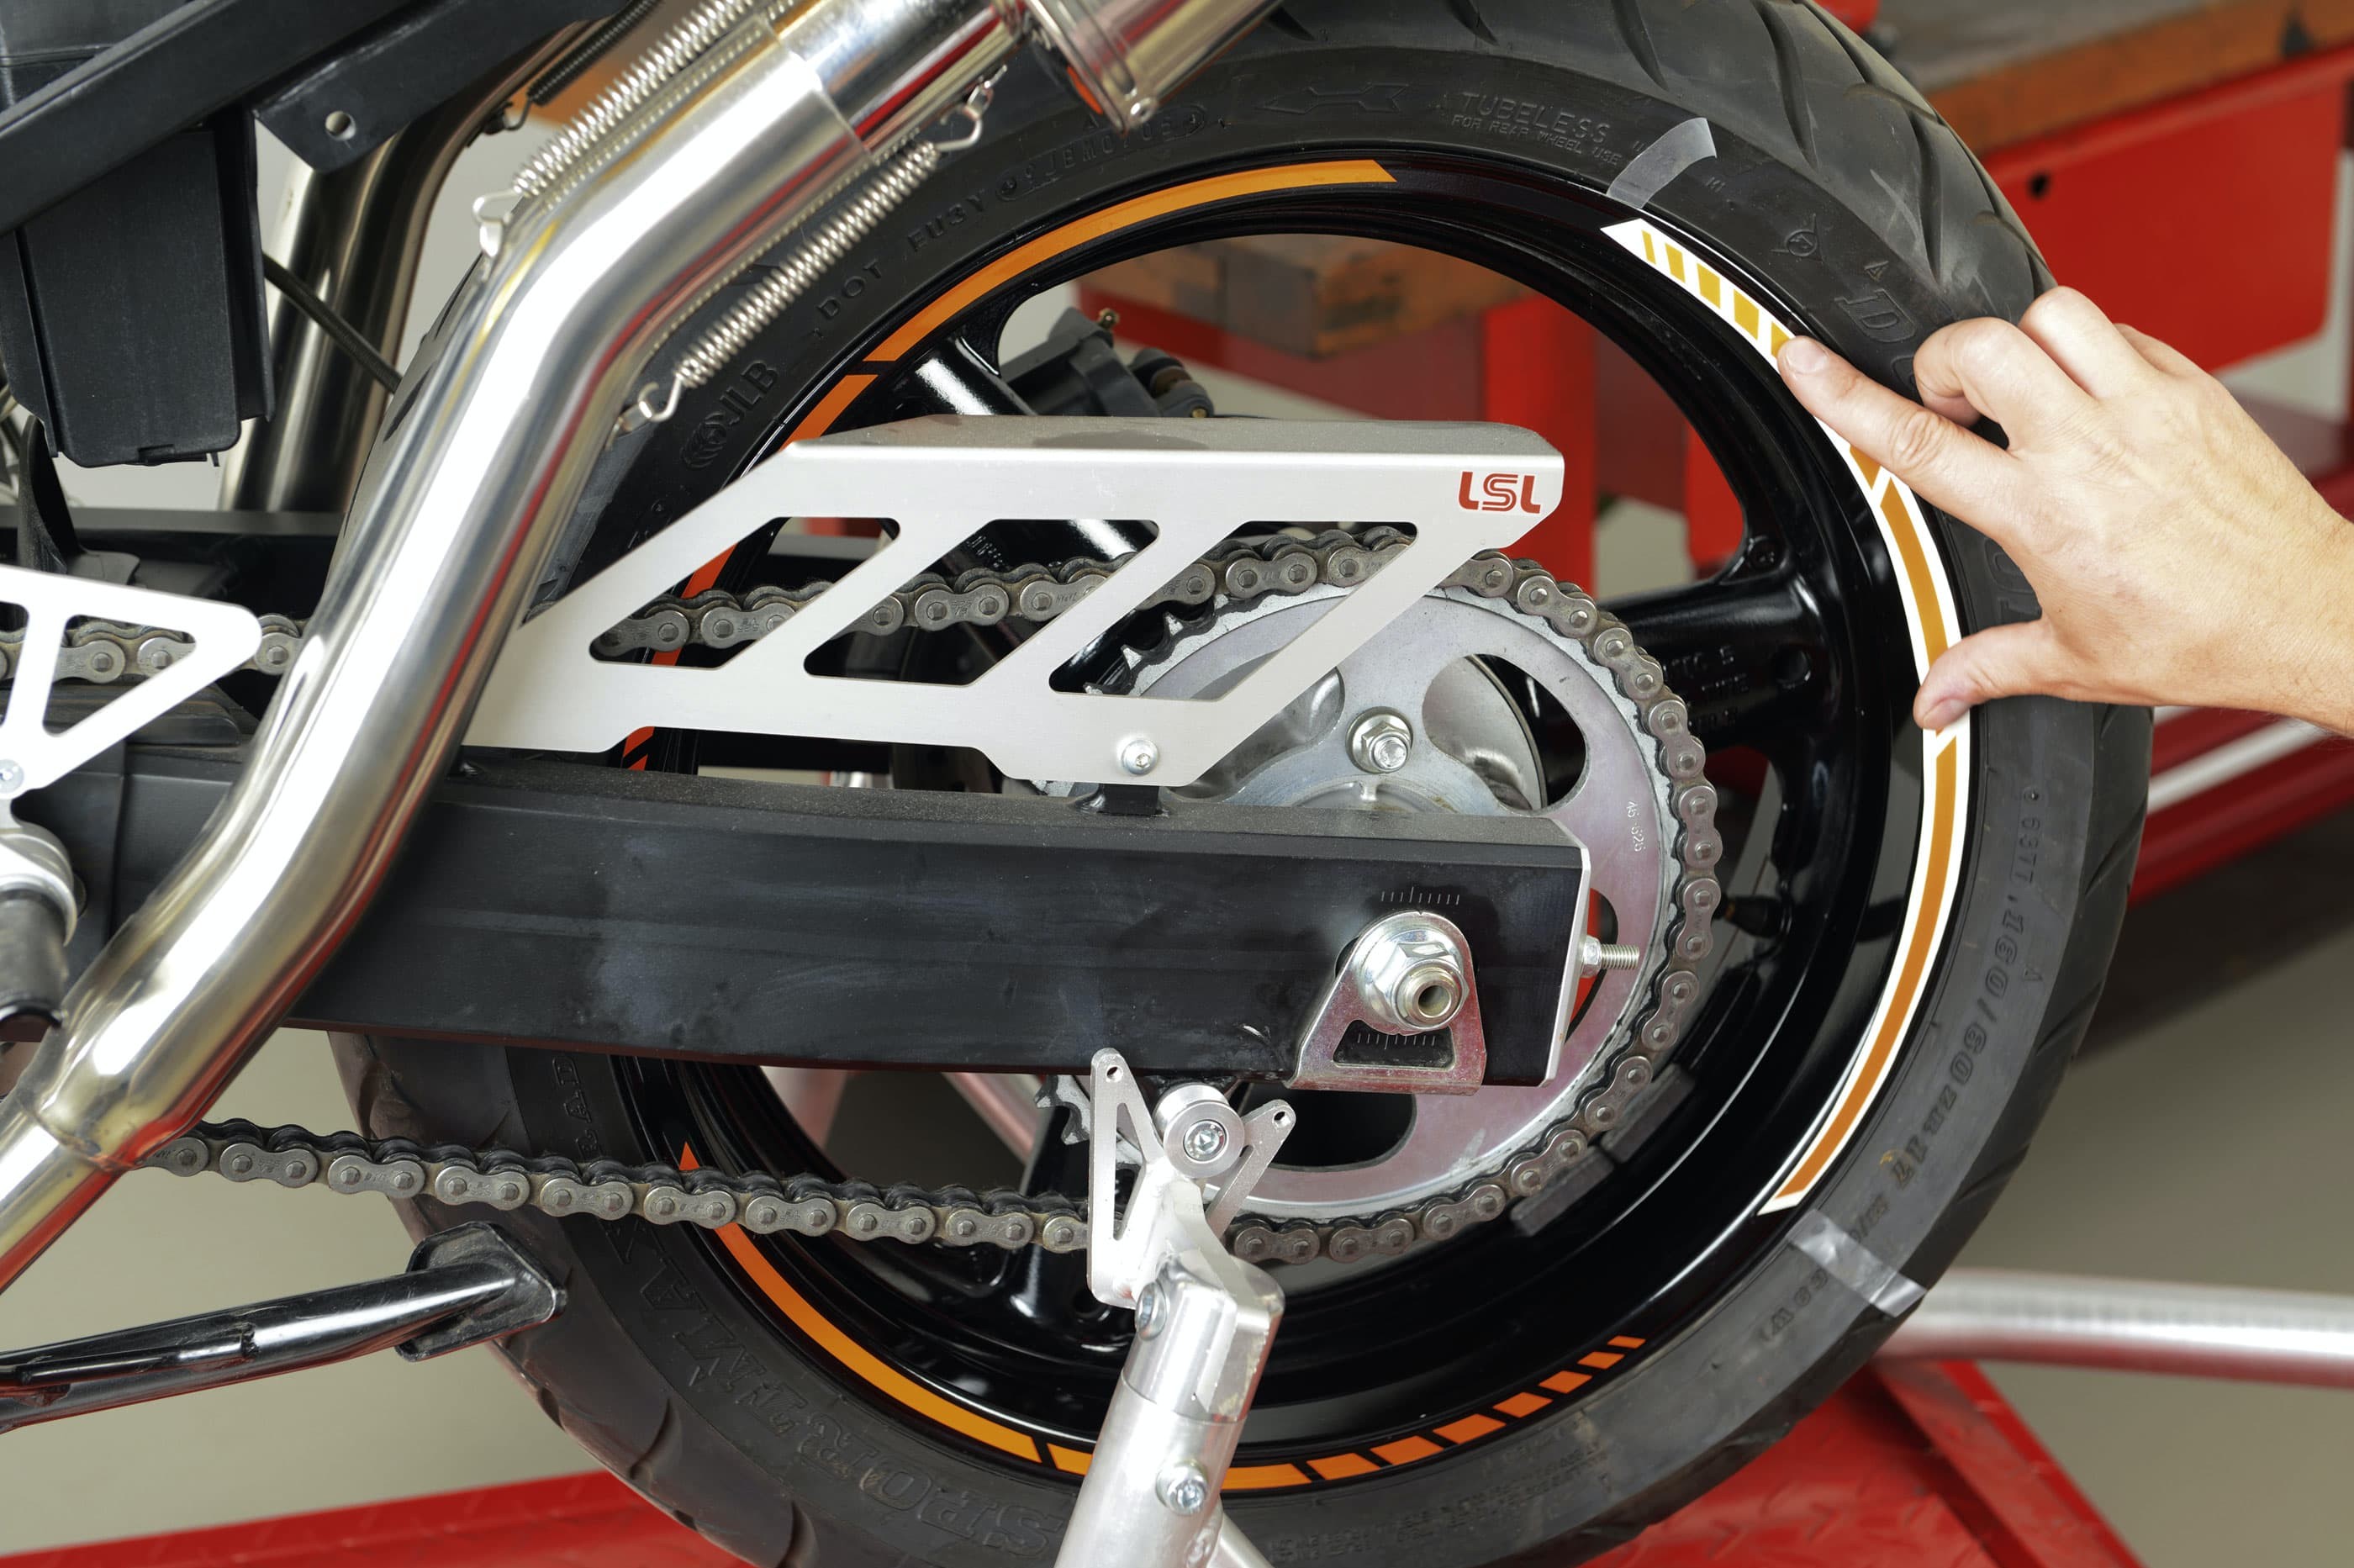
Option 2 – Step 5: Are all spacings correct?
05 – Check spacings
Check your measurements are correct by holding the two remaining segments against the rim. Are the segments equally spaced? If so, apply these two segments as before.
Sit back and admire the great new sporty look of your wheel rims.
Tip: To strengthen the adhesion of the wheel stripe, warm up the wheel rim and stripe with a hairdryer.
Bonus tips for real DIY mechanics
Get yourself seen!
As a biker, making sure you're seen when riding in traffic can be a matter of life and death. So it makes sense, and is strongly recommended, to apply reflective adhesive tape to your luggage, for example. Or to your fairing and covers. Bright and neon colours will make your bike much easier to see.
Don't give dirt a chance!
Wherever you're working on your bike (at the roadside, in a corner of your garage, or in a workshop), always choose a clean spot. Why? Have you every tried to remove bits of dirt that have found their way into the engine or gearbox, for example? It's a frustrating, difficult job, and takes forever!
When a screw won't budge …
Two things help to free a seized screw or bolt better than brute force: oil or an oil-based spray like WD-40 or Ballistol and… patience! Lots of it. We're not talking about a few minutes, but rather hours. Or better still, overnight or longer. Give the oil or spray a chance to do its job. You'll see: it works!
Lock it tight with Loctite
When it comes to making sure engine bolts are secure, Loctite is what you need. But there are two sorts: Medium-strength (Loctite 243; bolt can be undone with normal tools) and high-strength (Loctite 2701; bolt is difficult to undo with normal tools; needs to be heated up). So you should always use the sort specified in your workshop manual or recommended by the motorcycle manufacturer. Have you lubed today? Lubrication is vital for most things with moving parts, that's a fact. For us bikers, regular lubrication also includes all levers, for example. Motorbike levers are generally held in the control by hinge pins. If they aren't lubricated, metal will grind against metal, and it won't be long before the lever starts to wobble.
Have you lubed today?
Lubrication is vital for most things with moving parts, that's a fact. For us bikers, regular lubrication also includes all levers, for example. Motorbike levers are generally held in the control by hinge pins. If they aren't lubricated, metal will grind against metal, and it won't be long before the lever starts to wobble. Hydraulic levers, on the other hand, actuate a piston, and to ensure that everything works smoothly, you should use a dry lubricant (graphite, but not oil or grease). With control cables, make sure that the cable heads can turn in their mount. If not, lubricate them!
The Louis Technical Centre
If you have a technical question about your motorbike, please contact our Technical Centre, where they have endless experience, reference books and contacts.
Please note!
These tips for DIY mechanics contain general recommendations that may not apply to all vehicles or all individual components. As local conditions may vary considerably, we are unable to guarantee the correctness of information in these tips for DIY mechanics.
Thank you for your understanding.


